
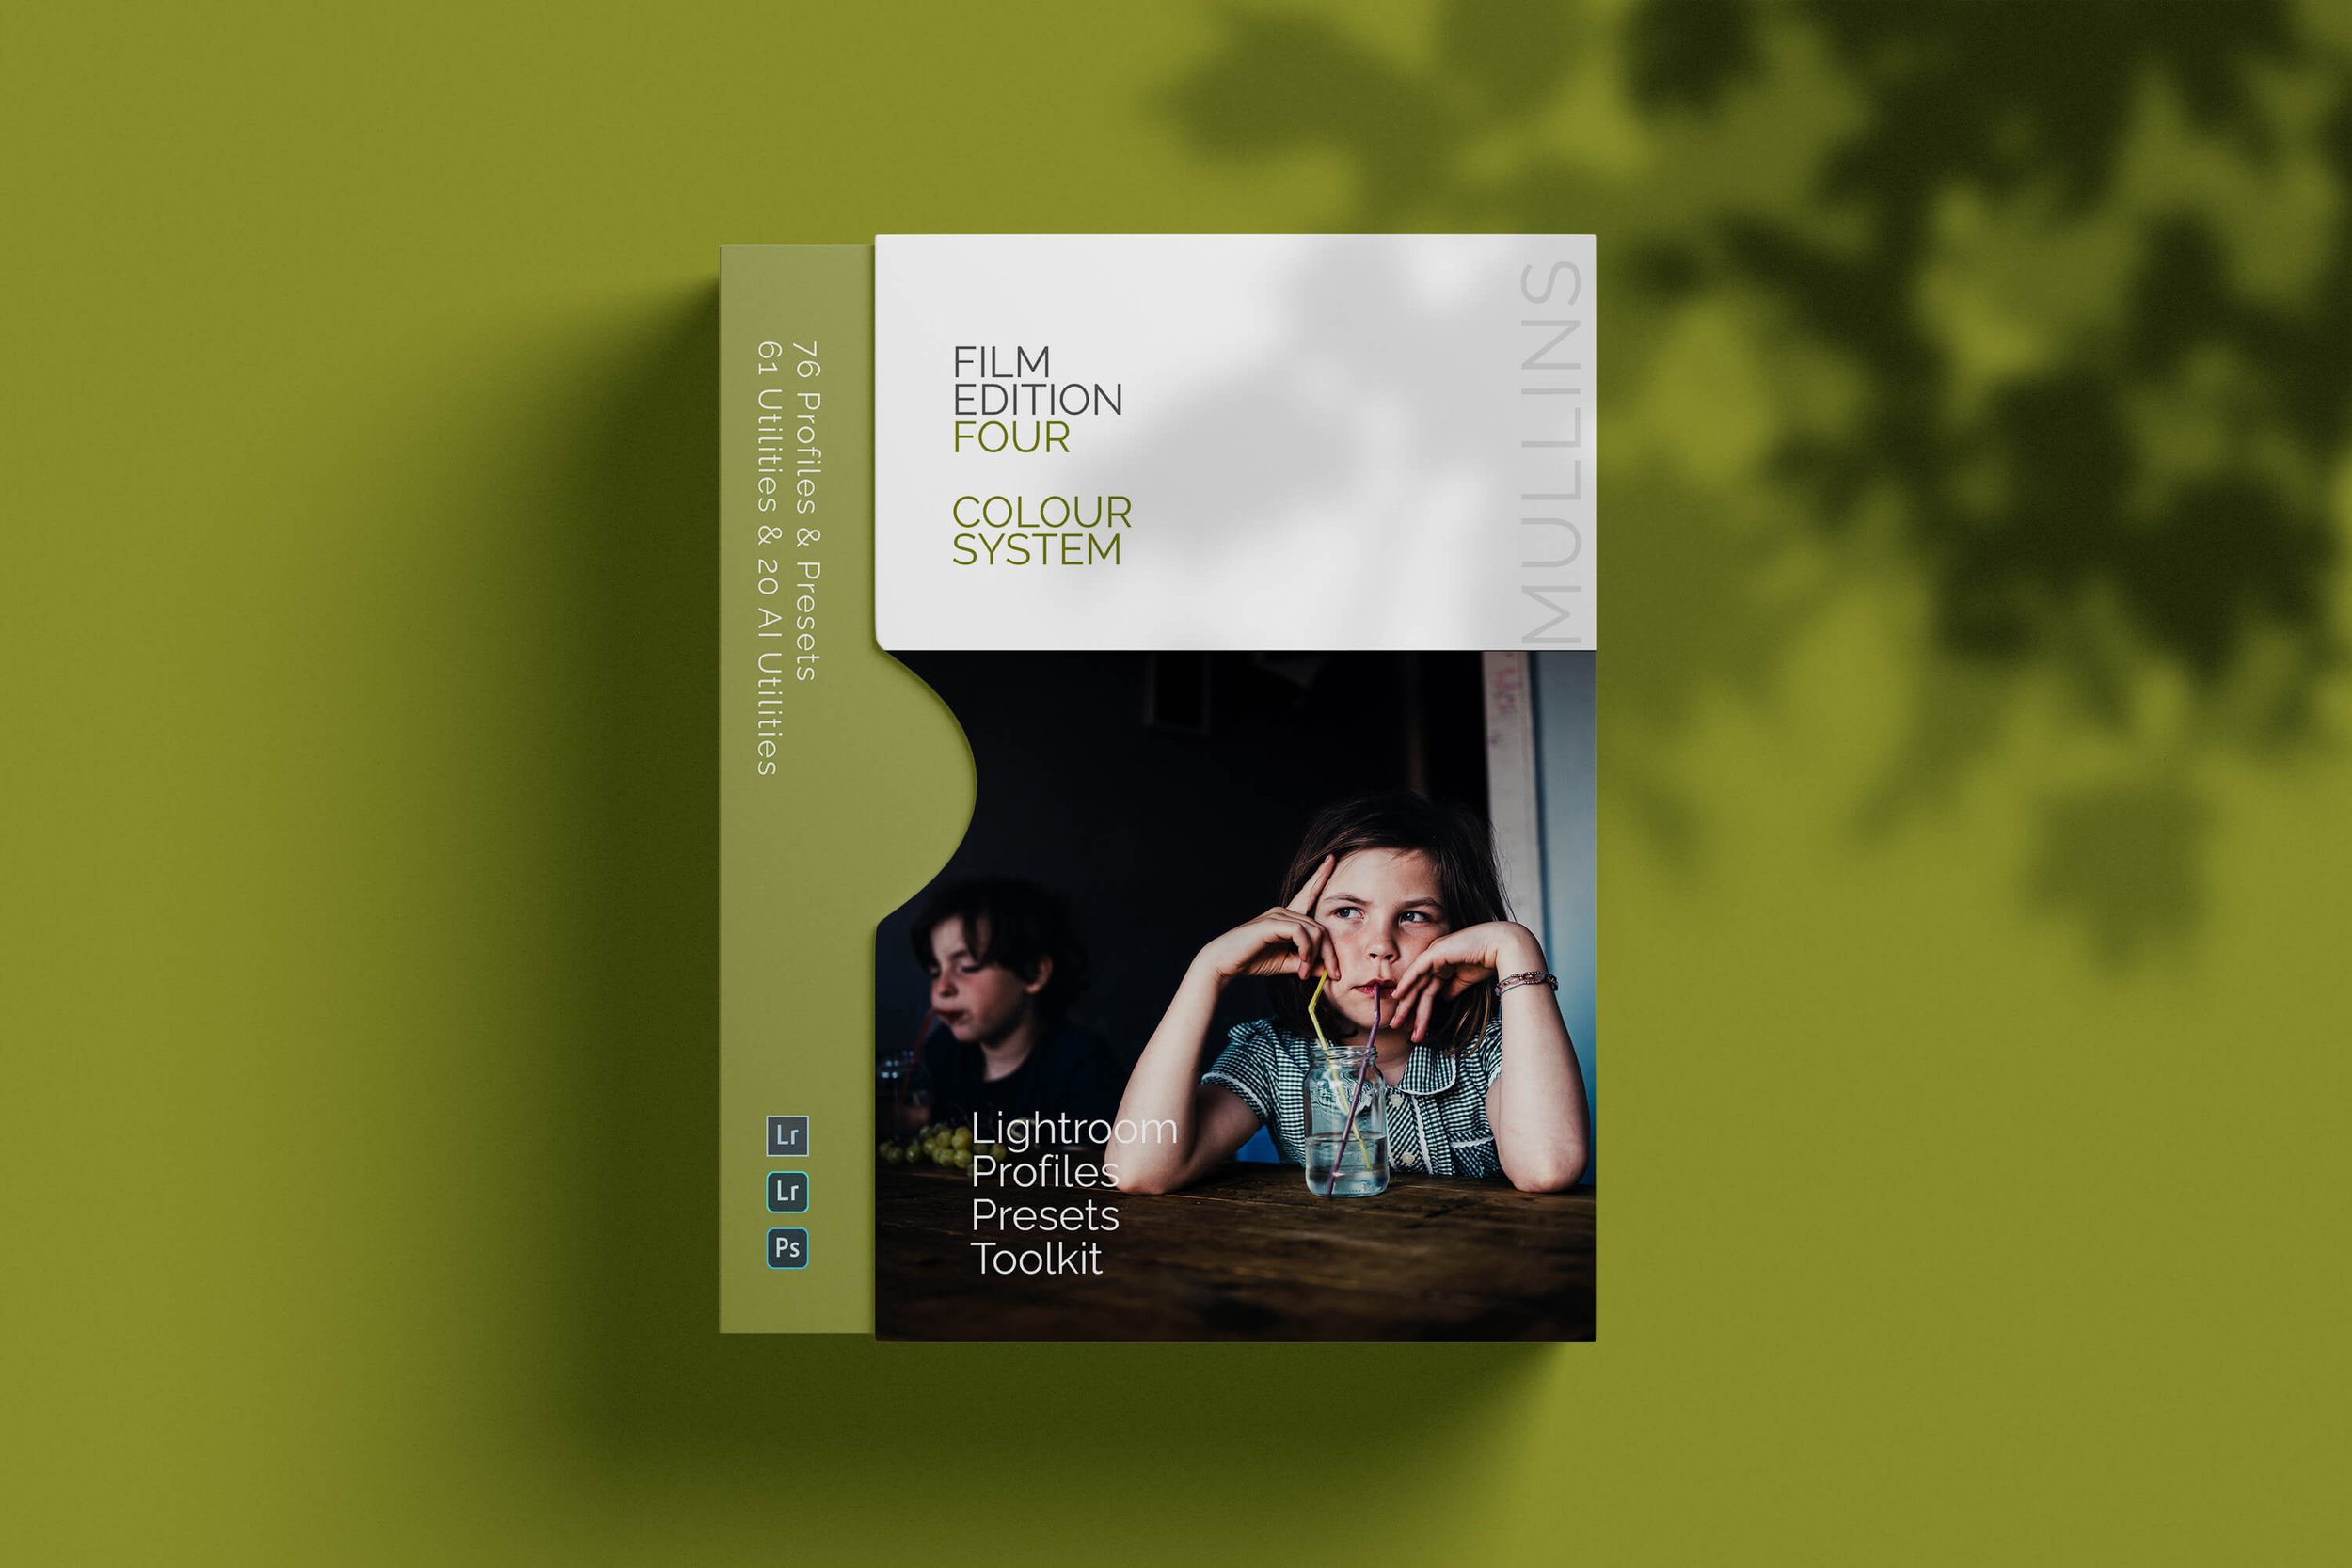
Fujifilm GFX for Portrait Photography: How I Use It in My Studio
Introduction
There are plenty of cameras capable of making lovely portraits. That much is obvious. You do not need medium format to take a strong picture of someone, and I would never pretend otherwise.
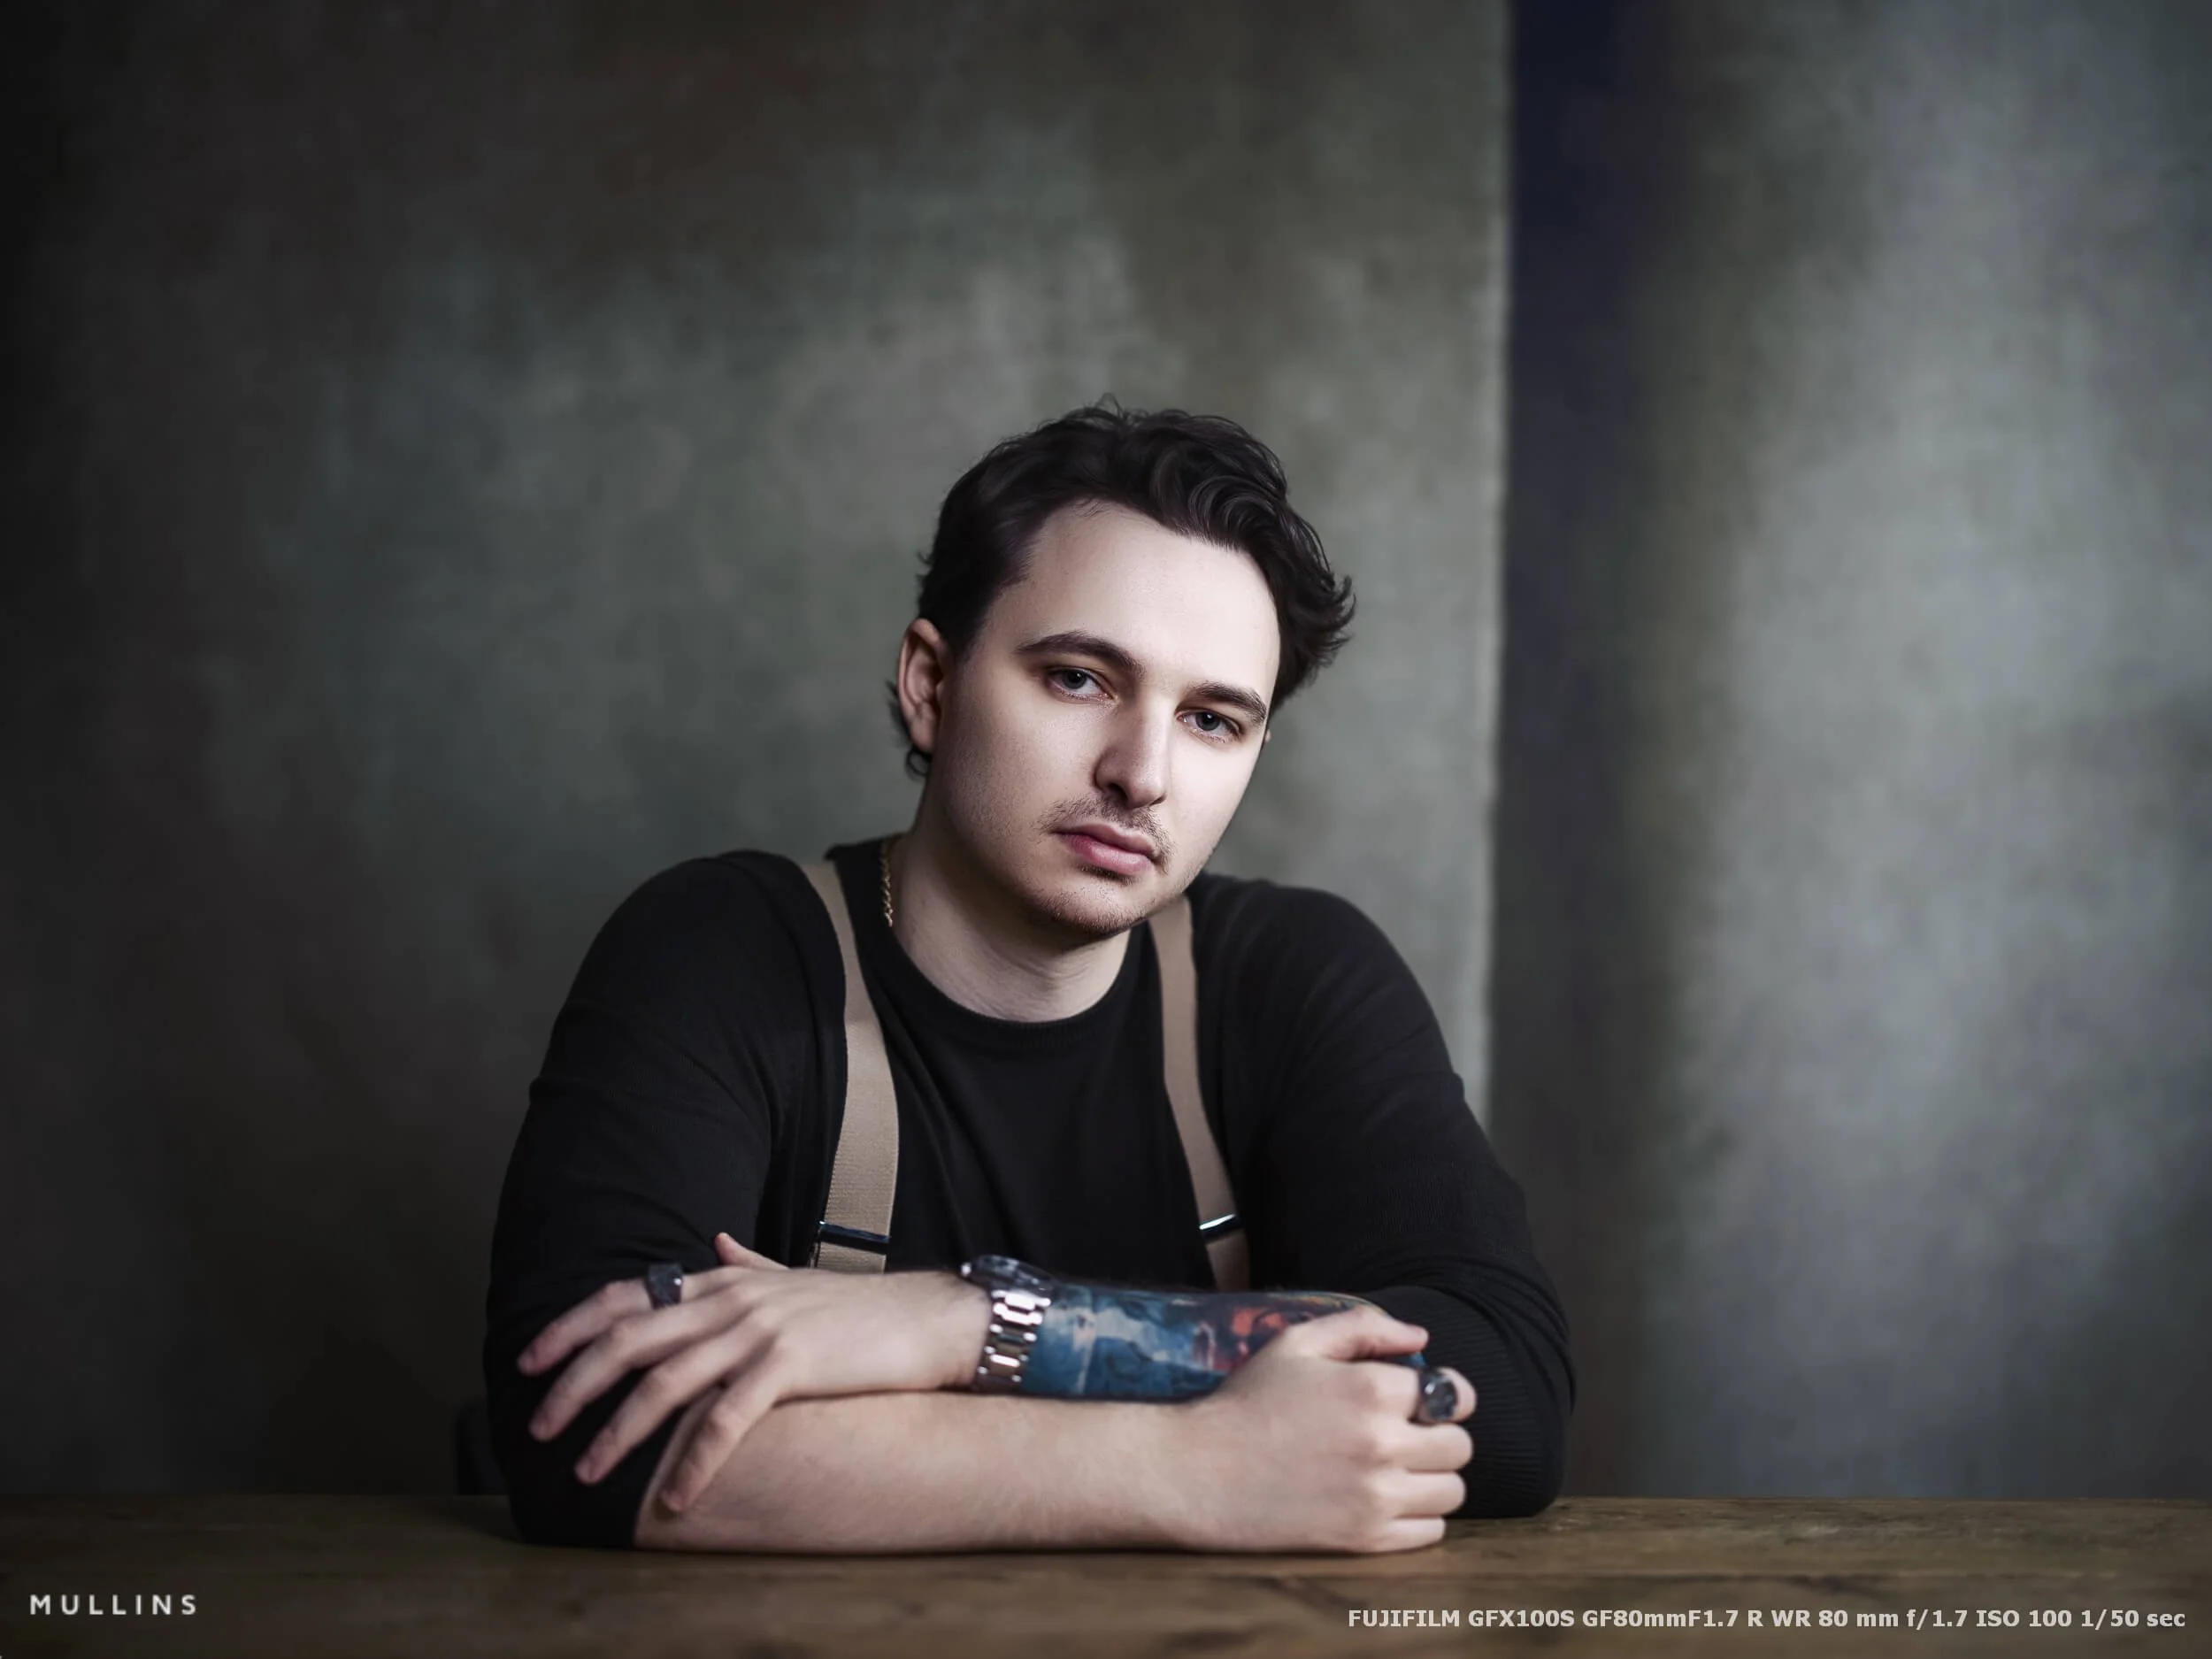
But when it comes to my studio portrait work, the Fujifilm GFX system has become a very natural fit for the way I like to work. It suits my pace, it suits the way I light, and it gives me files that are incredibly forgiving when I want to shape tone, colour and contrast with a bit of care afterwards.
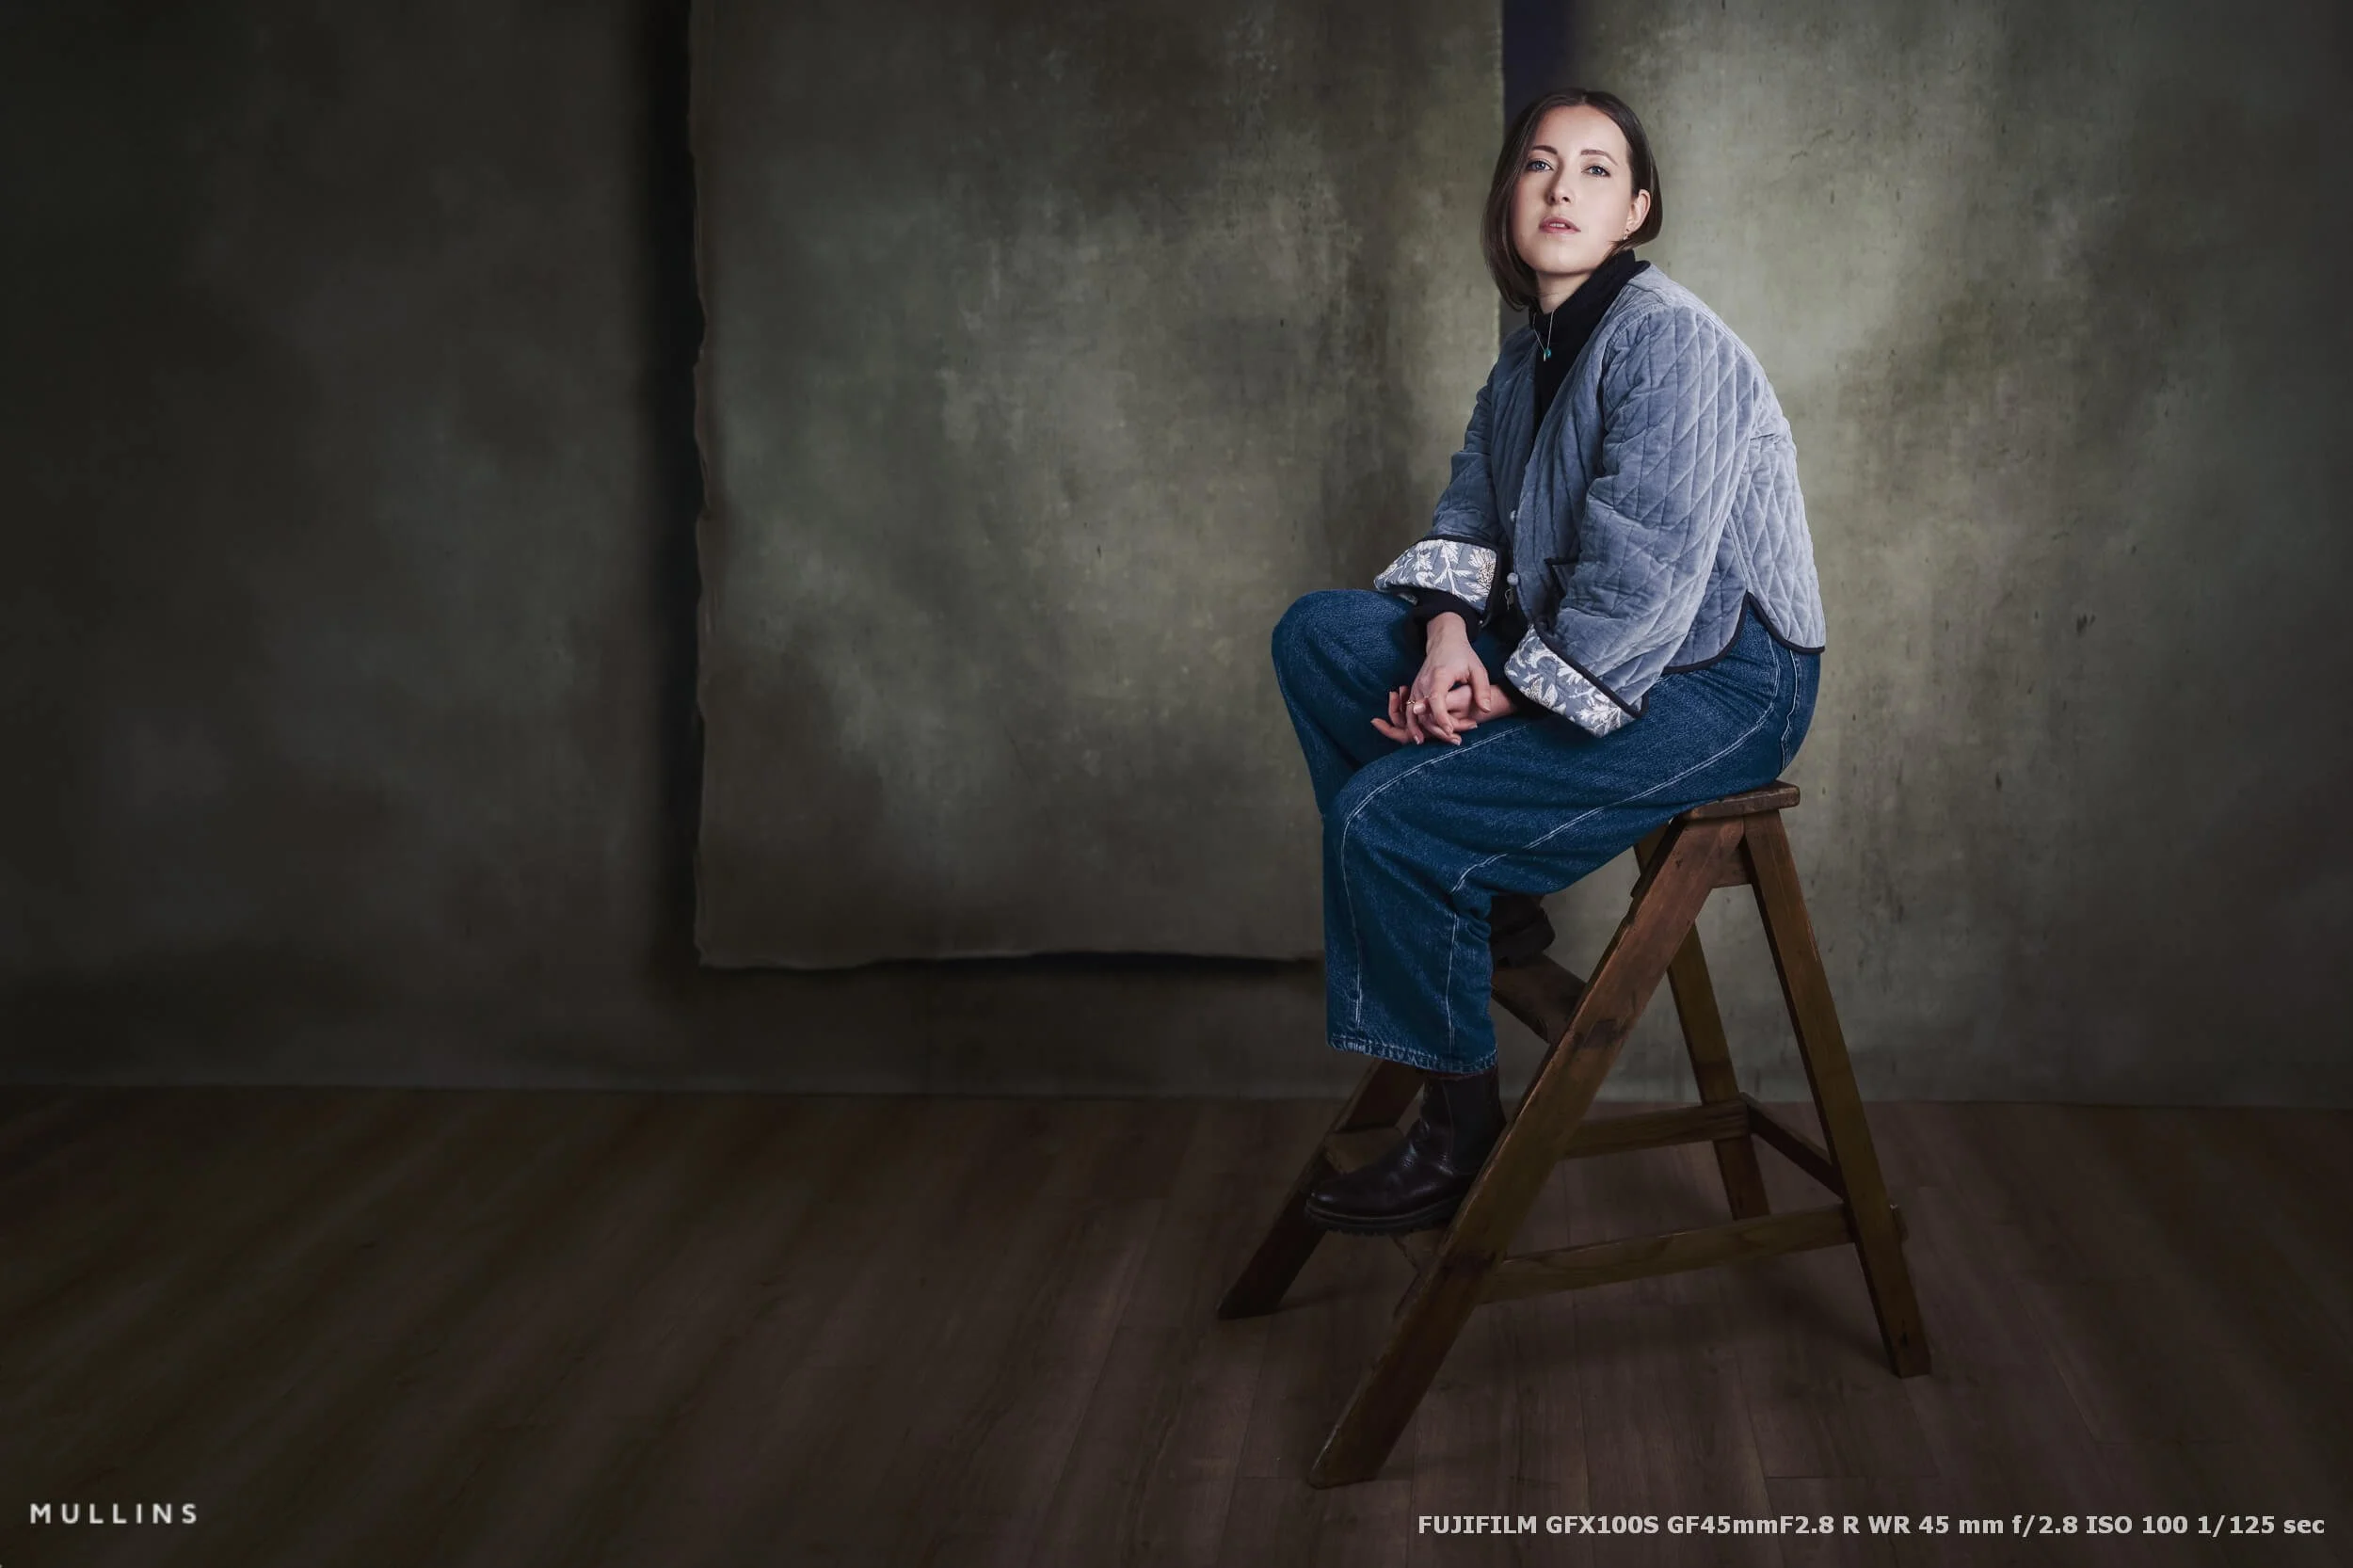
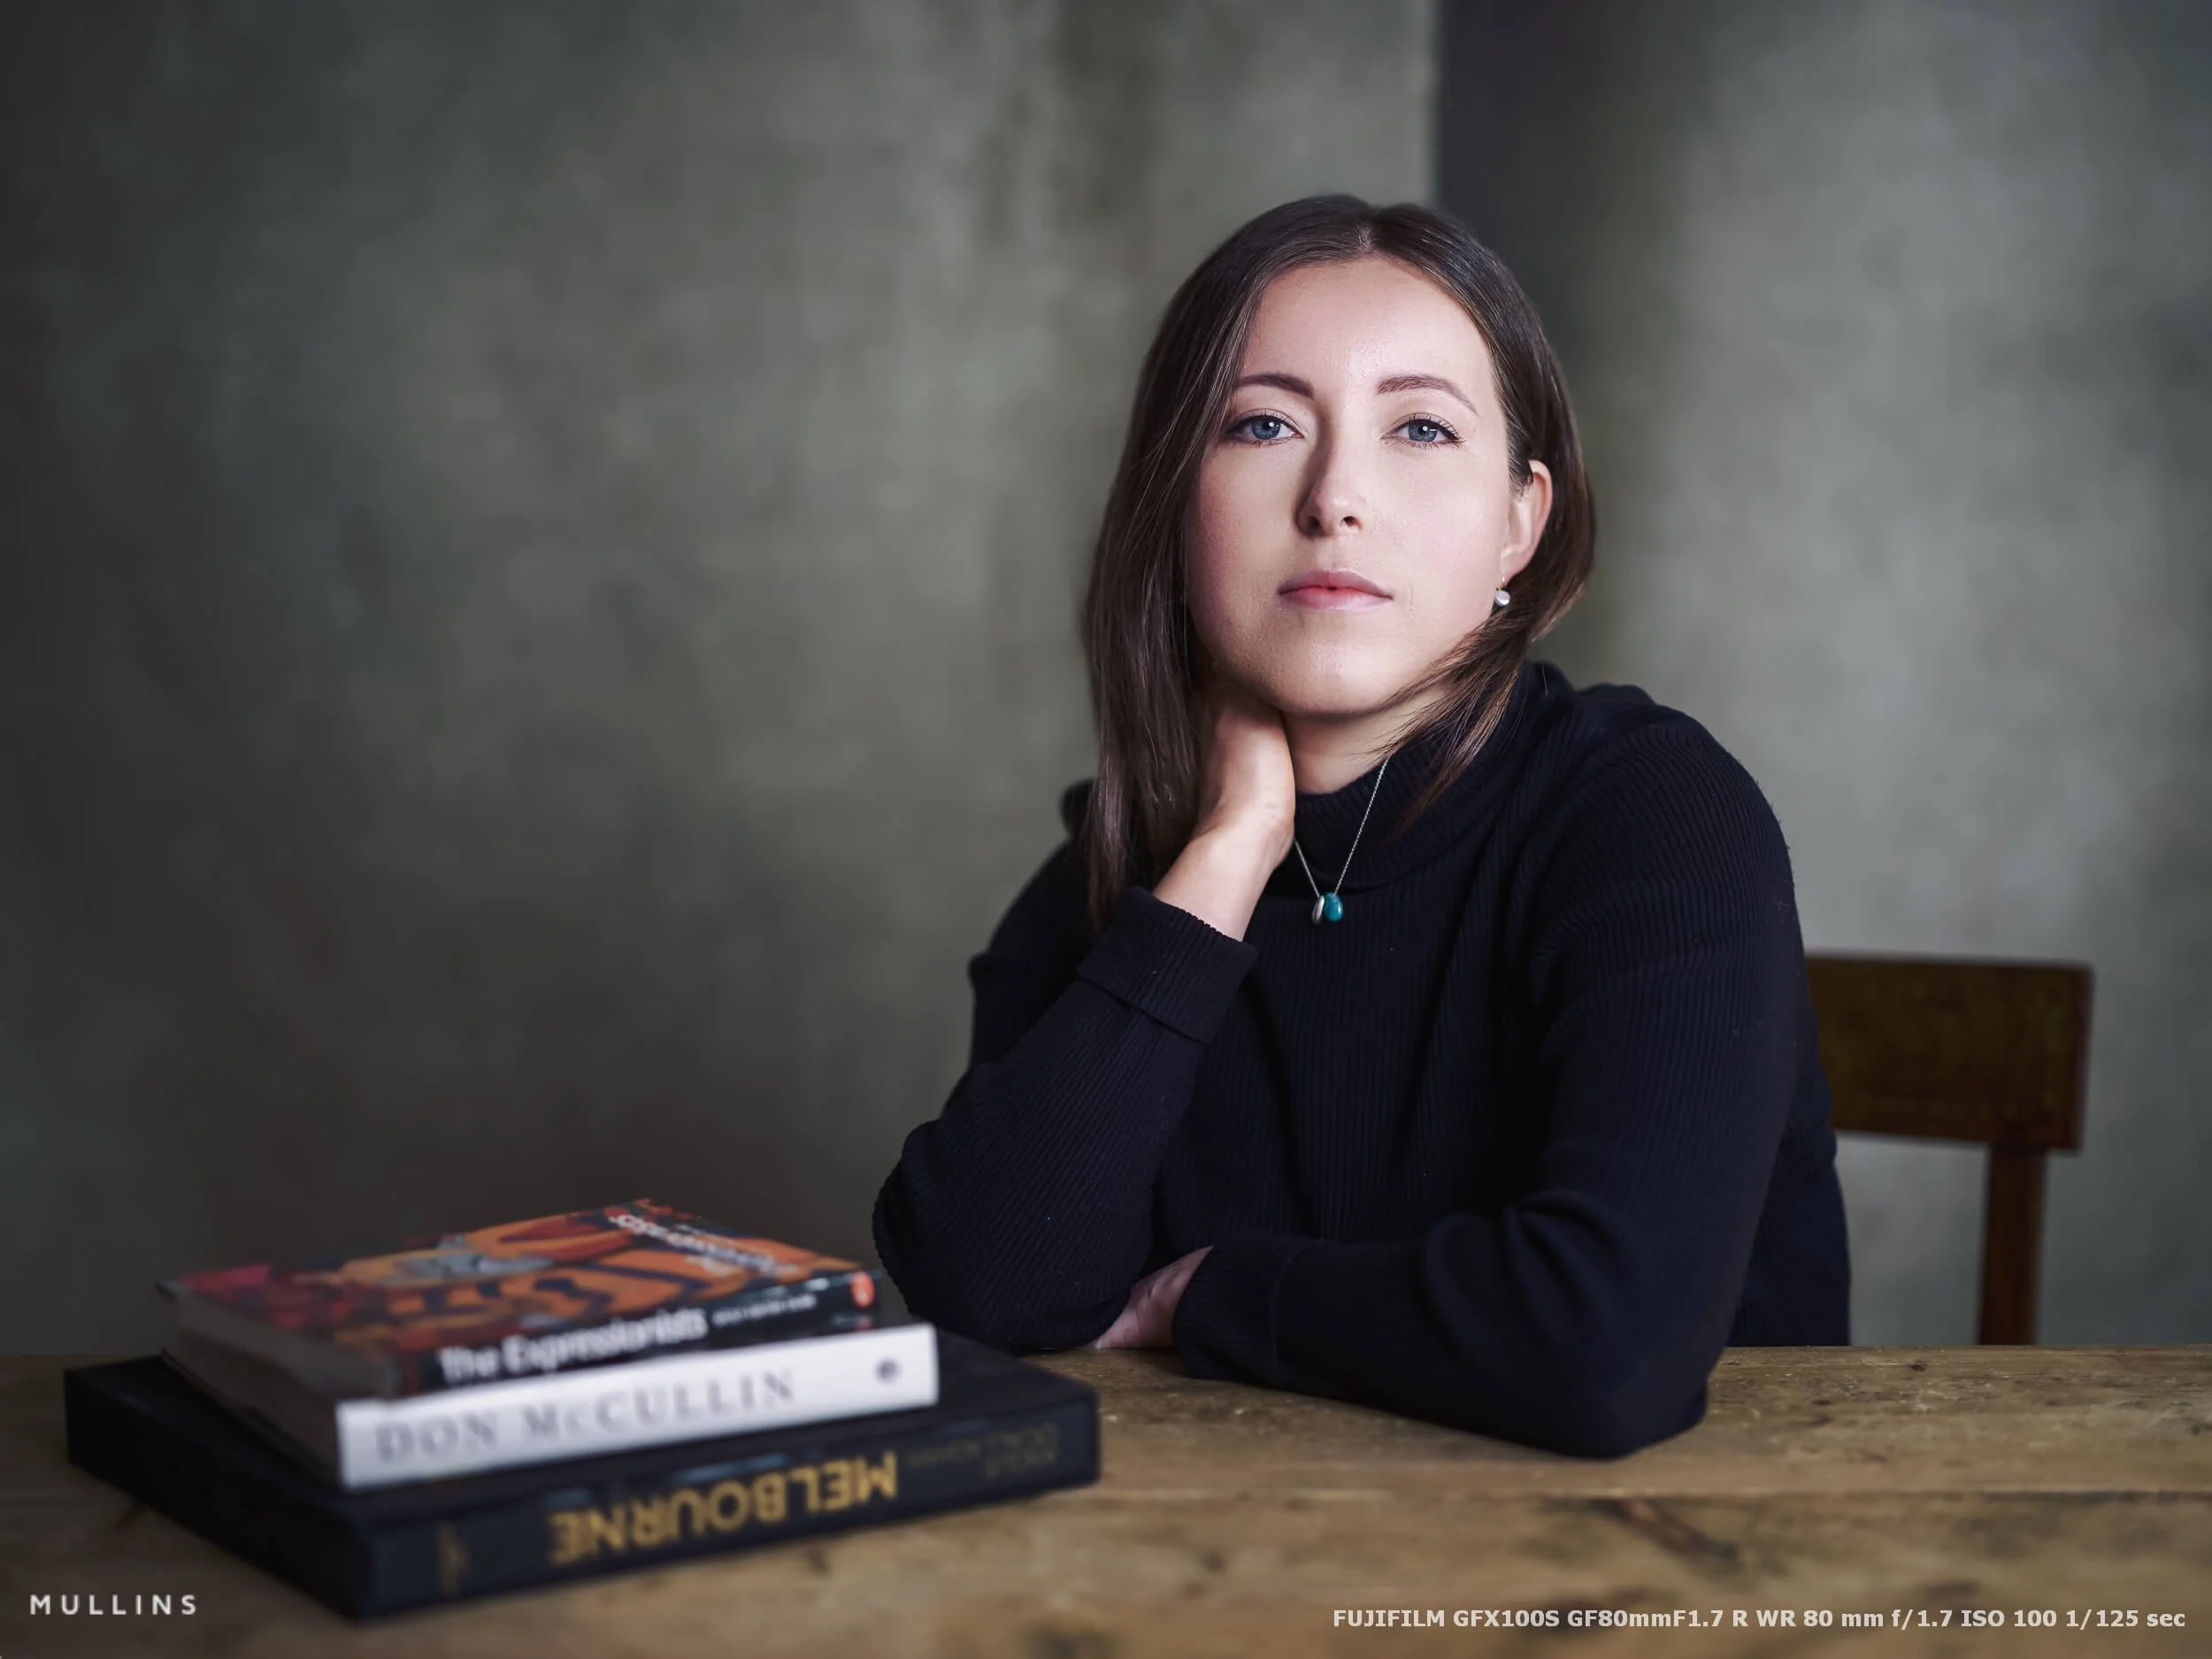
Most of the portraits in this article were made with the Fujifilm GFX100S, though I have also used older GFX bodies over the years, and the core experience remains fairly similar. This is not really a post about lab tests or pixel peeping (though I hope the images do the camera justice).
It is more practical than that. I want to show you how I actually use the system in my Malmesbury studio, why I trust it for this kind of work, and the choices I make around lighting, support, settings, file handling and editing.
So yes, there will be photographs. Quite a lot of them, I hope. But I also want this to be useful.
I will talk through the lights I use, the modifiers, why I nearly always work from a tripod, how I set up the camera, why dual-card recording matters to me, and why I choose to shoot RAW at the highest quality the camera allows. I will also touch on editing, because with GFX files, that part of the process is definitely worth discussing.
If you are curious about using Fujifilm GFX for studio portraits, whether professionally or simply to get the best files you can reasonably get, this should give you a clear sense of how I approach it.
And perhaps more importantly, why.
In Summary
The Fujifilm GFX100S still does everything I need: for studio portrait work, I have no real need to upgrade when the files, handling and overall experience already suit my process so well.
Three lenses do most of the real work: the GF80mm is my default portrait lens, the GF110mm is there for tighter framing, and the GF45mm comes out when I want a wider or more environmental feel.
Lighting is simple and controlled: an Aputure 300d II with Light Dome as the main light, a PixaPro Liner 80 for side shape, and an Aputure 120d with Lantern as a secondary or hair light.
I shoot manually and preview in black and white: that keeps the exposure consistent and helps me judge light, shadow and tonal shape more clearly while still recording full RAW files.
Tripod, 16-bit RAW and dual matched UHS-II cards are all part of the method: the tripod slows me down in the right way, the files give me maximum flexibility, and dual cards give me the redundancy I want for paid portrait work.
The workflow is designed to stay functional and dependable: Photo Mechanic for culling, Lightroom Classic for the main edit, Photoshop for finer work, and then a properly archived and backed-up catalogue once the job is complete.
Why I use Fujifilm GFX for portrait work
I should probably start by saying that you do not need a Fujifilm GFX camera to make a good portrait. You just don’t. A strong portrait is still about light, expression, timing, connection and taste. The camera helps, of course, but it does not do the seeing for you.
That said, for the kind of portrait work I do in the studio, the GFX system makes a great deal of sense.
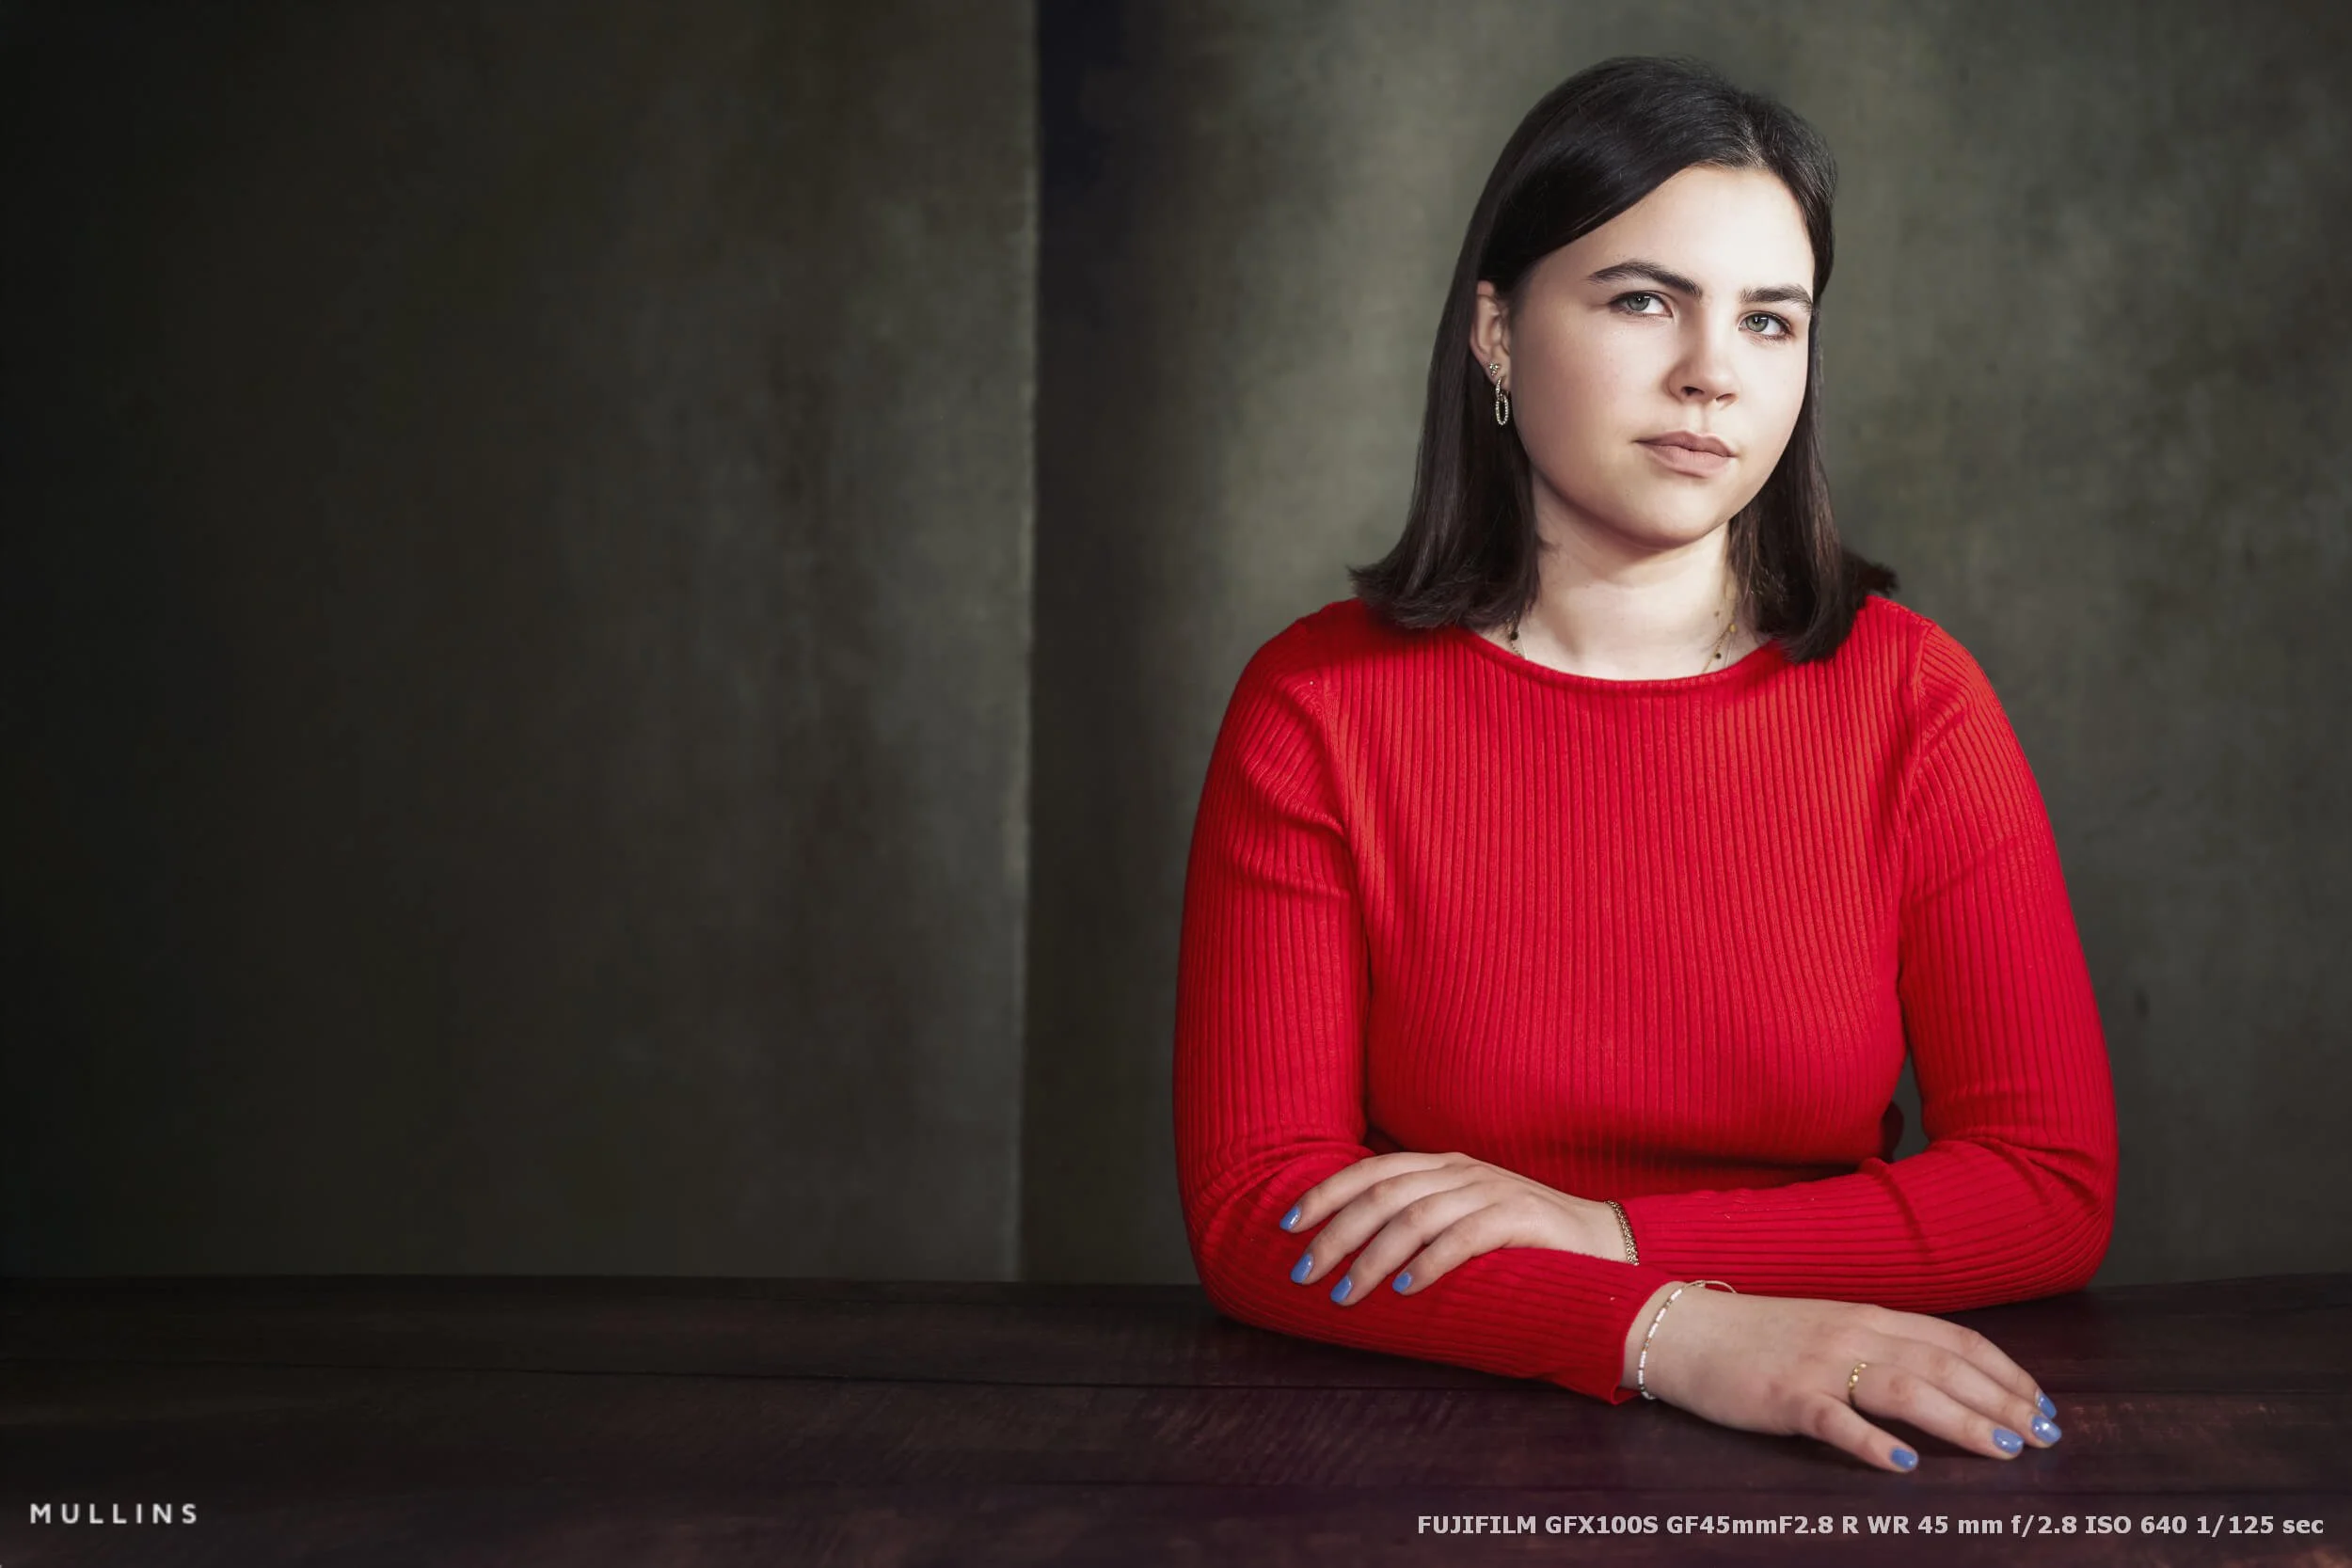
Part of that is the files. They are big, flexible, and very forgiving. If I want to make small exposure adjustments, refine skin tones, hold onto highlight detail, or shape the overall mood of the image in post-processing, the GFX files give me plenty to work with. You can just feel the quality. There is a kind of depth to them that I like, especially when the light is controlled, and the subject is not moving around at speed.
The other part is the way the system encourages me to work.
Studio portrait photography, at least the way I do it, is not rushed, which is very different to the way I approach my Documentary Wedding Photography. I am usually building the picture one step at a time. Adjusting the light. Looking at the shadow. Watching the pose settle. Fine-tuning the composition. In that sort of environment, the GFX system feels completely at home.
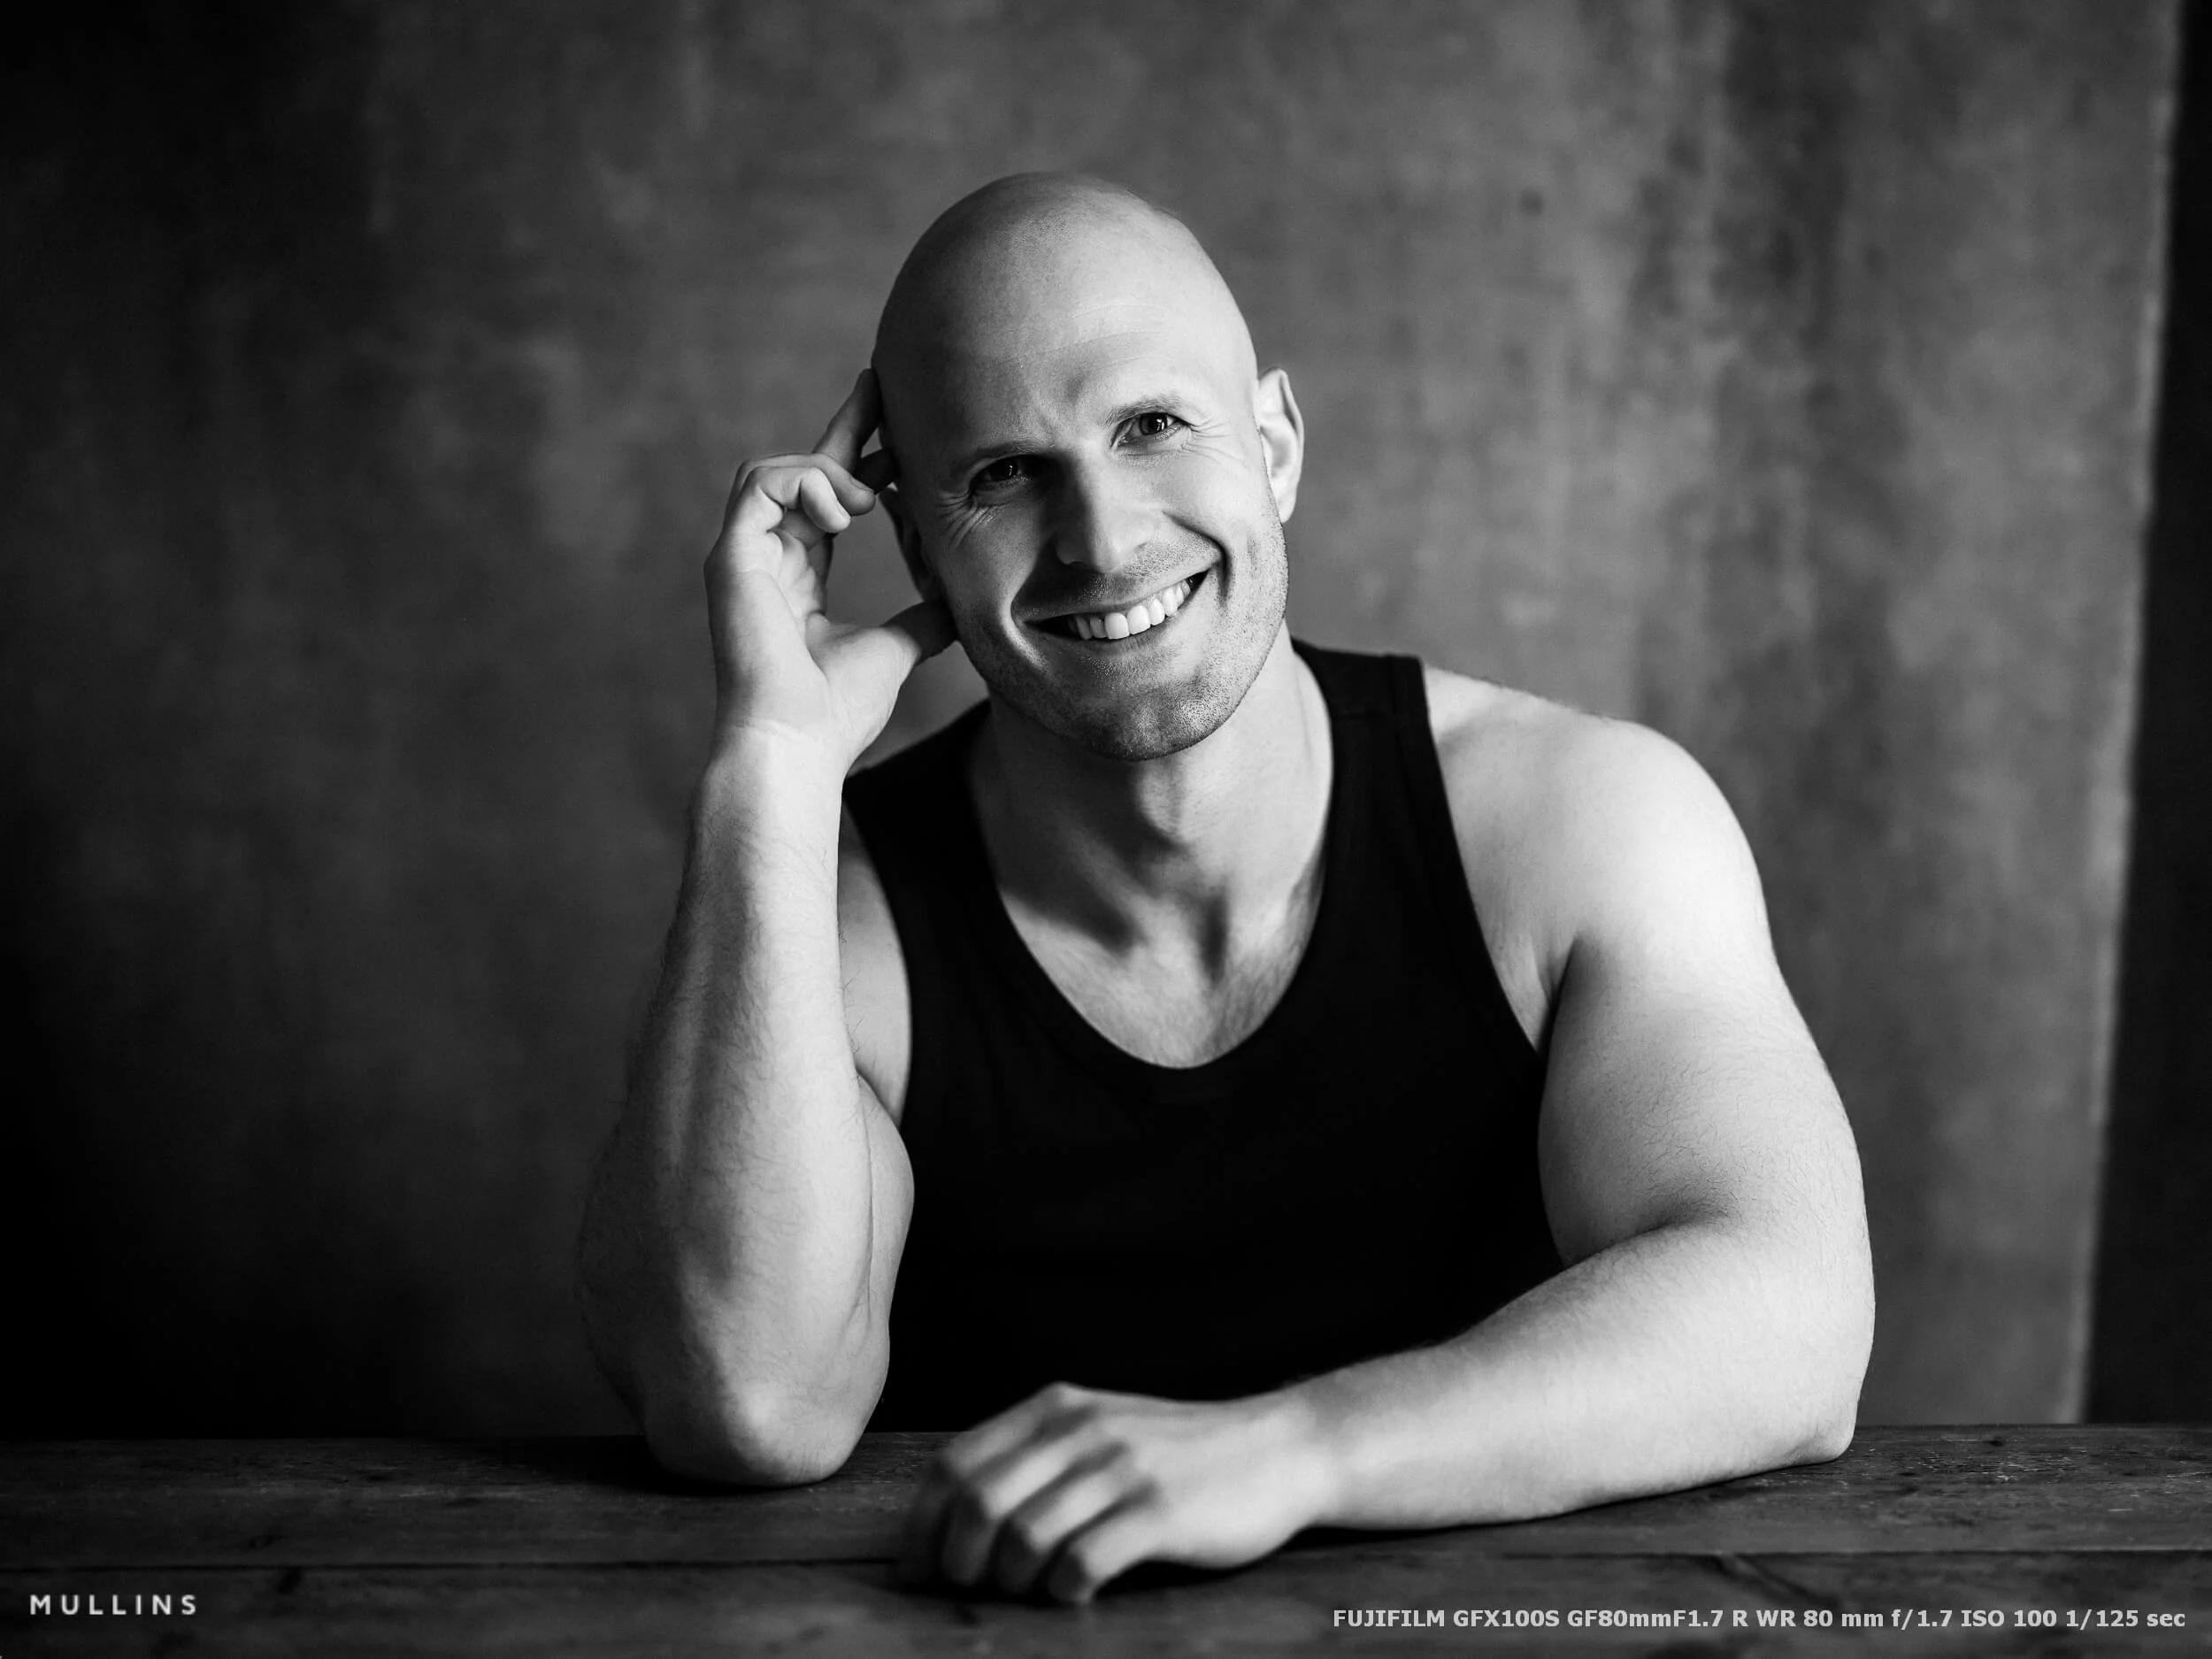
There is also the look of the images, which is a difficult thing to describe without drifting into nonsense. But I think most photographers know it when they see it. The rendering feels so nice. Tonal transitions feel gentle. There is a clarity there, but not in a super-harsh way. Skin looks lovely when the light is right. Black-and-white conversions, in particular, have a richness I find really lovely.
That is not to say smaller formats cannot do beautiful things. They can, and I use them too. But when I am photographing portraits in the studio, and I want the best files I can make, GFX is usually what I choose.
In practical terms, this is what the system gives me:
A large, flexible RAW file with plenty of room for careful editing
Excellent detail for tighter crops or larger prints
A slower way of working that suits portrait sessions
Beautiful tonal separation, especially in controlled studio light
Files that respond very well to monochrome treatment
Another reason I enjoy using GFX in the studio is that it works well with the way I see light.
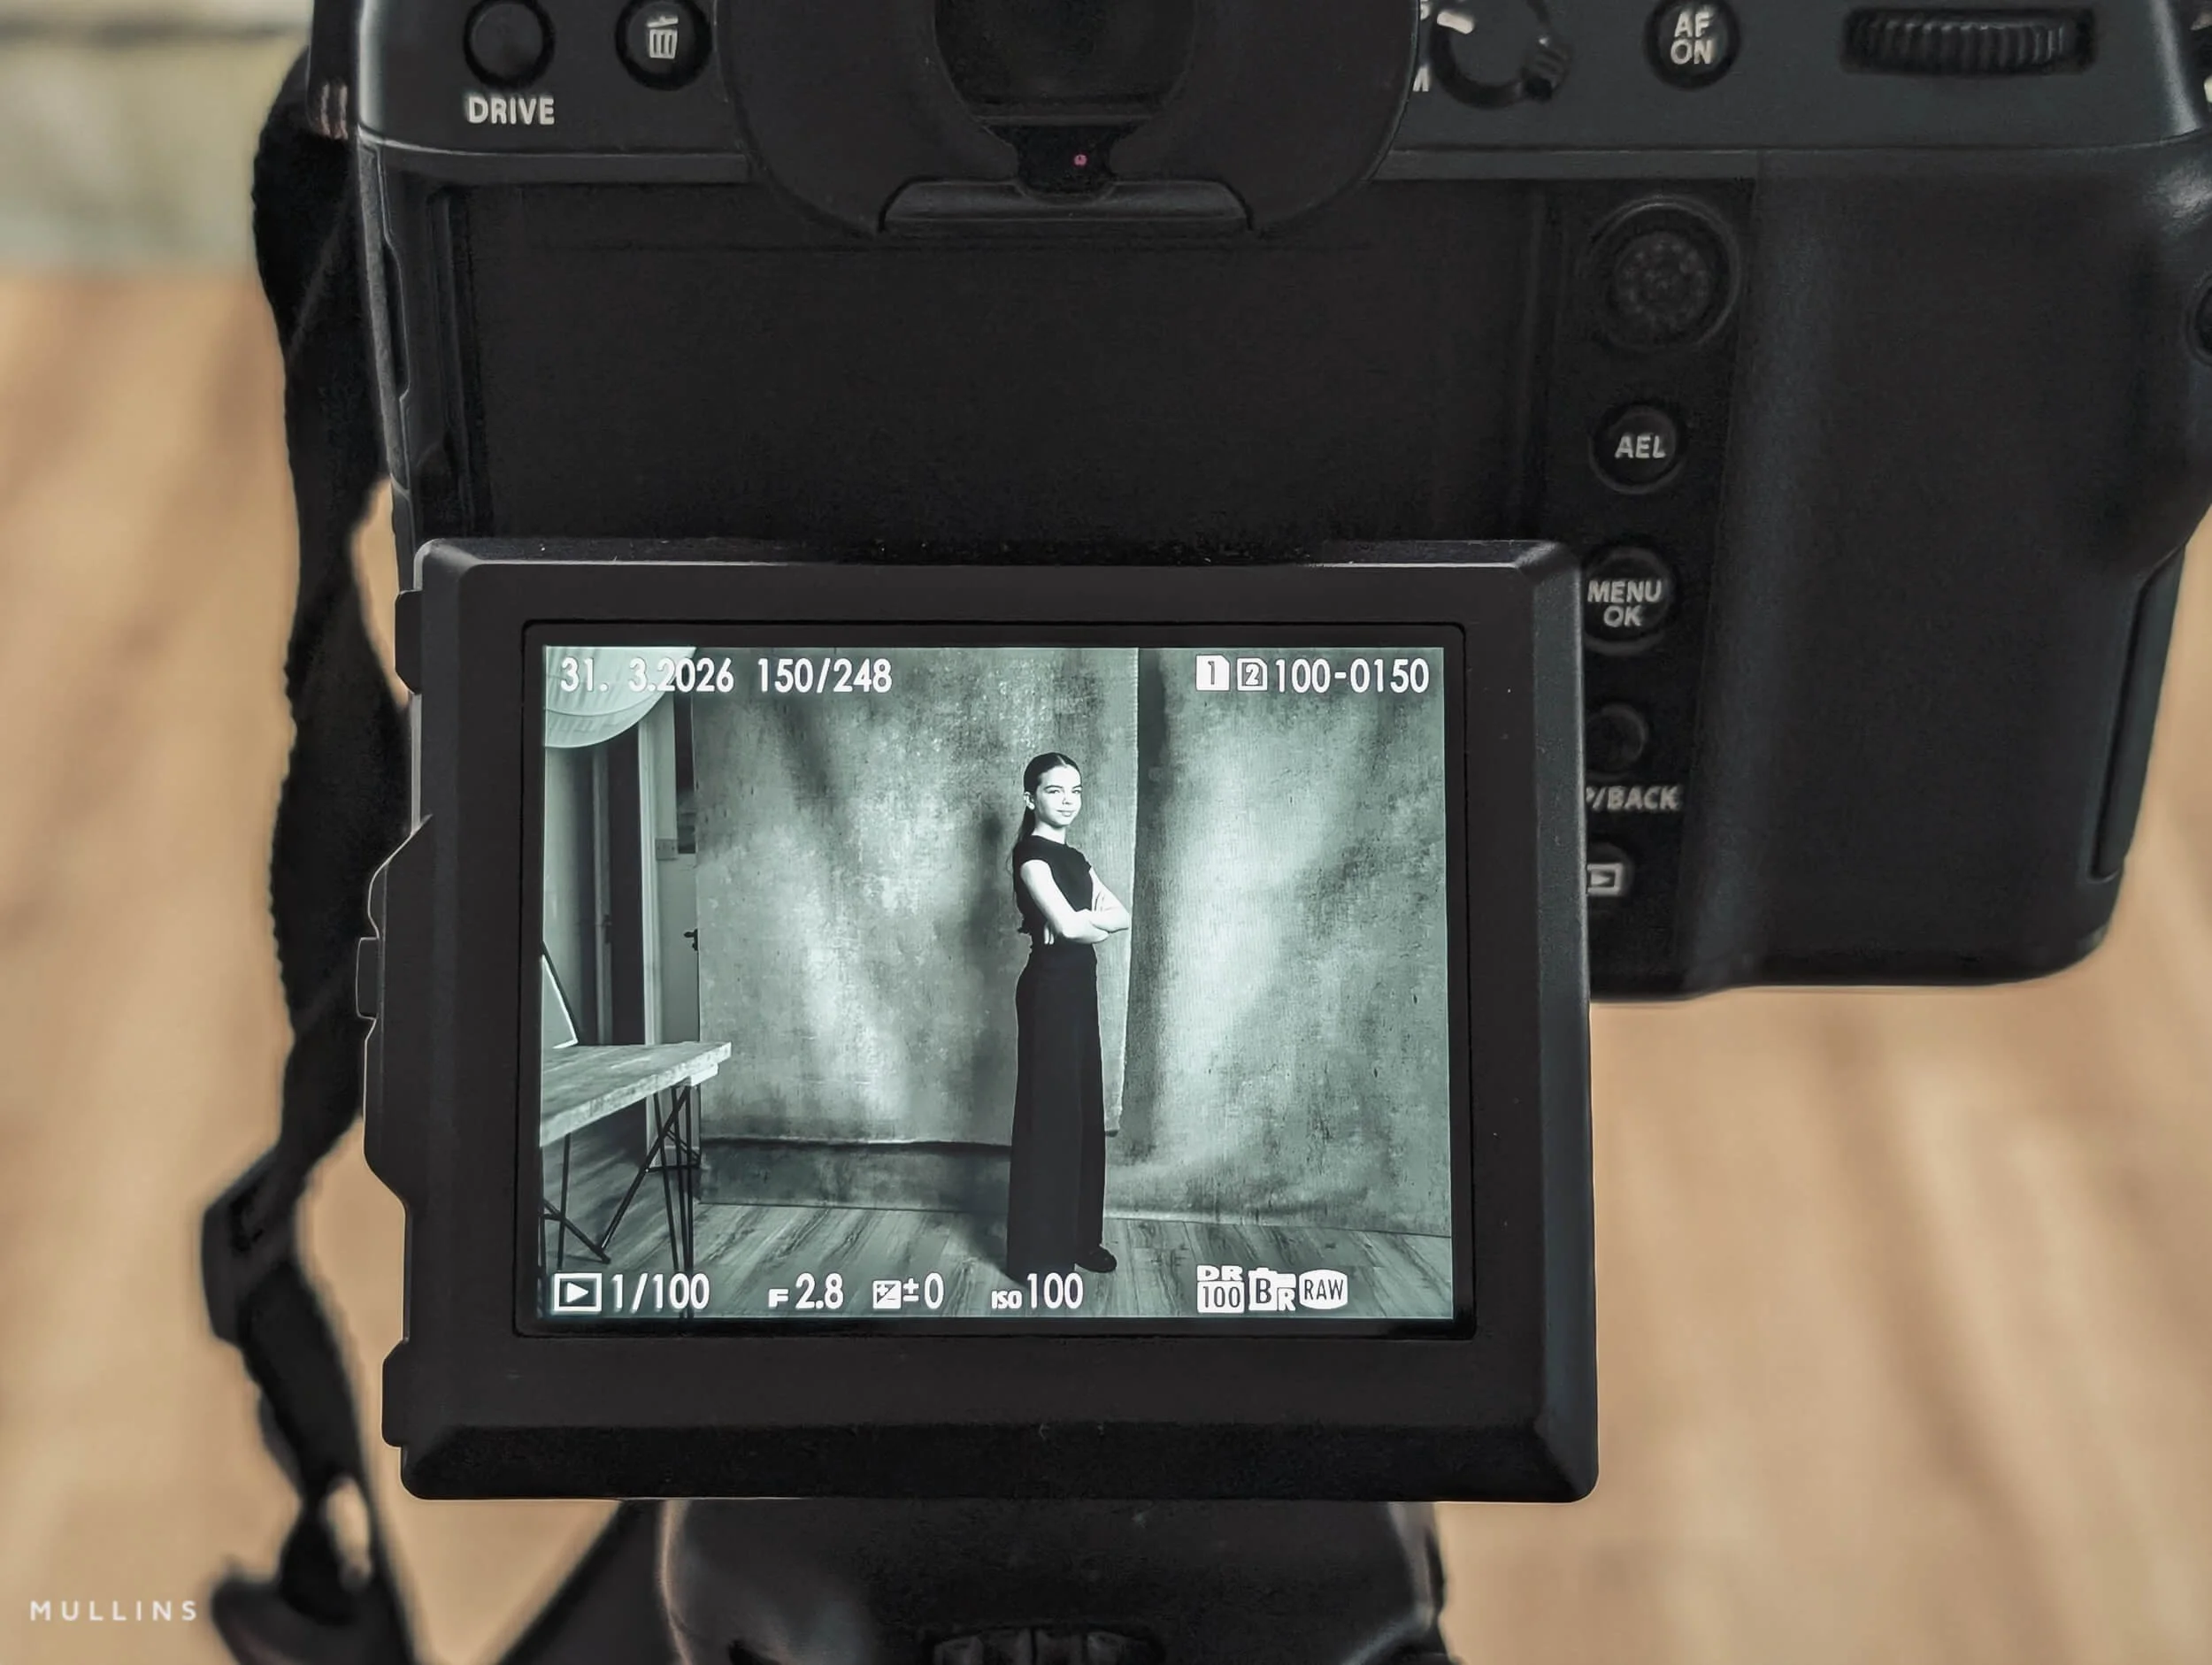
I nearly always keep the camera set to a black-and-white film simulation while shooting, even though I am recording dual RAW files.
For me, that strips away distraction. Colour can sometimes flatter a setup that is actually doing very little. Monochrome lets me judge the shape of the face, the quality of the shadow, and the direction of the light so easily.
This is important because you are not just lighting a person. You are deciding what not to show, what to let fall away, where the frame needs shadow, and where it needs structure. Seeing the scene in black and white on the back of the camera helps me make those decisions more clearly.
I also shoot manually. Always, really, in the studio. Once the light is where I want it and the subject is in position, I do not want the camera second-guessing anything. I want consistency from frame to frame, and I want to control exactly how the exposure is built. That is one of the reasons the GFX system suits this work so well.
So the reason I use GFX for portrait work is not simply that it is a higher-end kit, or that the files are bigger, or that it looks impressive on a tripod in the studio. None of that really matters.
I use it because it fits what I do very well.
It lets me work slowly, see clearly, light carefully and come away with files that give me exactly what I want when I sit down to edit them later.

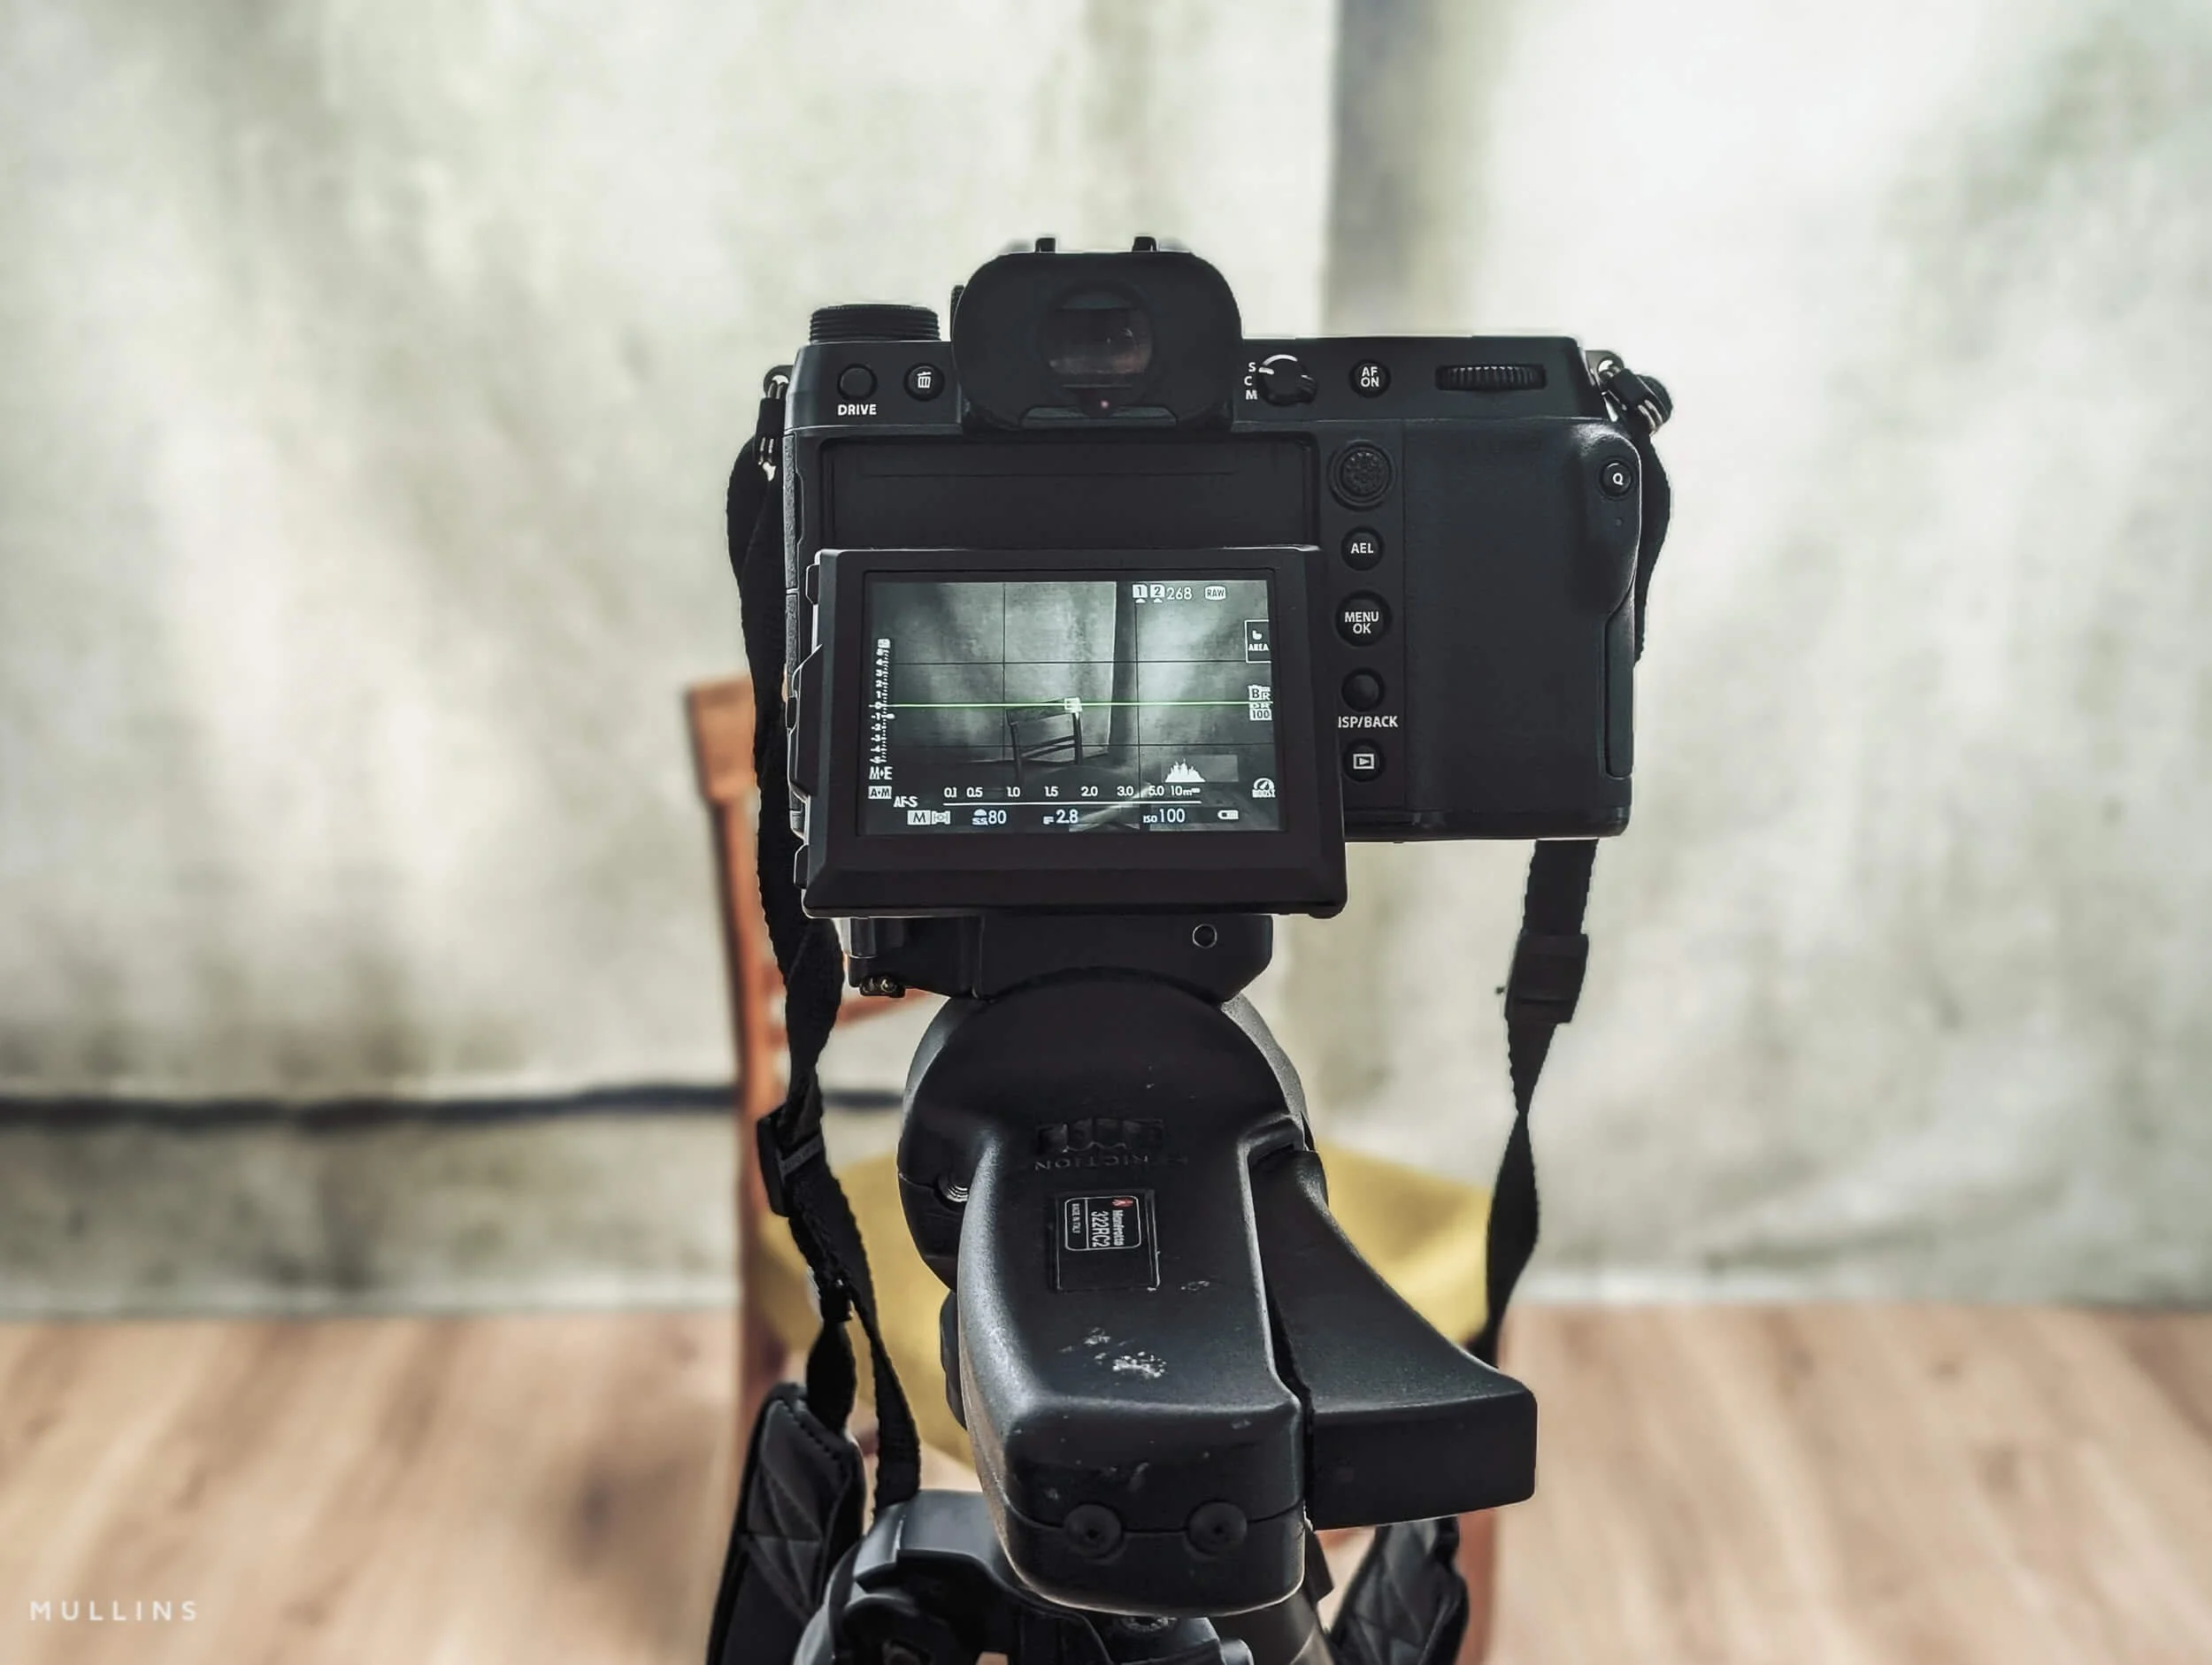
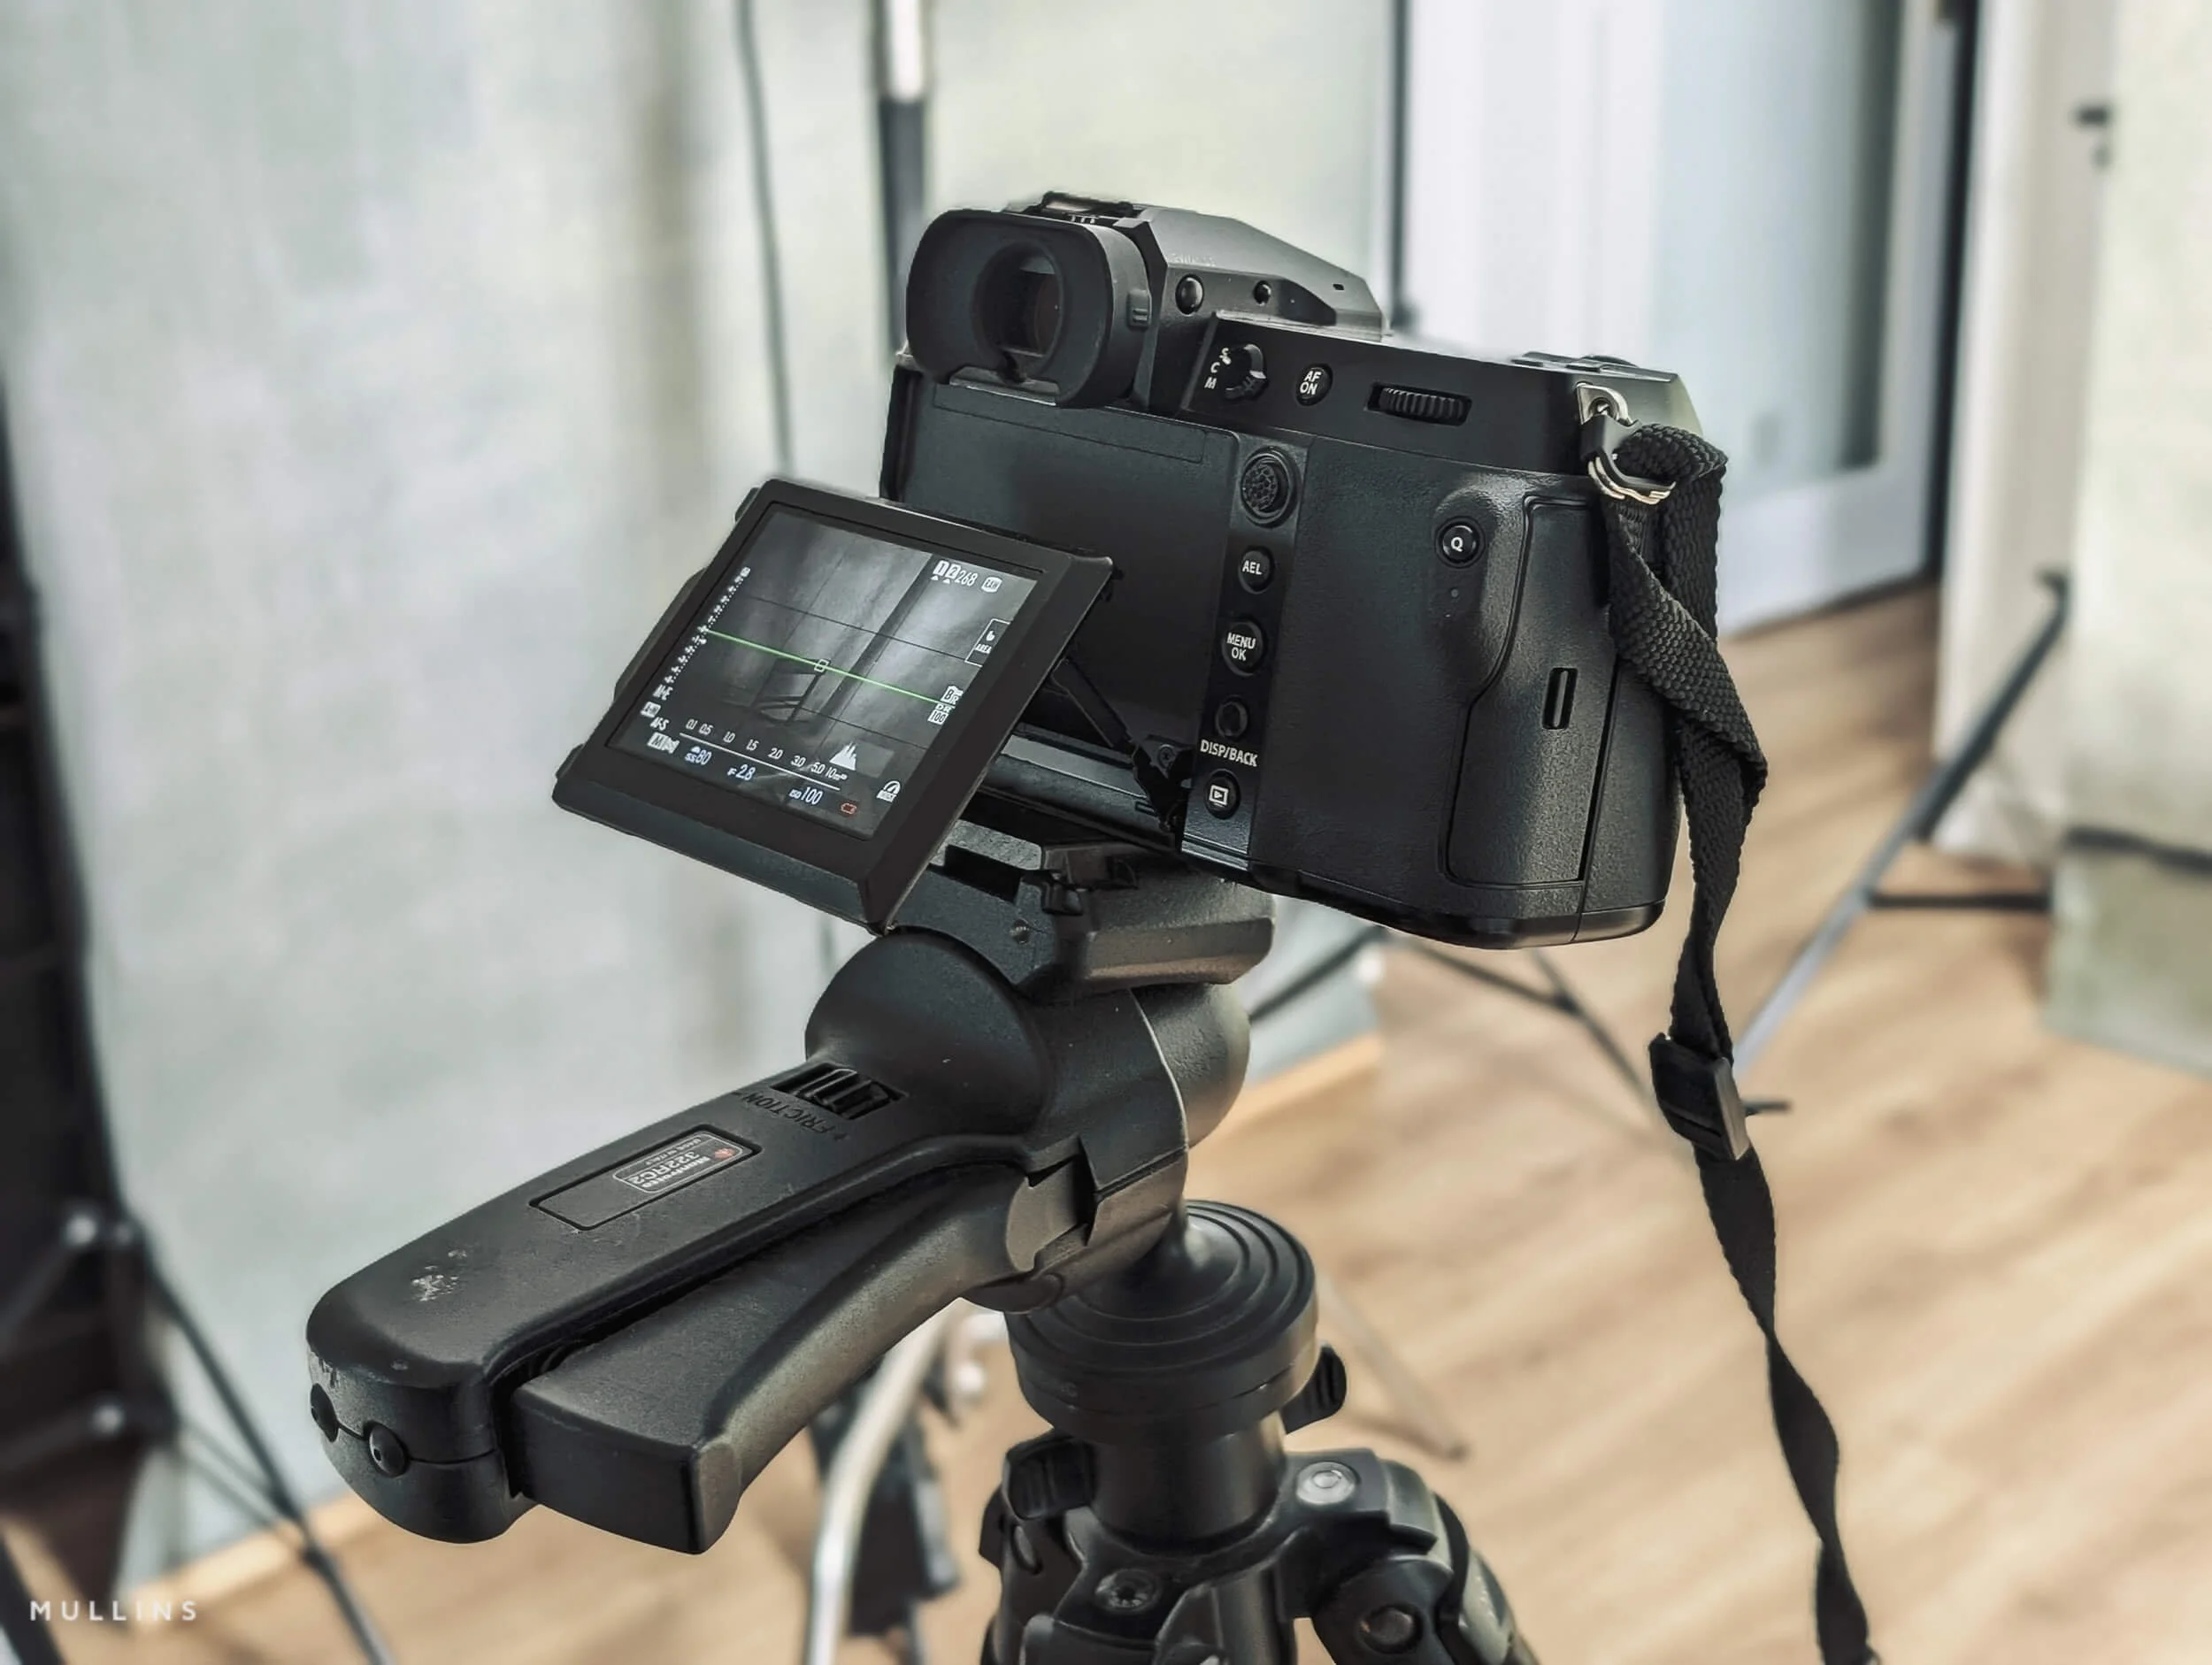
My GFX100S in the Studio; set to a monochrome film simulation.
This article is part of my Fujifilm Learning Hub.
A growing collection of real-world guides, camera setup tips, lens suggestions by use-case, practical assignments, and buying advice with examples.
Prefer to see everything I write, brand-agnostic pieces on documentary & street work, reviews, tips, and the business of photography? Browse Main Articles & More.
The cameras and lenses I use
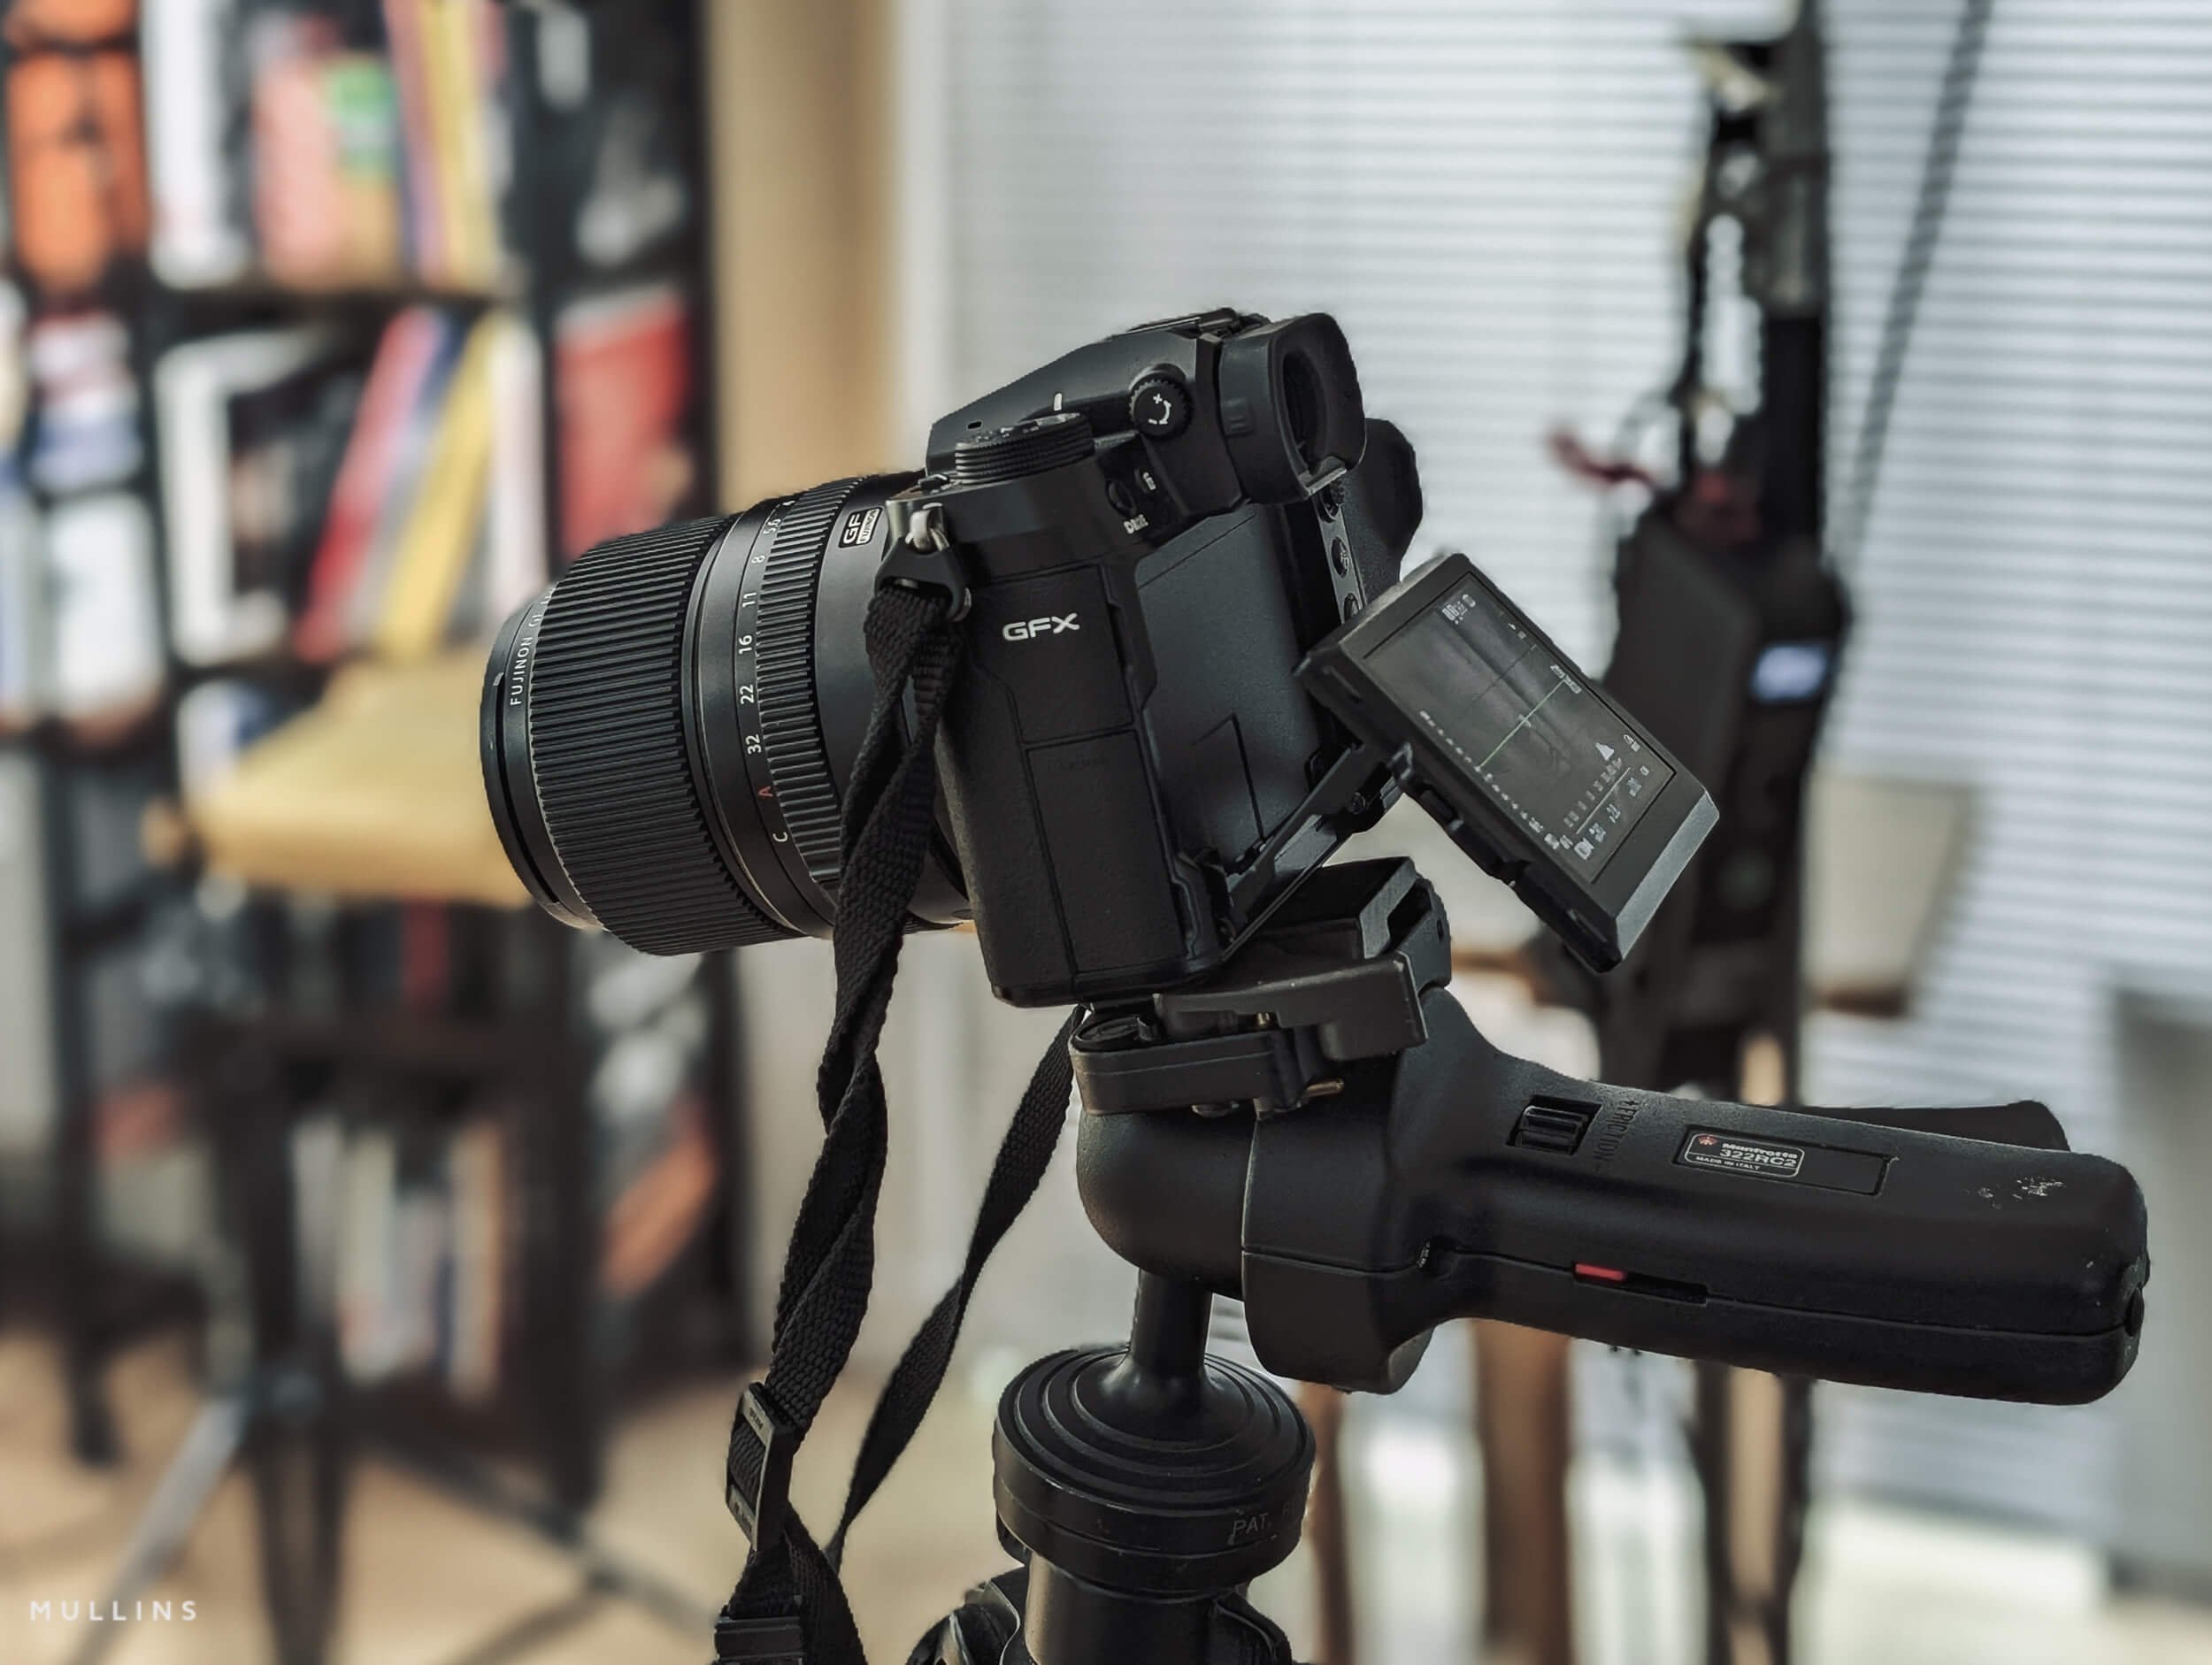
My main camera for this work now is the Fujifilm GFX100S. It is an older body in the line-up now, and Fujifilm lists it as discontinued. It is still a 102MP GFX body, and for the kind of studio portraiture I do, that is a serious amount of camera.
The newer GFX100S II and GFX100 II are both officially in the current range, but I have not felt any real pressure to move on from the GFX100S just for the sake of it.
Before the GFX100S, I used the GFX50R, the GFX50S and the original GFX100. So this is not a system I have dipped into briefly and then talked about as if I know it inside out. I have used it a lot, which means I use it based on what works for me in the studio, session after session.
The short version is this: the GFX100S already does everything I need it to do.
I am not using GFX for sports (though I have tried that), fast-paced events, or anything especially chaotic. I am using it for controlled portraiture in a studio where I set the pace, make the light, and work quite deliberately. In that environment, the GFX100S is still excellent. The files are wonderful, and nothing about it gets in my way.
The lenses I have available
I have a few GF lenses at my disposal, but in truth, I use a small core set most of the time.
| Lens | Best for | Why I like it | Trade-off |
|---|---|---|---|
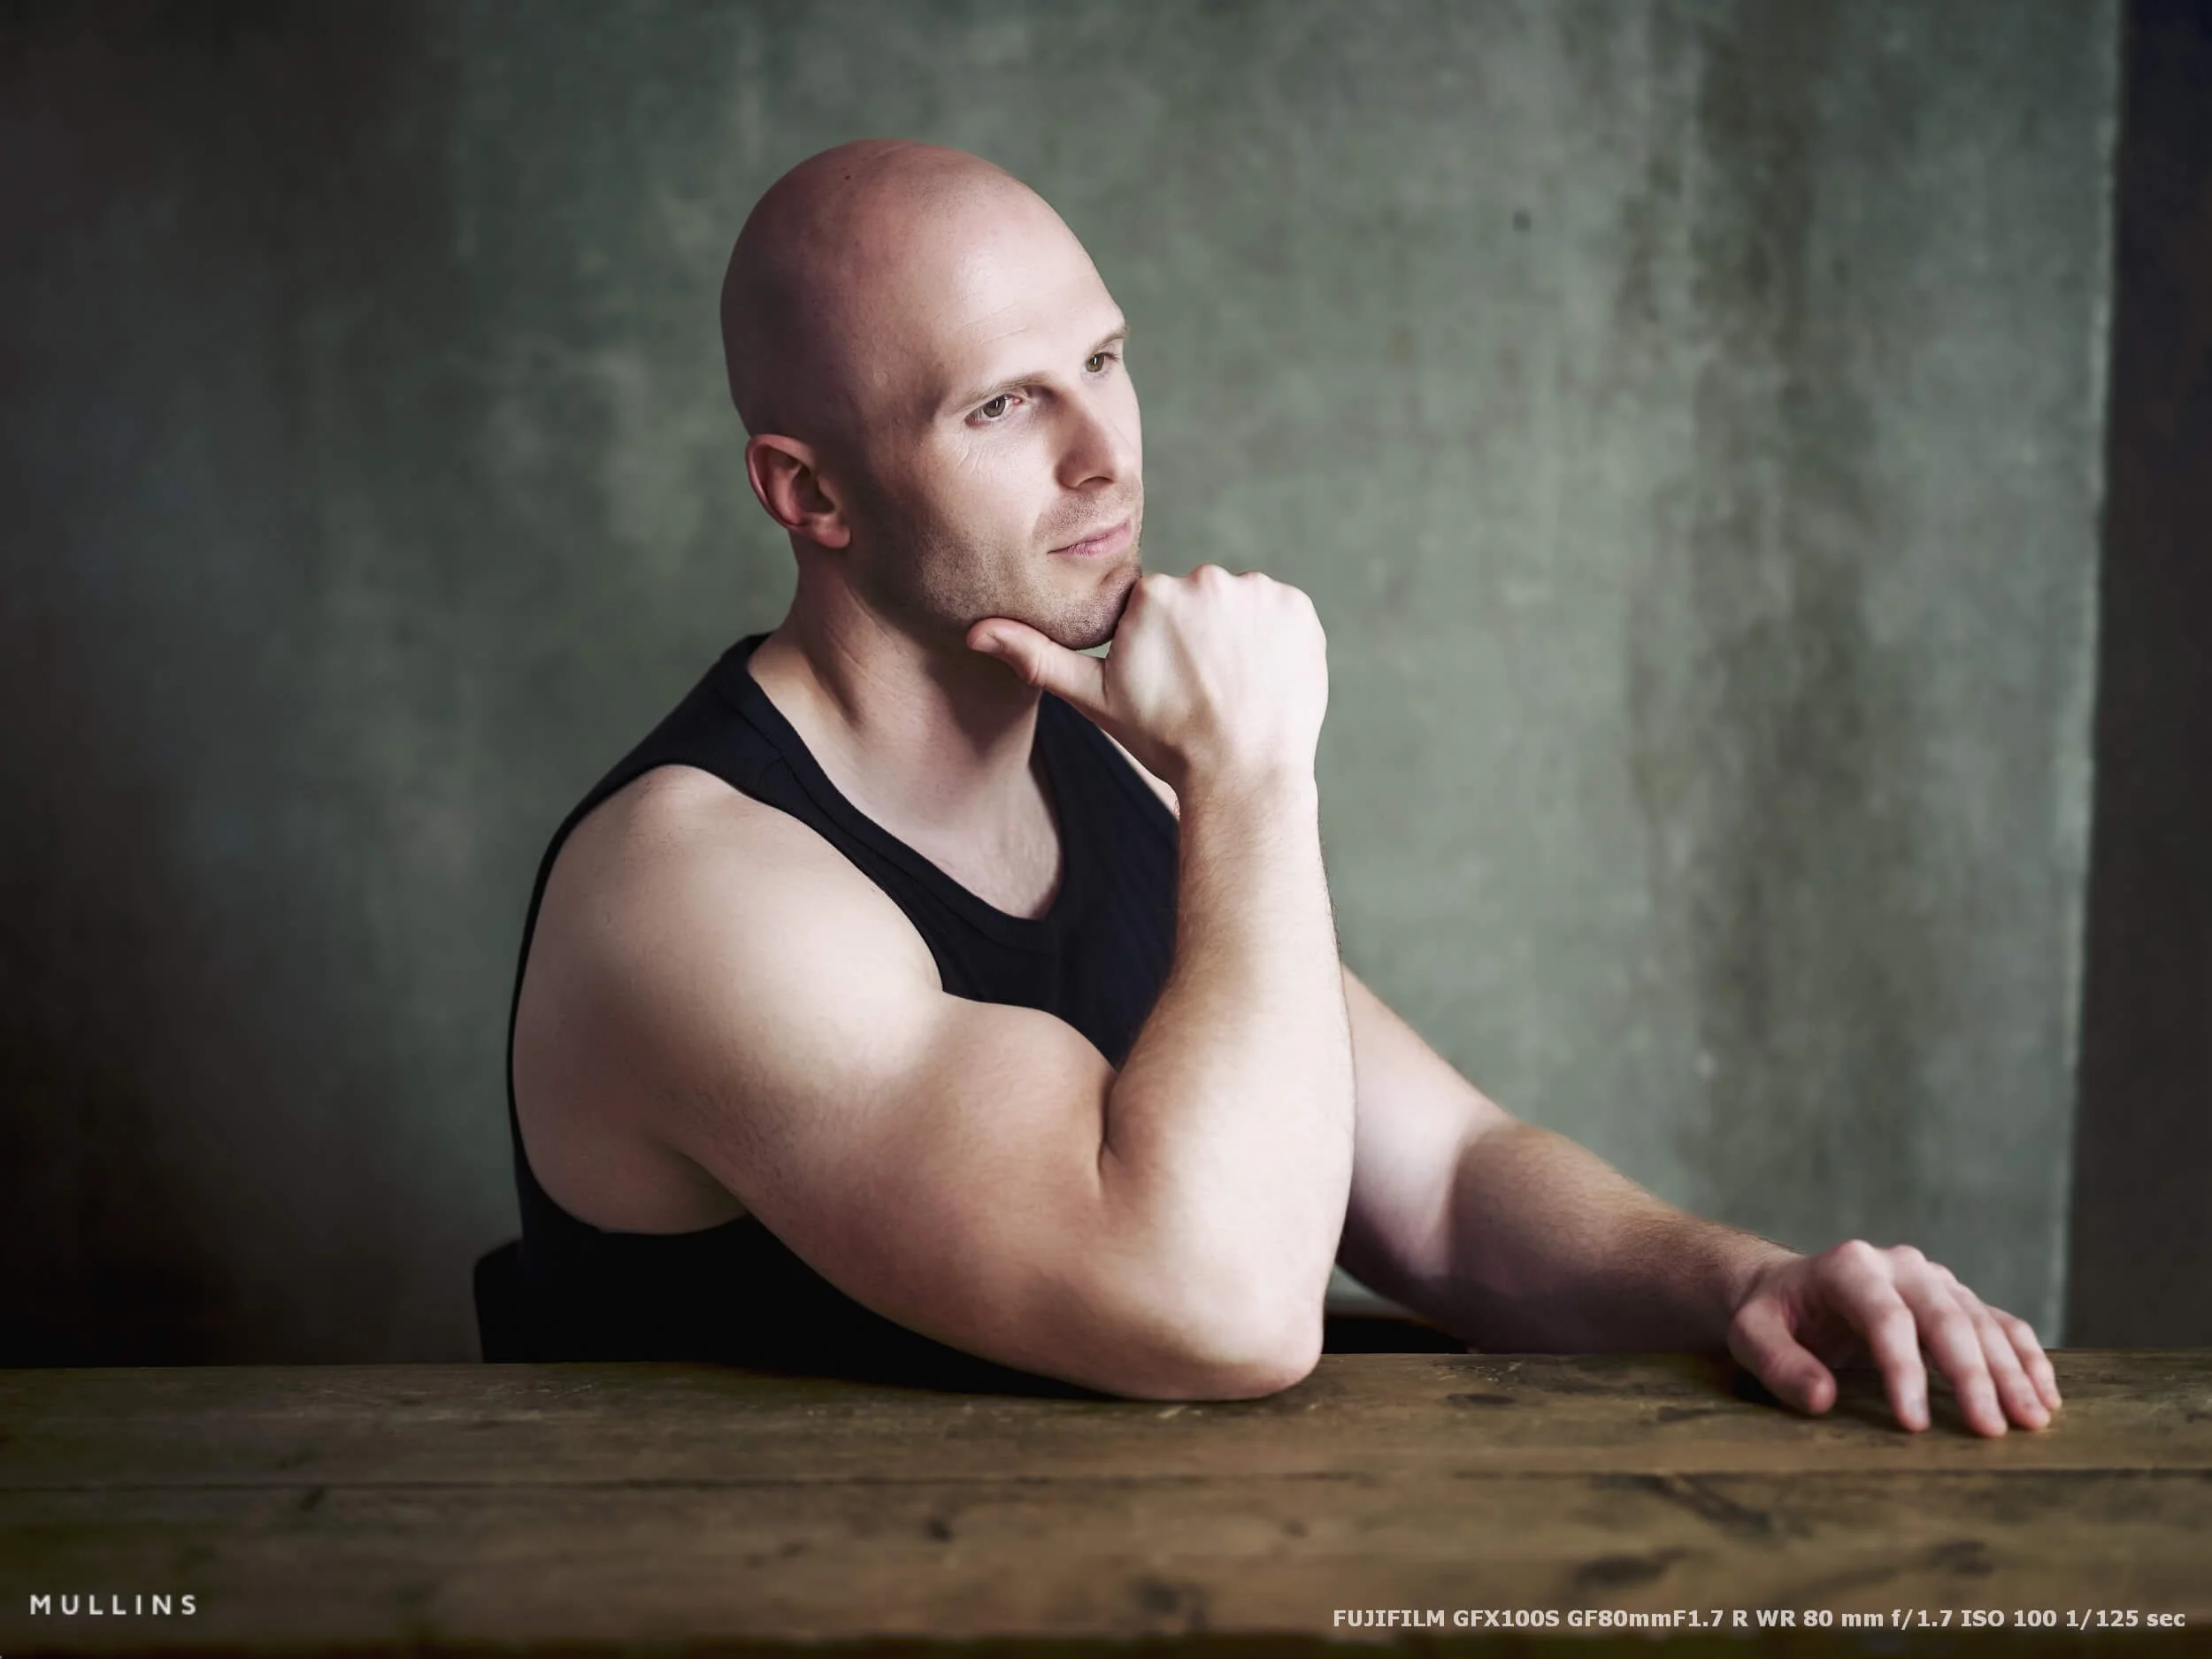
| Fujinon GF80mm F1.7 R WR | Main portrait work, headshots, half-length portraits | This is my default portrait lens on GFX. It gives me a flattering field of view and a look that feels natural, but still a bit special. | Not as flexible in tighter studio spaces as the wider options. |
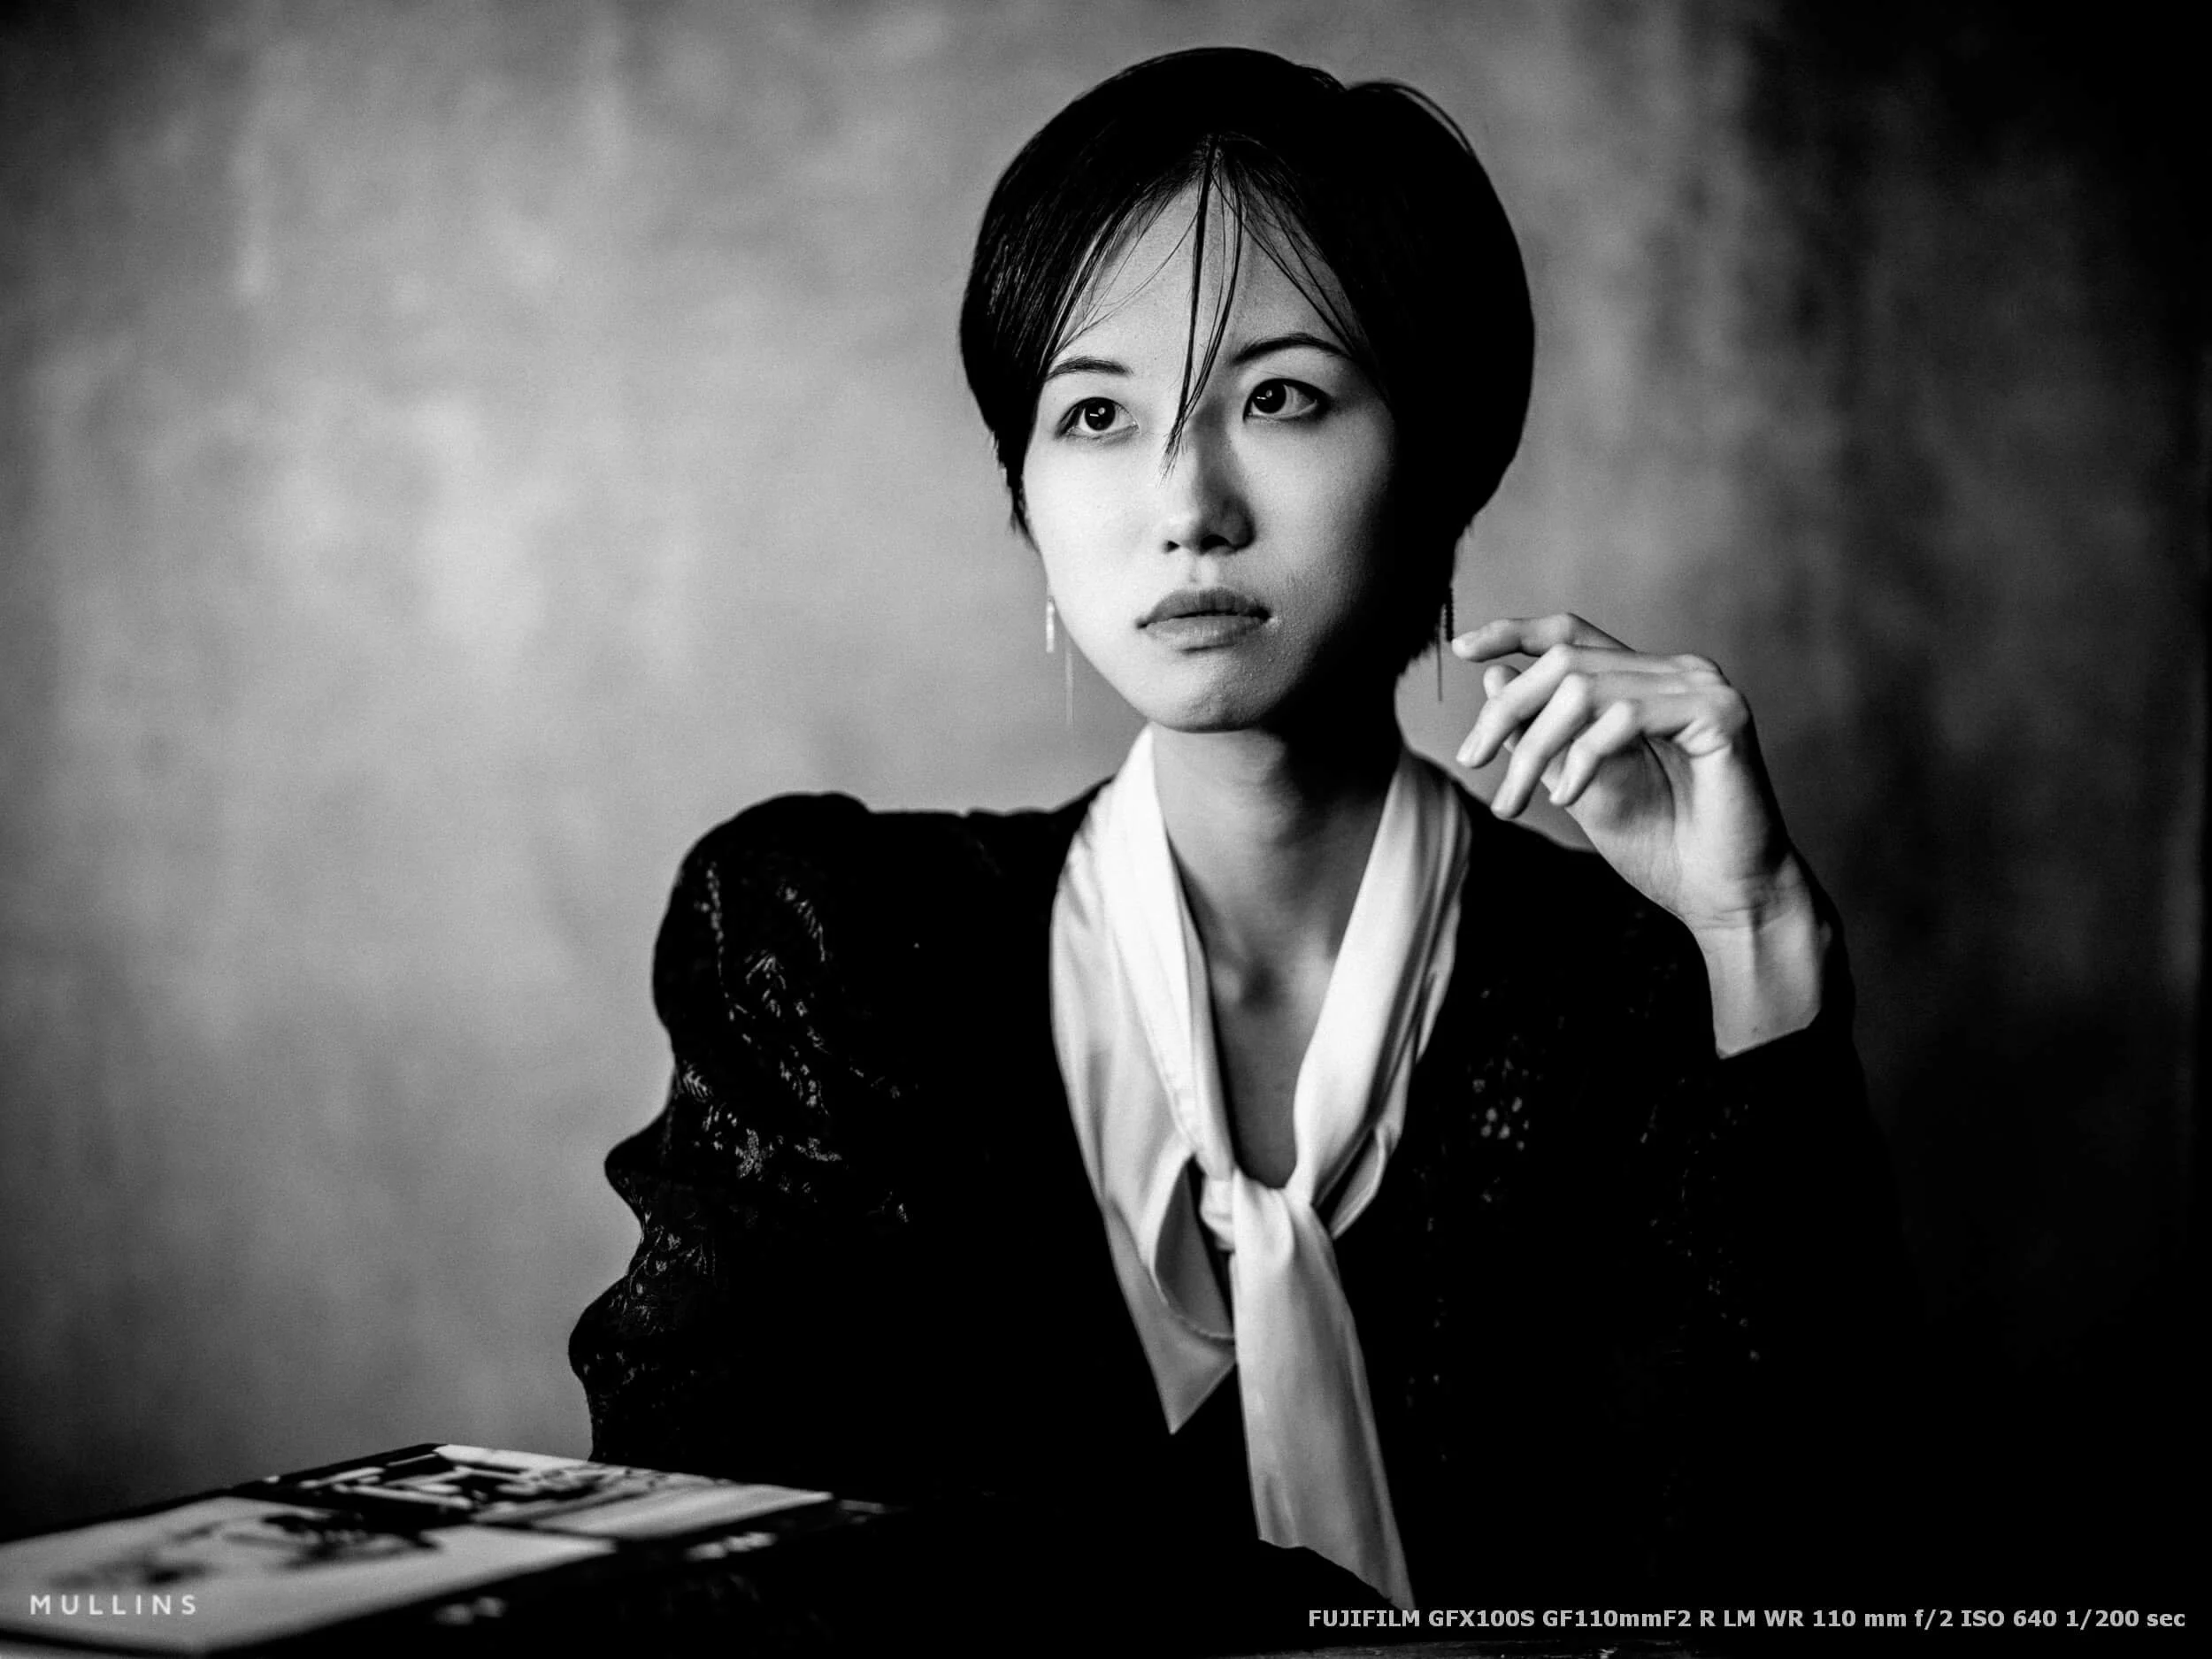
| Fujinon GF110mm F2 R LM WR | Tighter portraits, more compressed framing | Beautiful compression, lovely subject separation, and a very elegant look for tighter portrait work when I have the room. | Needs a bit more working distance, so it is not always the most practical choice in a smaller setup. |
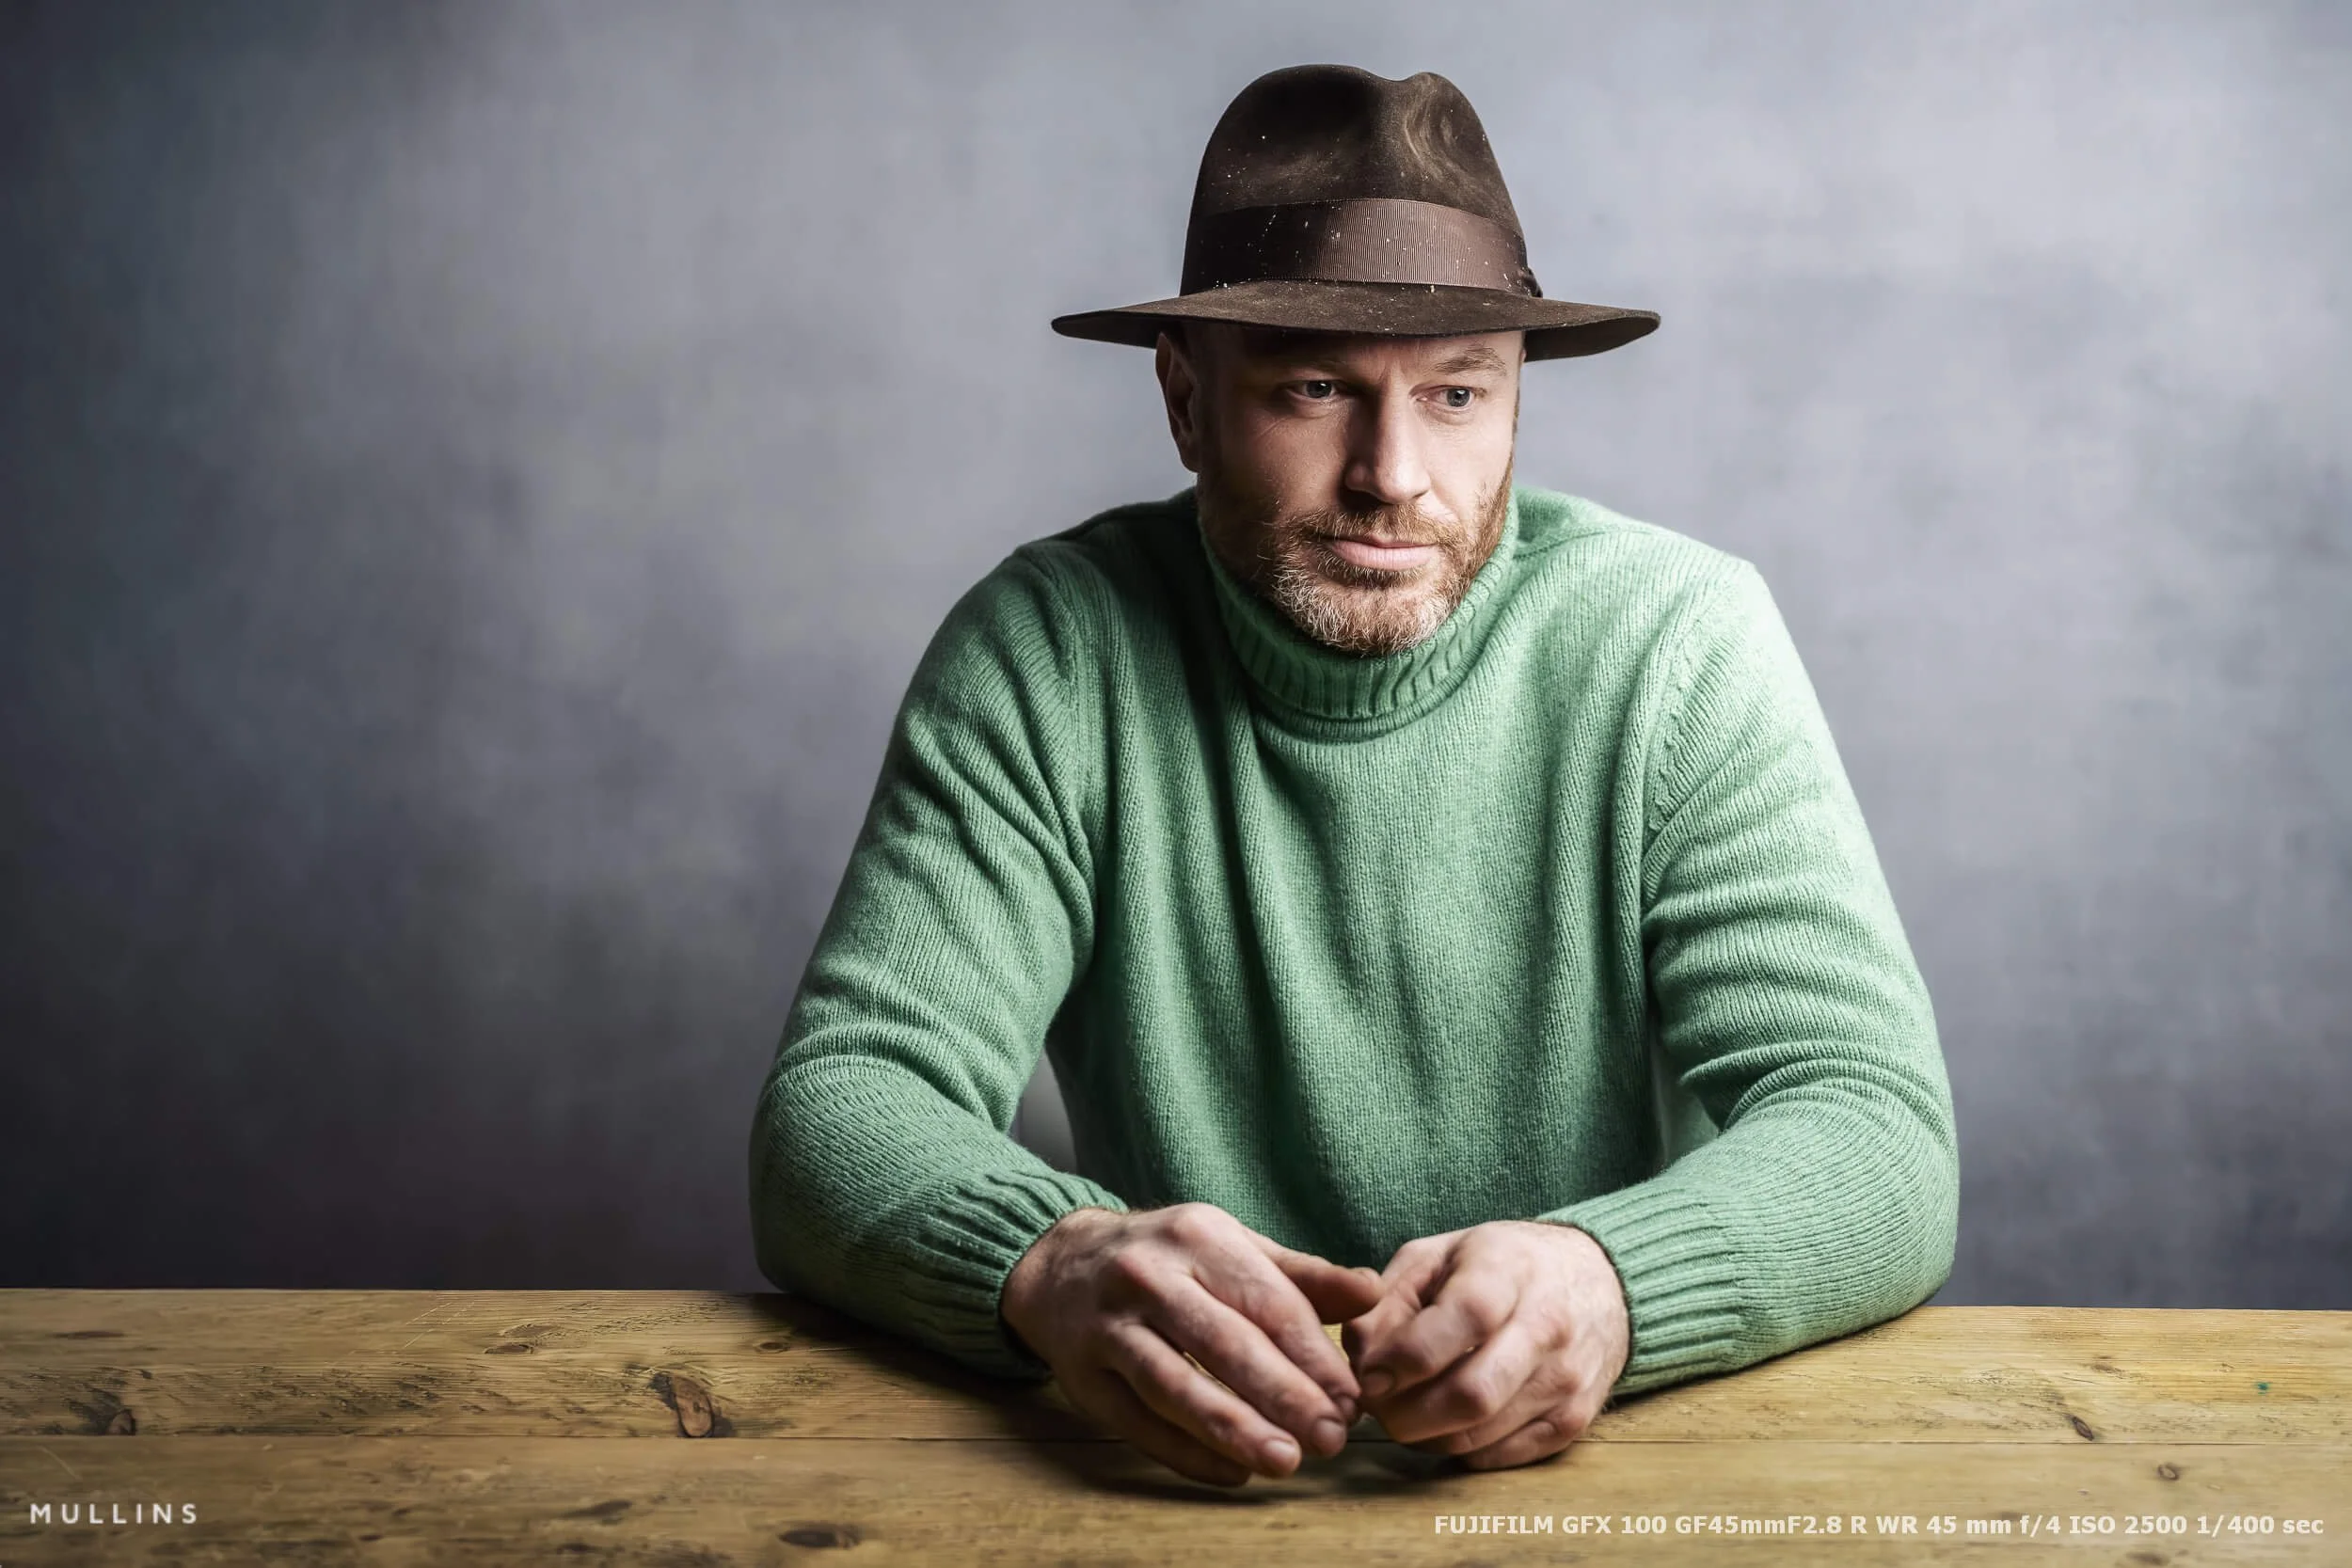
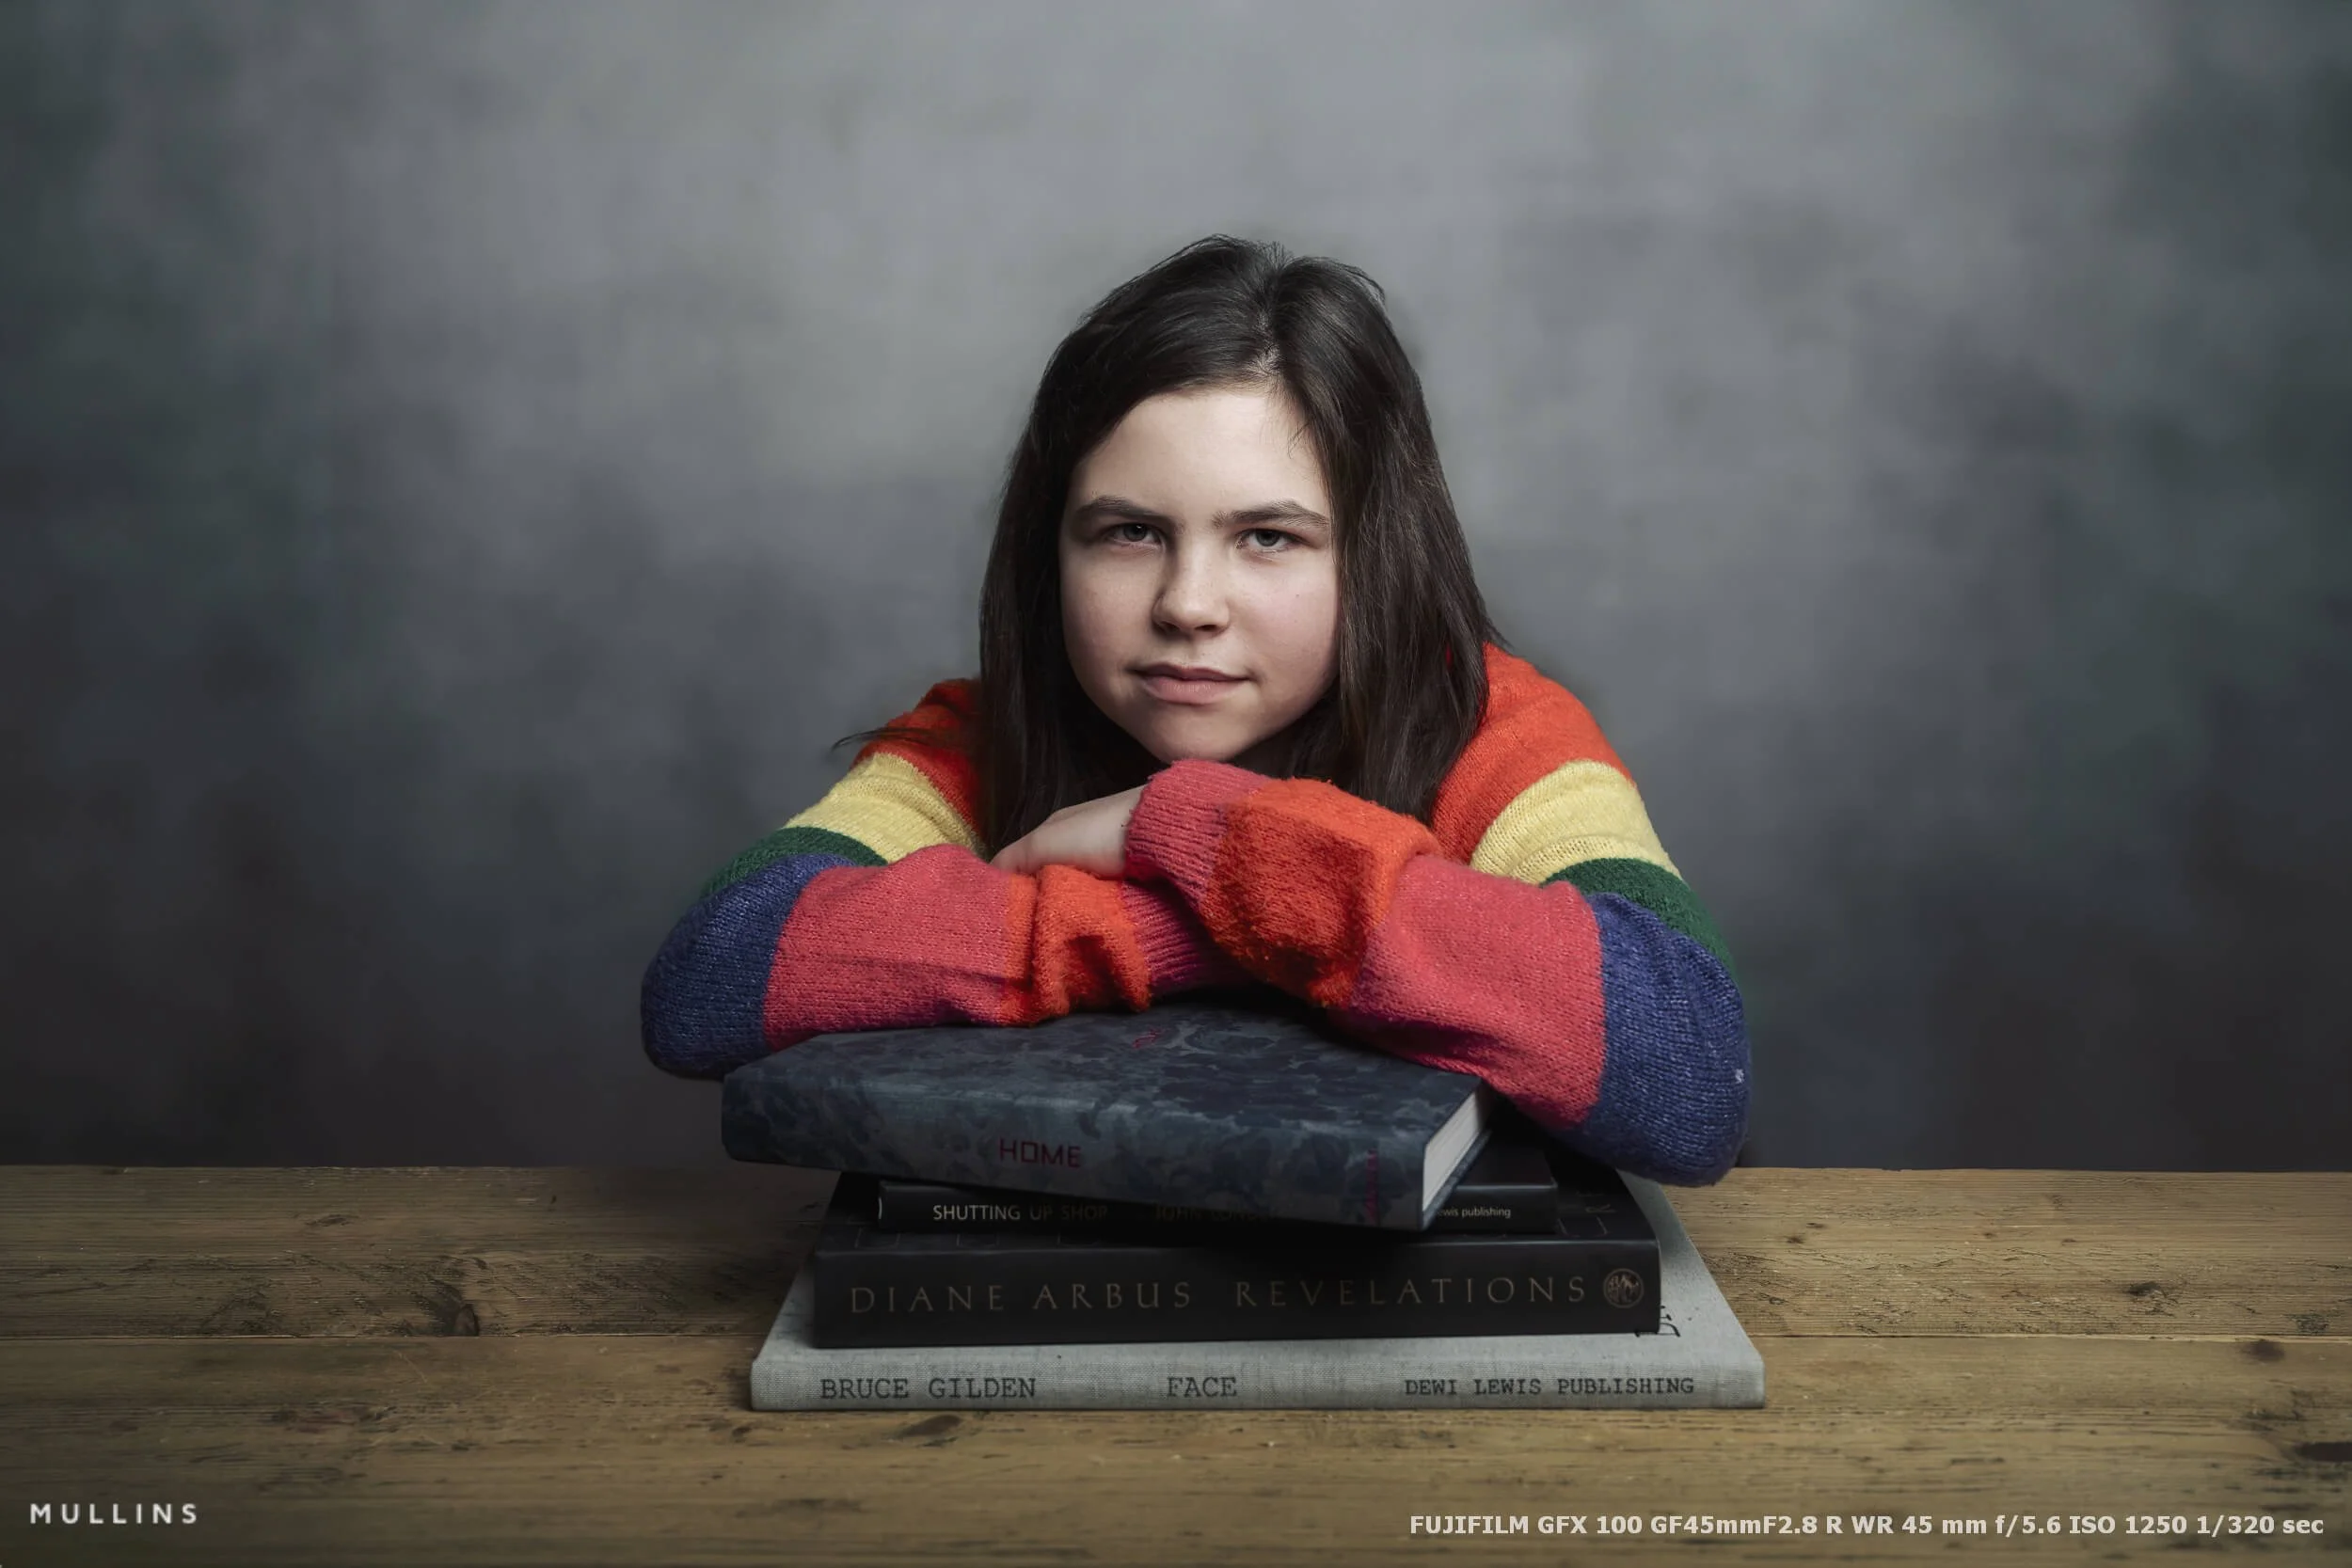
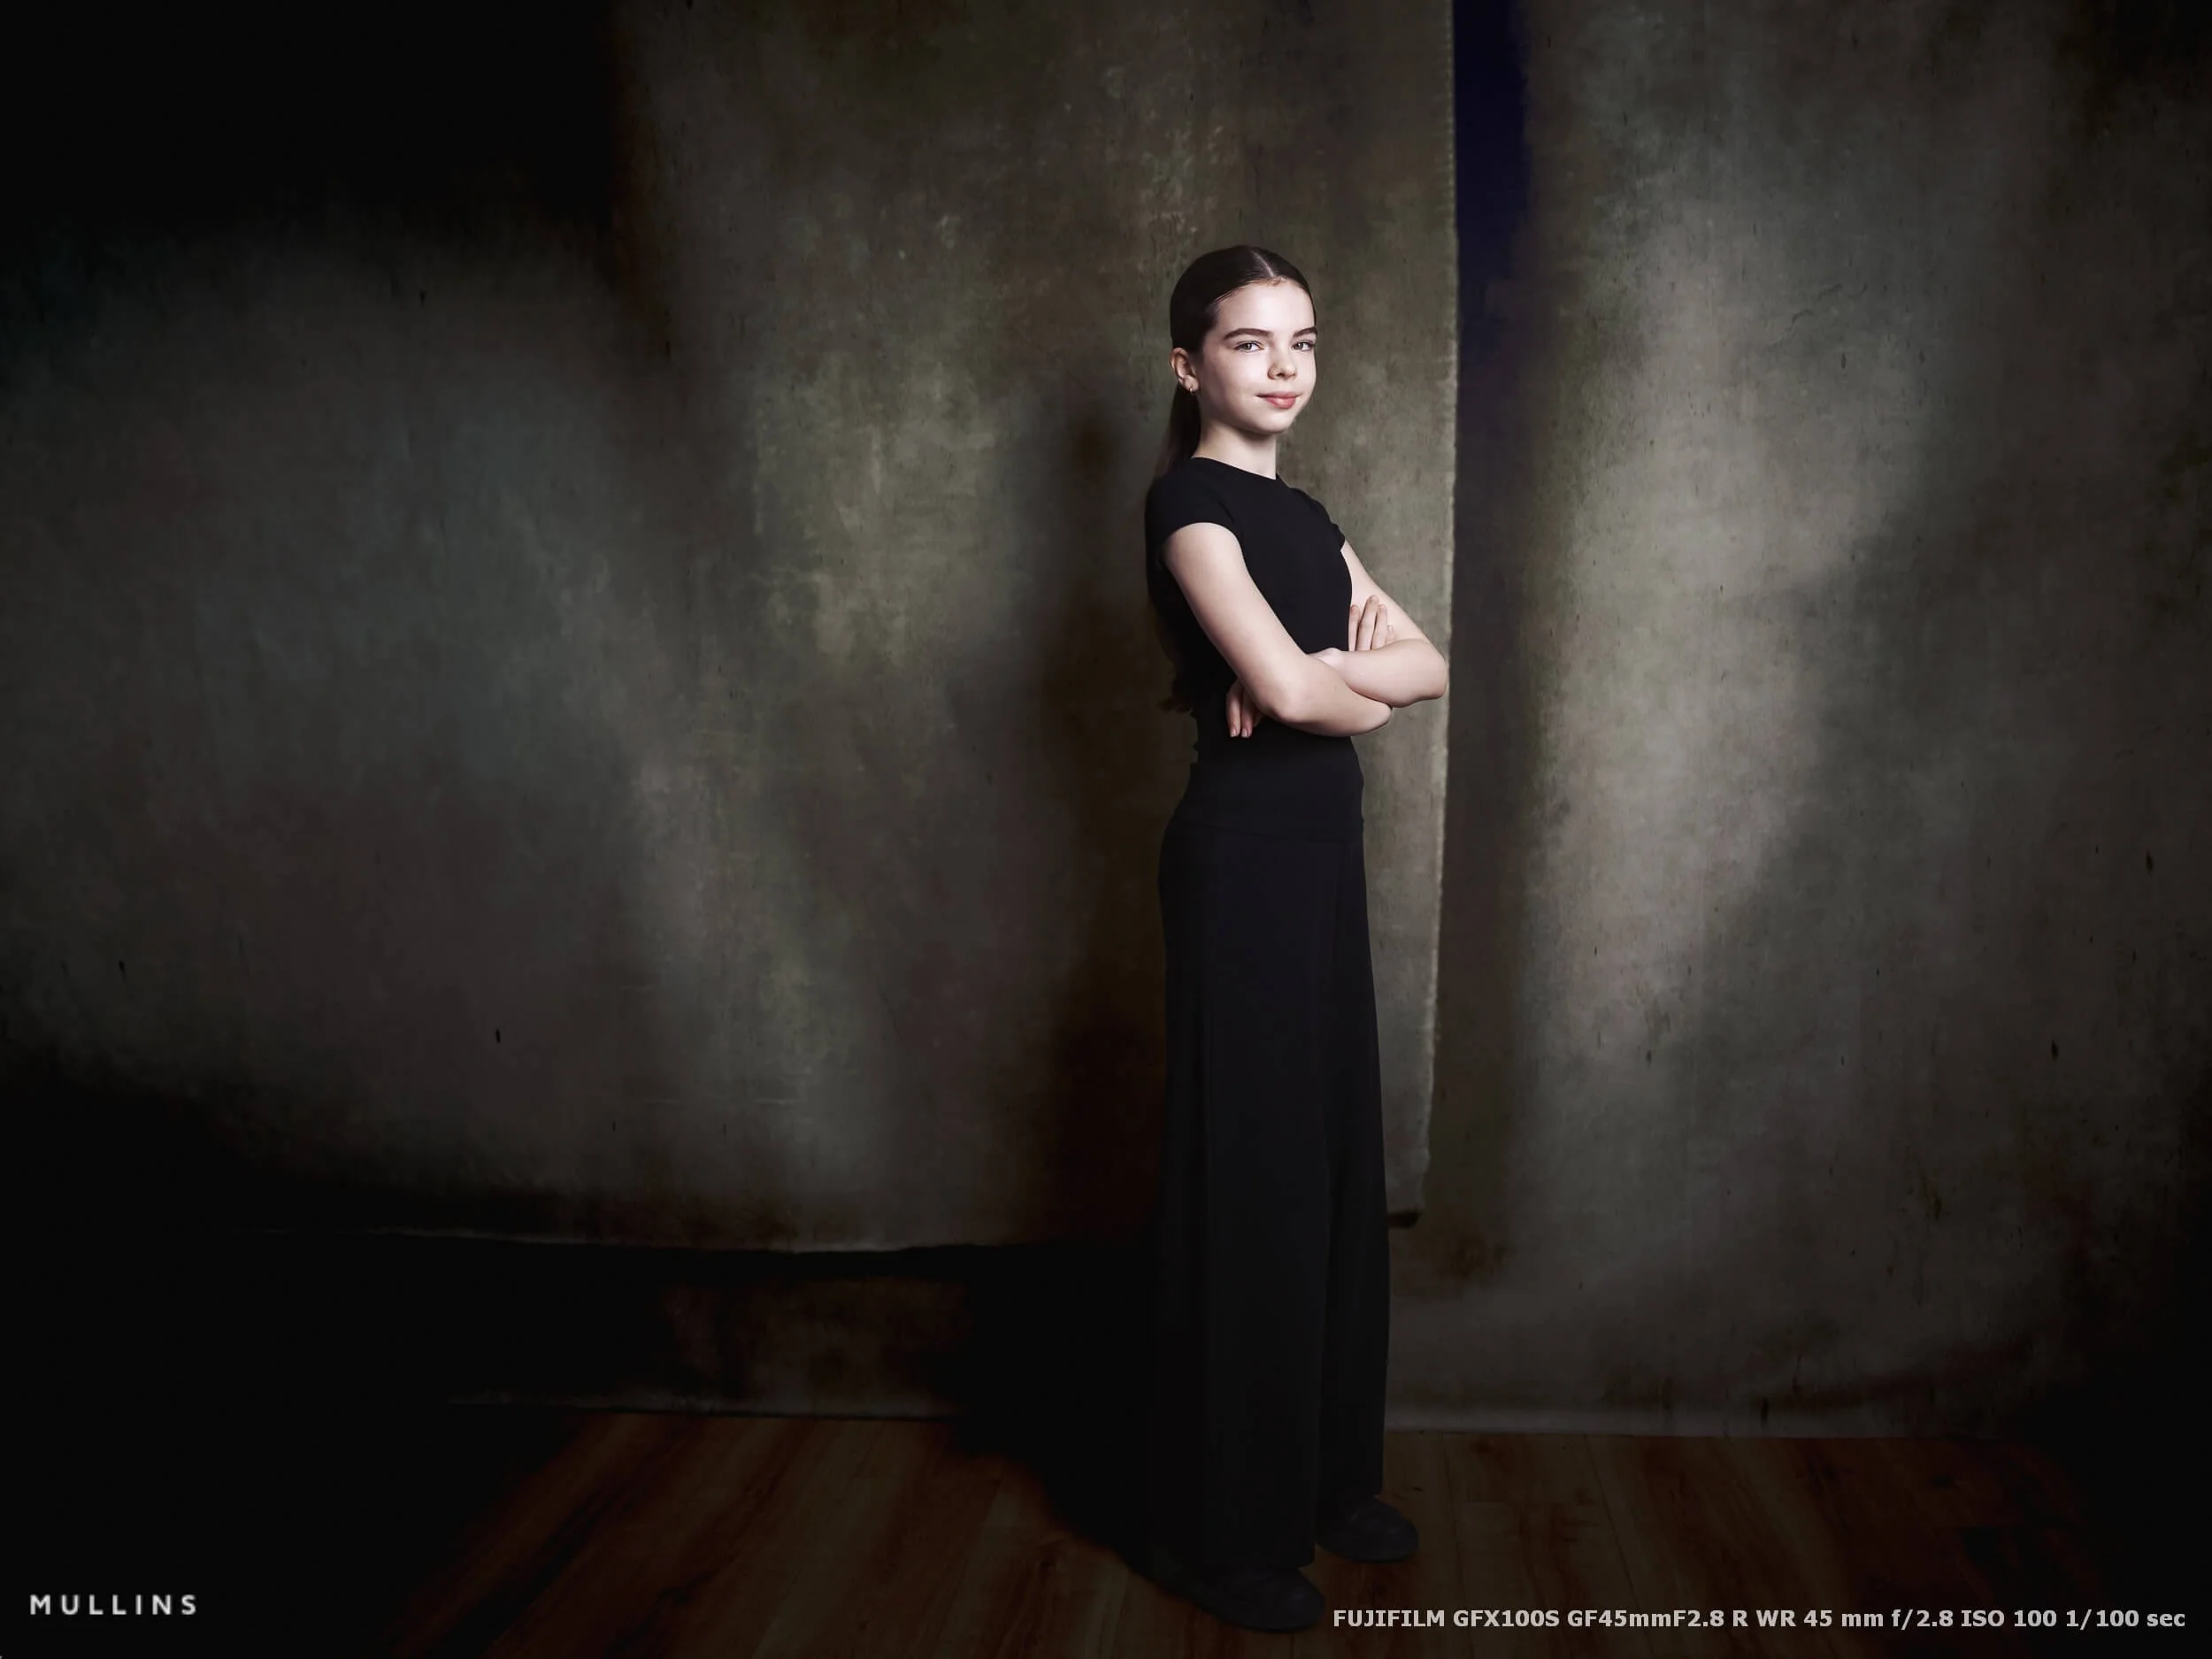
| Fujinon GF45mm F2.8 R WR | Wider portraits, environmental shots, full-length work | Very useful when I want to include more of the set, more posture, or more of the studio environment in the frame. | Less naturally flattering for close portrait work than the 80mm or 110mm. |
I do also have the GF50mm and GF63mm available to me, and both are very capable lenses. But in truth, most of my portrait work tends to revolve around the 80mm, the 110mm and, when I want to go a little wider, the 45mm.
Those are the lenses that best suit the way I like to build a portrait in the studio.
If I am doing straightforward portrait work, especially head-and-shoulders or anything with a fairly classic feel, the 80mm is usually where I start. It has become my default lens on this system. The 110mm comes out when I want something a little tighter and a little more compressed. The 45mm is the one I use when I want to back away from that classic portrait feel a touch and show more of the space, the styling, or the posture.
So although I do have several lenses available, most of the work is done by the 80mm, the 110mm, and the 45mm.
Why have I not upgraded to the GFX100S II or GFX100 II?
This is not me saying the newer cameras are not better. They are newer for a reason.
The GFX100S II uses Fujifilm’s newer 102MP CMOS II sensor and X-Processor 5, and Fujifilm positions it as a faster, lighter and more accessible current GFX body. The GFX100 II is positioned even higher, with Fujifilm explicitly highlighting higher-speed performance, expanded video features, and what it calls “lightning fast autofocus”.
So yes, if I needed a GFX body for faster autofocus work, or I wanted one large-format camera to do everything from studio portraits to more reactive assignments, the GFX100 II would be the body I would look at most seriously.
But that is not really my use case at the moment.
For studio portrait photography, the GFX100S still gives me the resolution, tonal depth, handling and dependability I want. I shoot manually. I work with controlled light. My subjects are not tearing across the frame. I am not asking the camera to behave like a sports body. In those circumstances, I would rather spend money on lights, modifiers, support gear, or even just keep the money in the bank than upgrade a camera that is already doing the job beautifully.
Of course, this would be a very different conversation if we were talking about my work as a wedding photographer, where I just would not use the GFX system at all.
A quick note on the rumoured GFX180
There is also some current rumour chatter around a possible 180MP GFX body. Fuji Rumors has reported that a 180MP GFX camera is coming. At the moment, though, that is all it is - rumour.
If something like that does arrive, it will be interesting. It may open the door to an even more specialised level of commercial, product, fine art, or very high-end fashion work. But for what I do in the studio now, it would not suddenly make the GFX100S inadequate.
If anything, a rumoured GFX180 just reinforces the point that the GFX line is still developing.
My studio lighting setup
I try not to make studio lighting more complicated than it needs to be.
There are endless ways to light a portrait, and if you spend too long online, you can start to feel as though every photograph needs five lights, three reflectors, a smoke machine and a small committee. Mine generally do not. I prefer a setup that is simple, repeatable, and easy to adjust once the subject is standing in front of me.
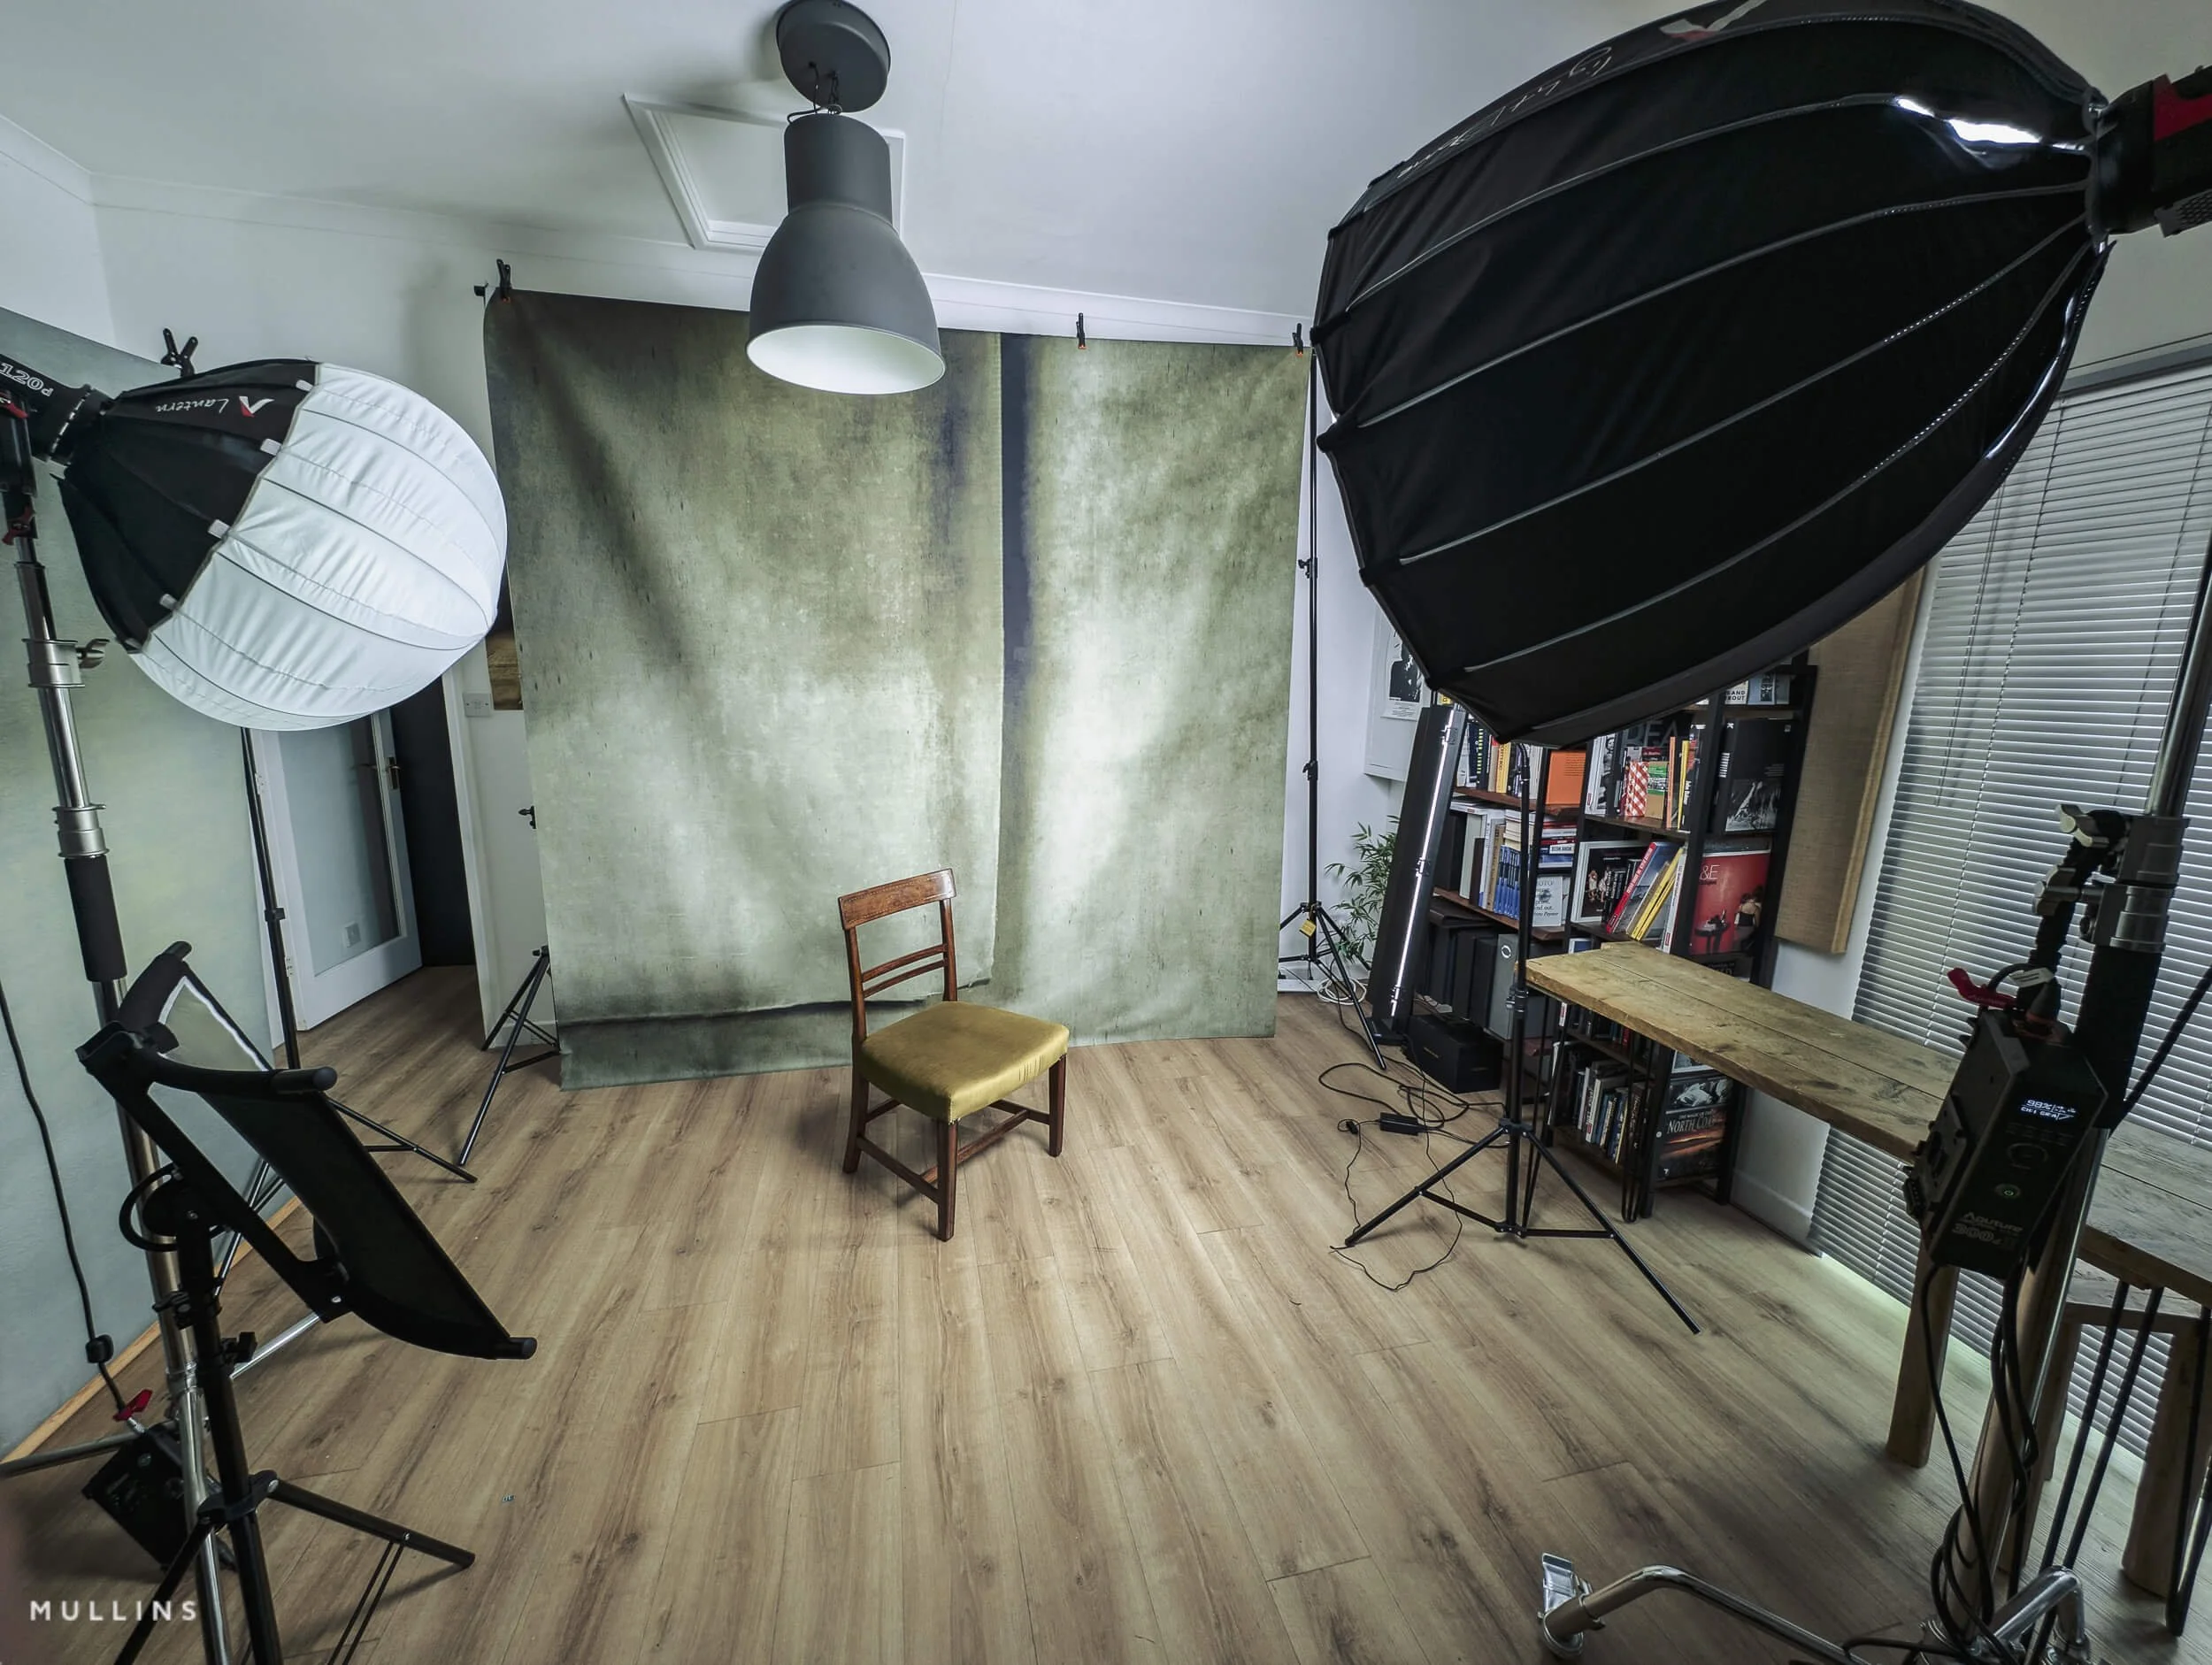
Most of the time, I work with one, two, or three continuous lights.
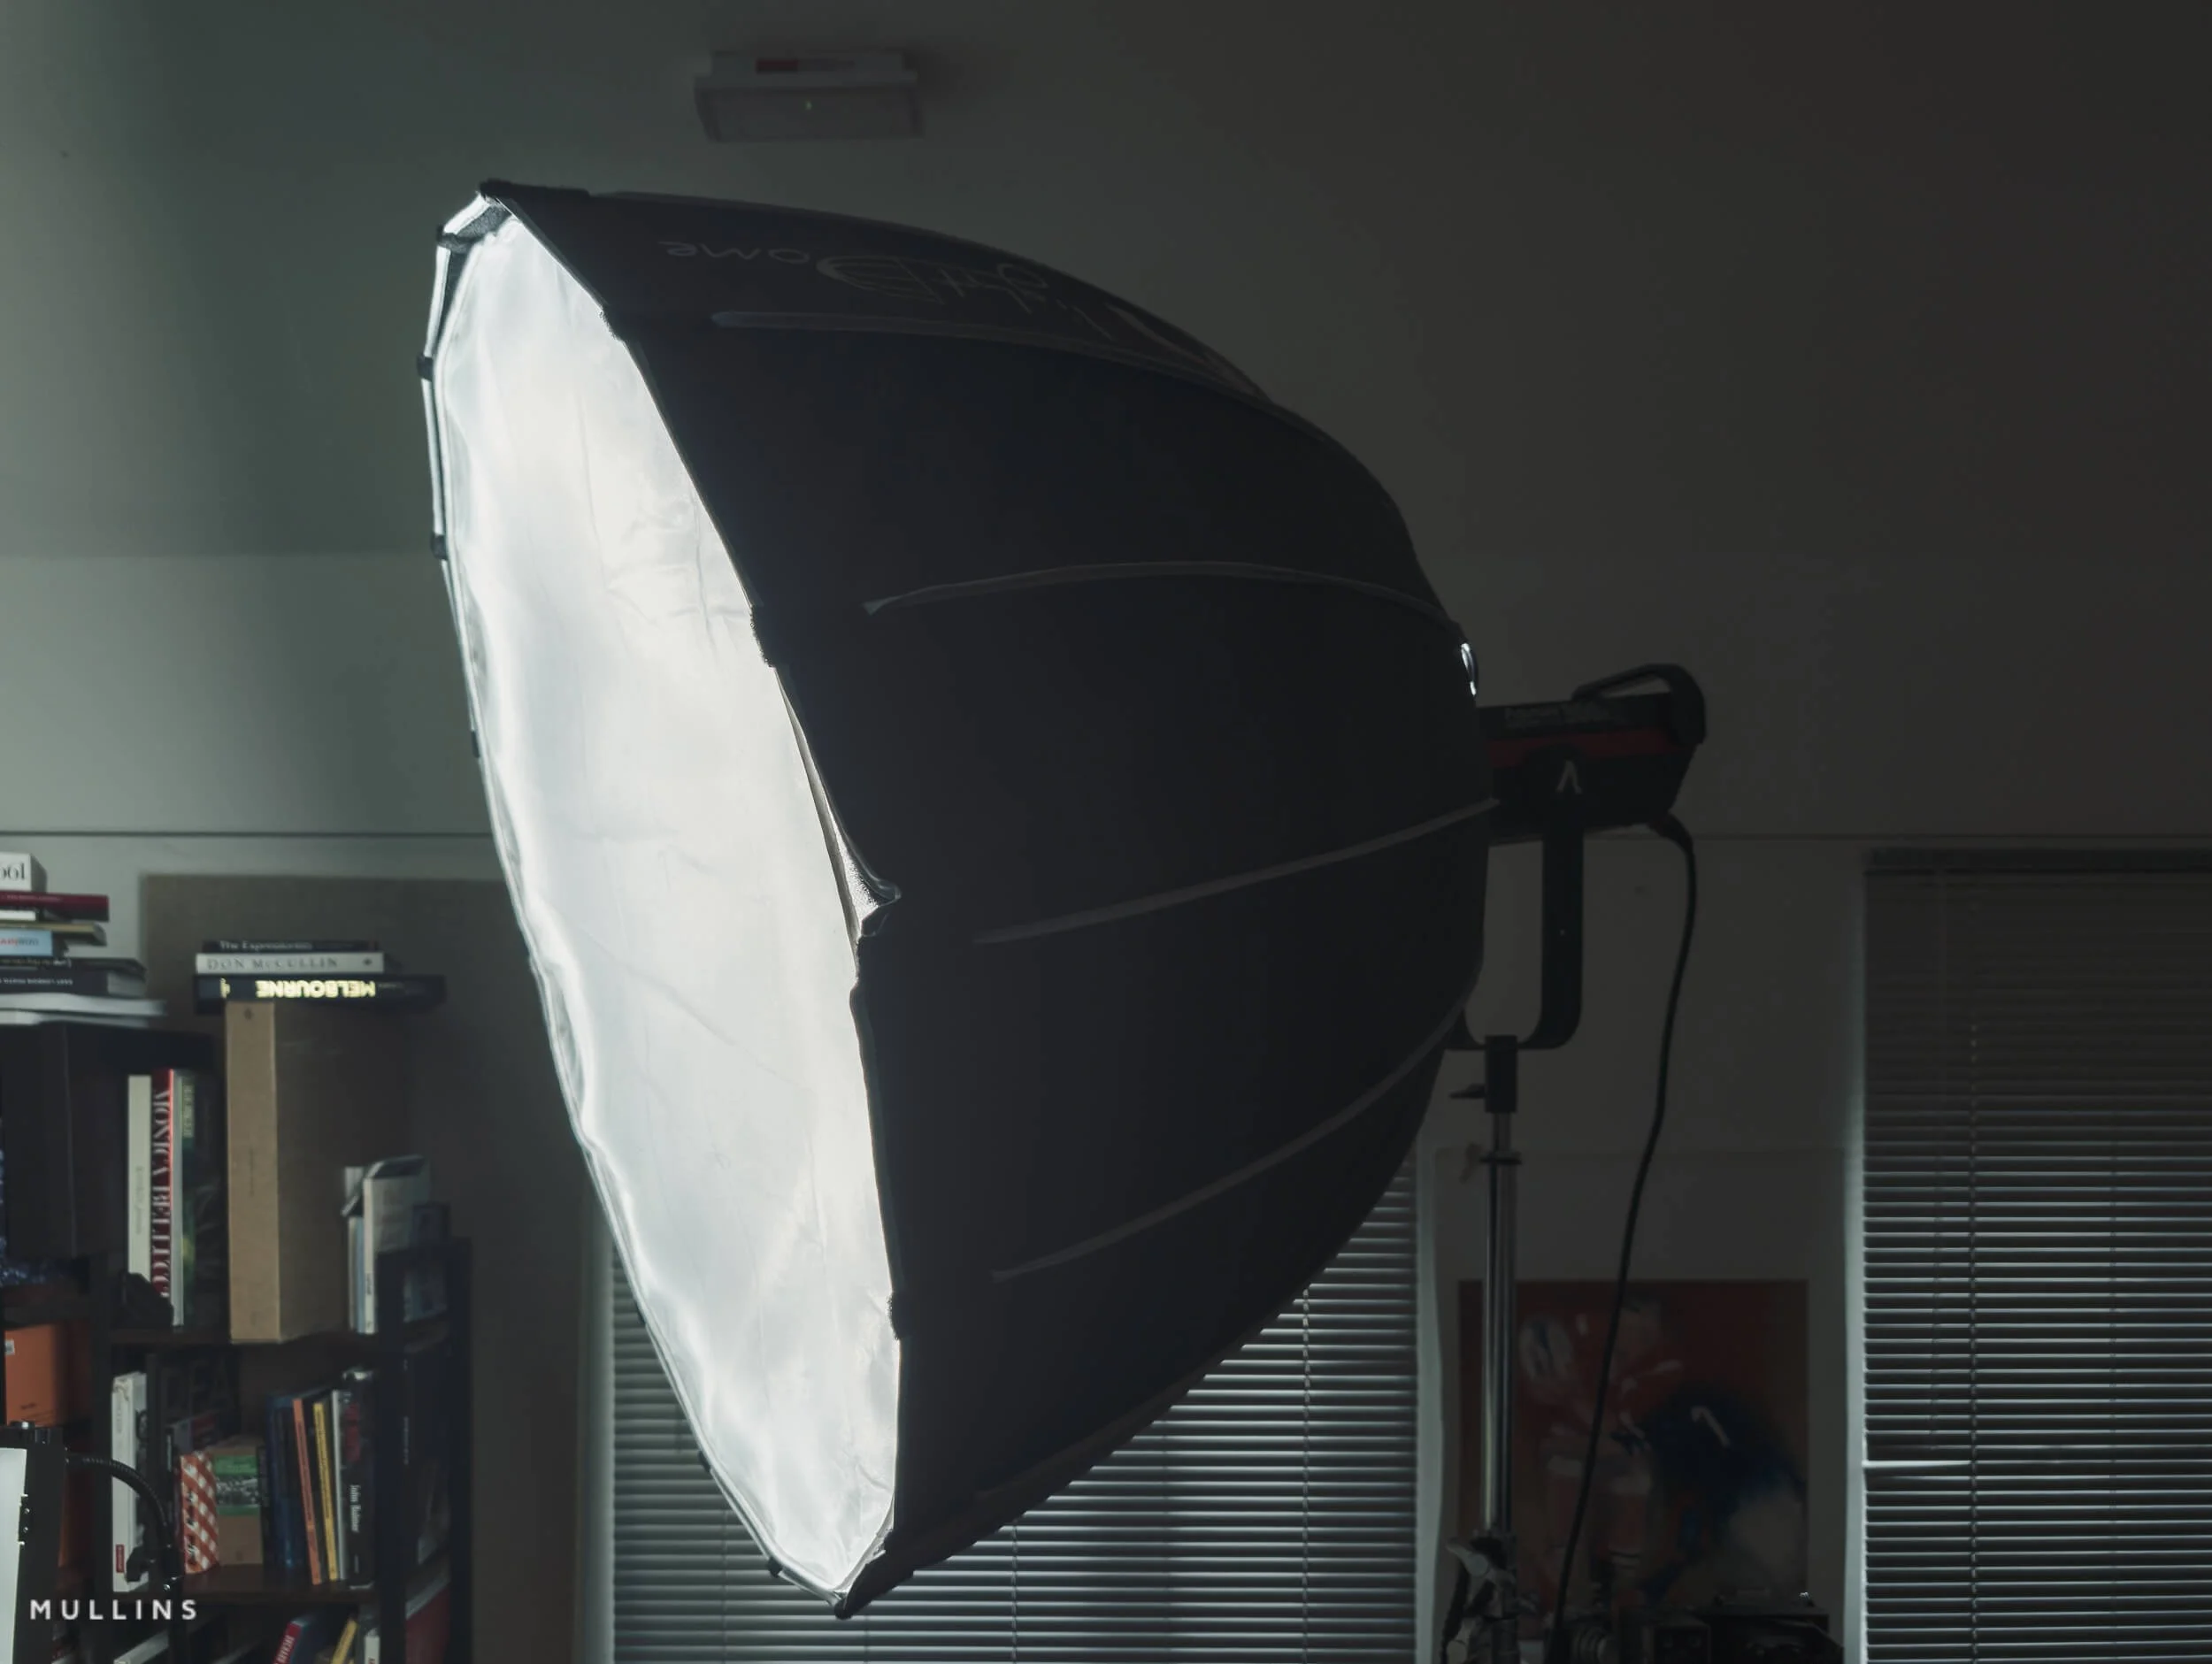
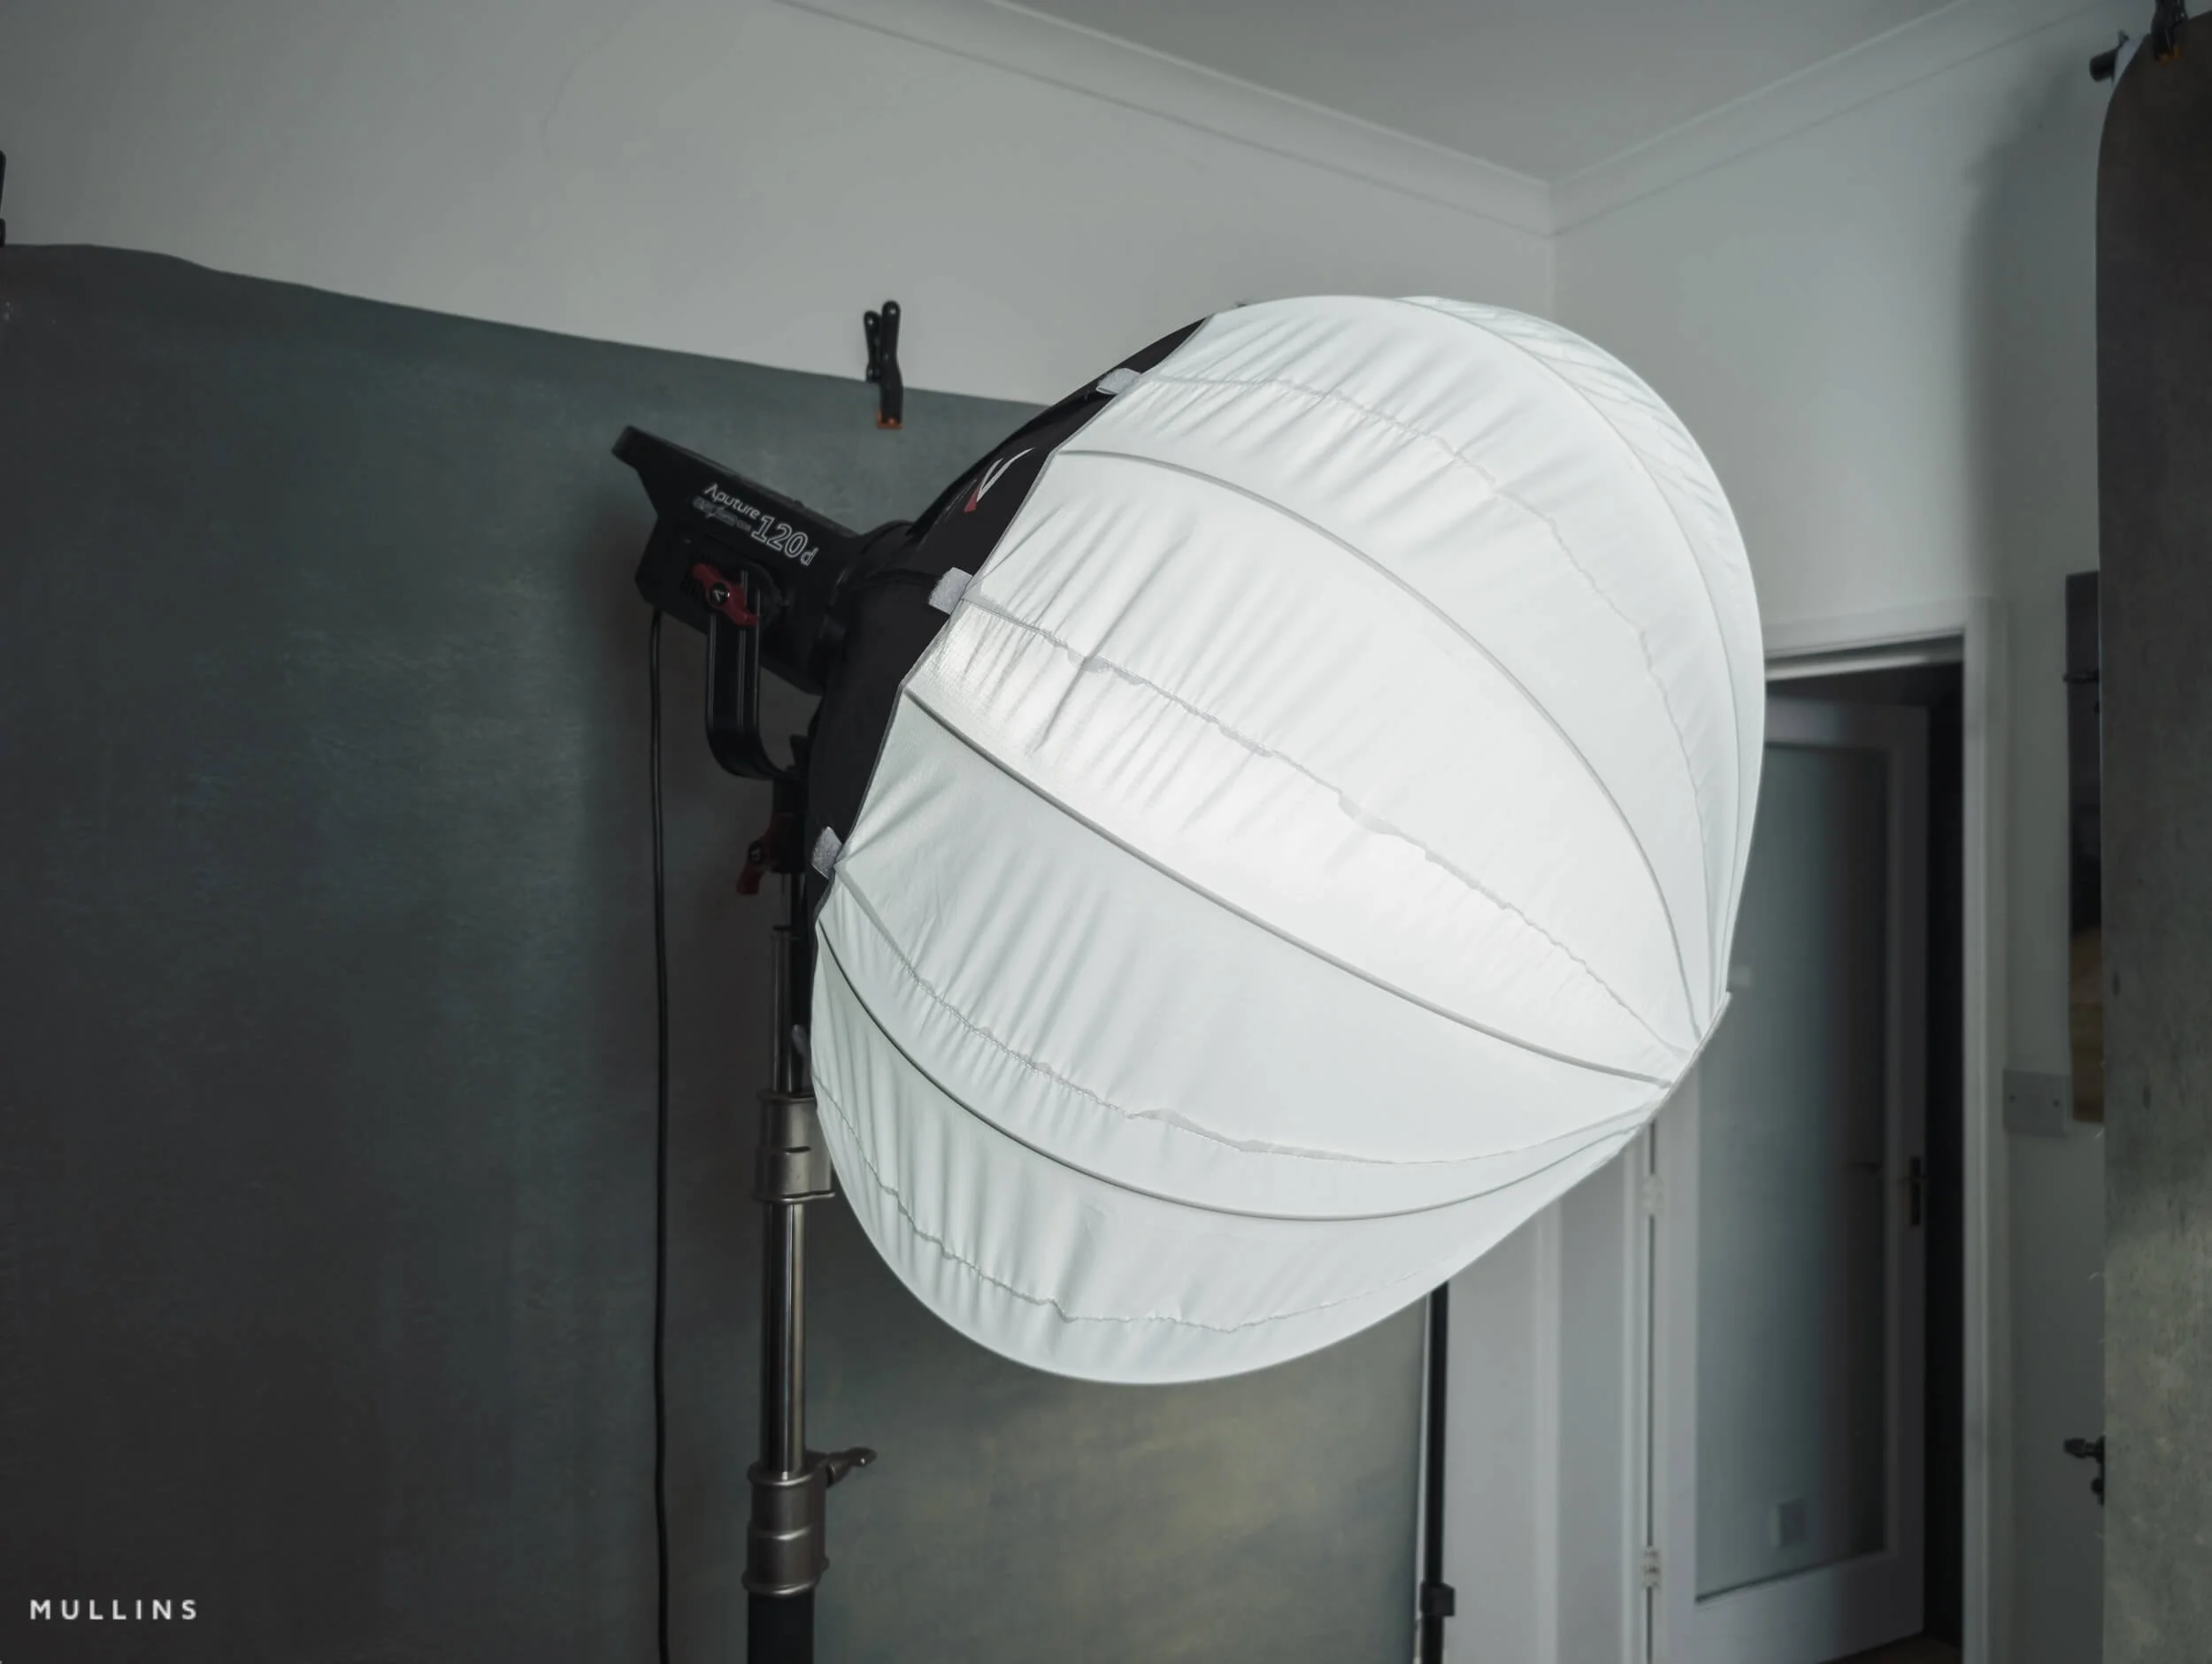
My main light is the Aputure 300d II fitted with an Aputure Light Dome. This is the key light, and it does most of the heavy lifting. If I had to strip the whole setup back to one light, this would be the one I would keep. It gives me a soft but directional quality that works very nicely for portraits. It wraps enough to be flattering, but it still gives me shape. I do not want flat light unless I am very deliberately going after that look.
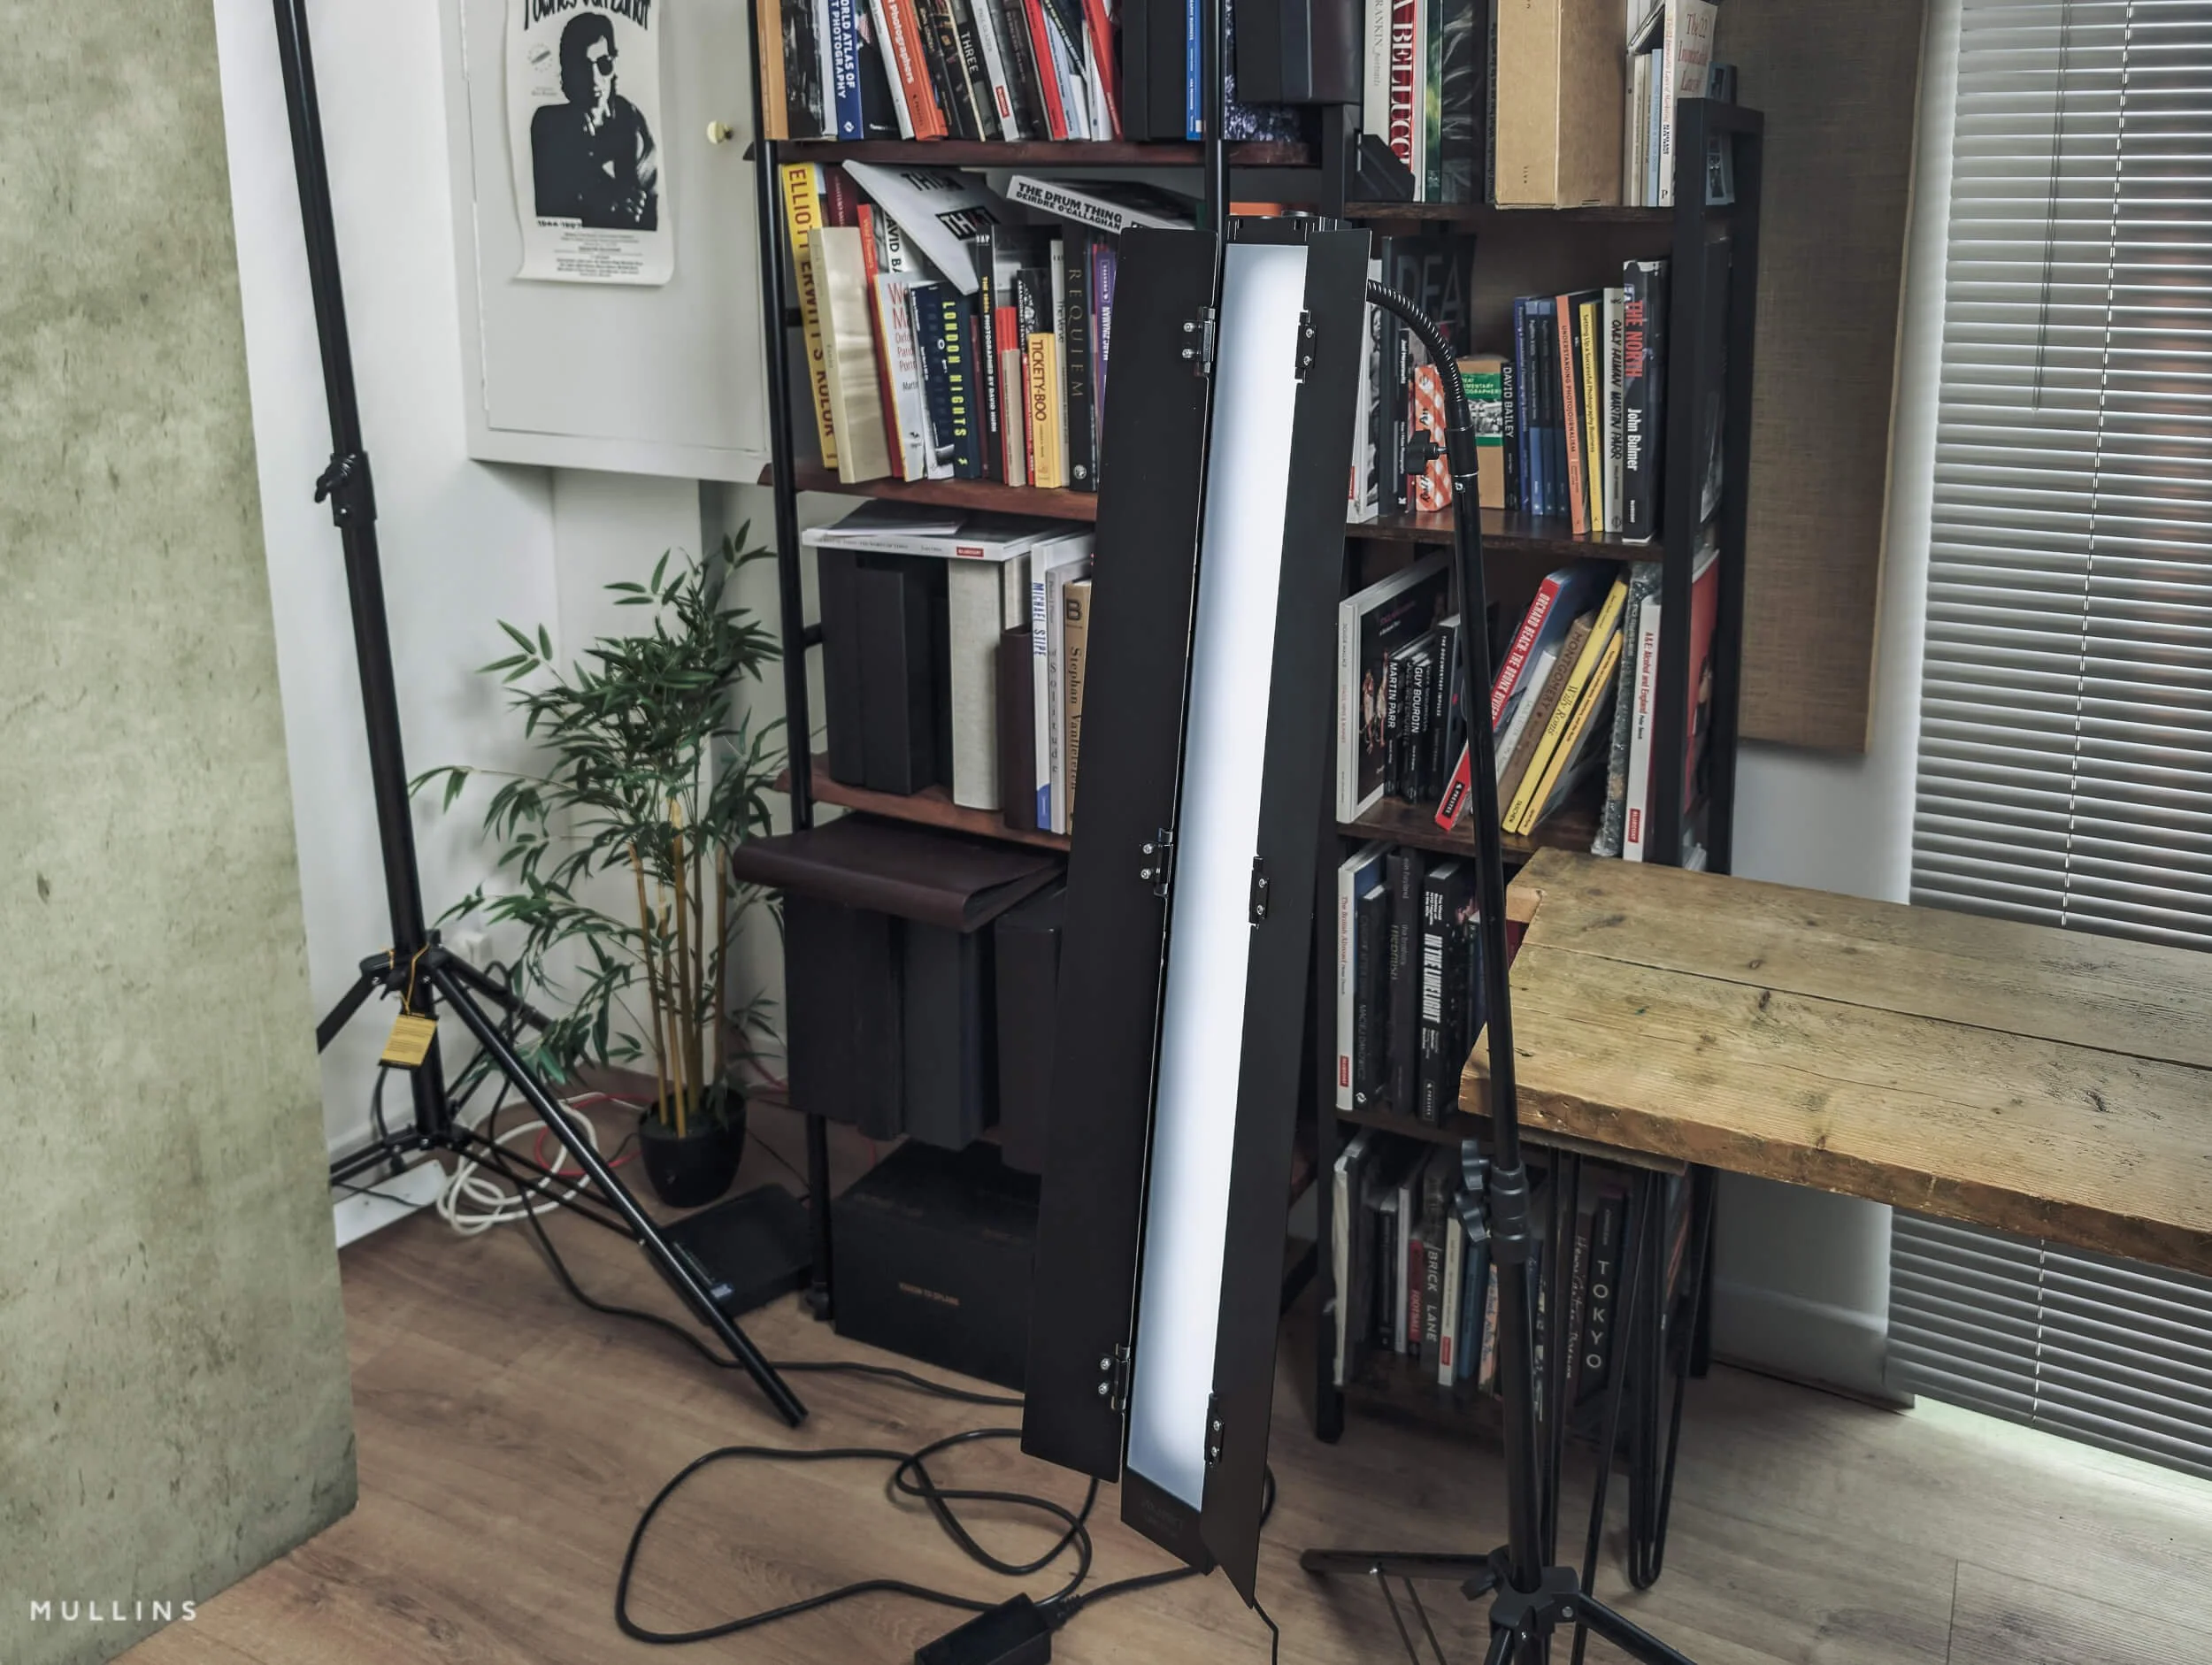
The second light is the PixaPro Liner 80, which I tend to use as a side light. This is useful when I want to introduce a bit more separation, edge, or structure into the photograph. Sometimes it is doing very little, really. Just a touch. But that touch can be enough to lift a portrait.
The third light is the Aputure 120d with the Aputure Lantern, and I usually use that as a secondary or hair light. Again, I am rarely blasting light everywhere. That is not really my style. I want it controlled. I want it subtle. The Lantern gives a softer spread, so I can use it to gently lift the top of the subject, separate darker hair from a darker backdrop, or put a bit of life into the background if it needs it.
So, although it is a three-light setup, I do not really think of it as complex. It is more a case of one main light, then two supporting lights that I can bring in as needed.
How I tend to use each light
Main light - Aputure 300d II with Light Dome: my primary shaping light, usually placed slightly to one side of the subject and above eye level.
Side light - PixaPro Liner 80: used to add structure, separation or a bit of shape to one side of the frame.
Secondary / hair light - Aputure 120d with Lantern: used for subtle lift on hair, shoulders or background, depending on the shot.
The main light is the one I pay most attention to. Once that is right, everything else becomes optional. That is generally how I think about studio lighting. The key light creates the portrait. The other lights simply support it.
I also like continuous lighting because it lets me see what is happening in real time. There is no guesswork, and no disconnect between what the light is doing and what I am seeing through the camera. I can move the light a little, watch the cheek shadow change, see the catchlight shift, and make small decisions as I go. It feels more intuitive to me than building everything around Flash.
And because I nearly always have the camera set to a monochrome film simulation while I shoot, I can judge those changes very quickly. I am not really looking at colour at that stage. I am looking at the direction of the light, the weight of the shadow, the brightness of the face, and whether the portrait has enough shape.
That black-and-white preview helps enormously here.
A colour image can sometimes make a setup look more finished than it really is. Nice skin tones and a pleasant backdrop can flatter a weak lighting setup. Monochrome tends to strip that away. It helps me see whether the portrait is actually working in terms of light and form, and that is far more useful to me when I am building the shot.
My usual starting point
I do not have one rigid lighting diagram that I use for every sitter, because faces are different and moods are different, but my starting point is usually something along these lines:
Main light at roughly 45 degrees to the subject
Height just above eye level, angled down slightly
Side light introduced only if the portrait needs more shape or separation
Hair / secondary light kept subtle, not theatrical
Background allowed to fall away unless I want it to play an active part in the portrait
That last point is worth mentioning, as I am very happy for parts of the frame to disappear a little. I do not feel the need to illuminate everything just because I can. Quite often, letting the background sit quietly is what makes the portrait work.
Why this setup works for me
This setup suits my way of shooting because it is:
Simple enough to repeat
Flexible enough to adjust quickly
Soft, but not flat
Controlled, without looking over-lit
Easy to read in monochrome while I shoot
I’m reiterating that last point about monochrome. If I can read the light quickly, I can spend less time fussing with equipment and more time working with the person in front of me. That is always the goal.
| Light | Role | How I use it | Why it matters |
|---|---|---|---|
| Aputure 300d II with Light Dome | Main light | Usually positioned slightly to one side of the subject and a little above eye level. | This is the key light and does most of the real work in shaping the portrait. |
| PixaPro Liner 80 | Side light | Used selectively to introduce a bit more structure, edge, or separation. | Helps stop the portrait feeling too flat or one-dimensional. |
| Aputure 120d with Lantern | Secondary / hair light | Used subtly to lift hair, shoulders, or sometimes add a little background presence. | Adds separation and depth without making the image feel over-lit. |
Why I use a tripod, 16-bit RAW files, and dual cards
My approach is probably a bit old-fashioned. In the studio, I want the process to be simple, repeatable and dependable. I am not trying to work quickly; I am trying to work well.
That is why a tripod, full-quality RAW files and dual-card recording are not optional extras for me.
Why I nearly always use a tripod
I use a tripod for most of my studio portrait work. When the camera is fixed, I am not drifting around the subject, making tiny, unnecessary changes to framing every second. I can settle the composition, study the light, talk to the person in front of me, and make deliberate decisions instead of reactive ones.
It also helps with consistency. If I have found the right position, the right height and the right framing, I can keep that locked in while I work on expression, gesture and small variations in pose. That is especially useful if I am making several frames with only subtle changes, or if I want to compare lighting adjustments without the camera position changing.
Why I shoot 16-bit RAW
The GFX100S can record stills as 16-bit or 14-bit RAW, and for this sort of work, I shoot 16-bit. It also supports UHS-I and UHS-II SD cards.
Now, in real life, not every portrait session will reveal a dramatic day-and-night difference between 14-bit and 16-bit. But when I am using a camera like this in a controlled studio environment, with carefully shaped light and the possibility of detailed post-production afterwards, I want the best file the camera can give me.
That is really the thinking. Though I admit it may be an overly-cautious approach.
I am not shooting 16-bit RAW because it sounds impressive. I am shooting it because this is portrait work, not machine-gun documentary coverage, and I would rather prioritise file quality over a slightly lighter workflow. The whole point of using GFX in the studio is to lean into what the system does well.
For me, that means:
as much tonal information as possible
maximum flexibility in post
cleaner, gentler transitions in skin and shadow
more room for careful monochrome conversion
no sense that I compromised the file at capture for no real reason
Storage is cheap compared to lost image quality.
Why I always record to dual cards
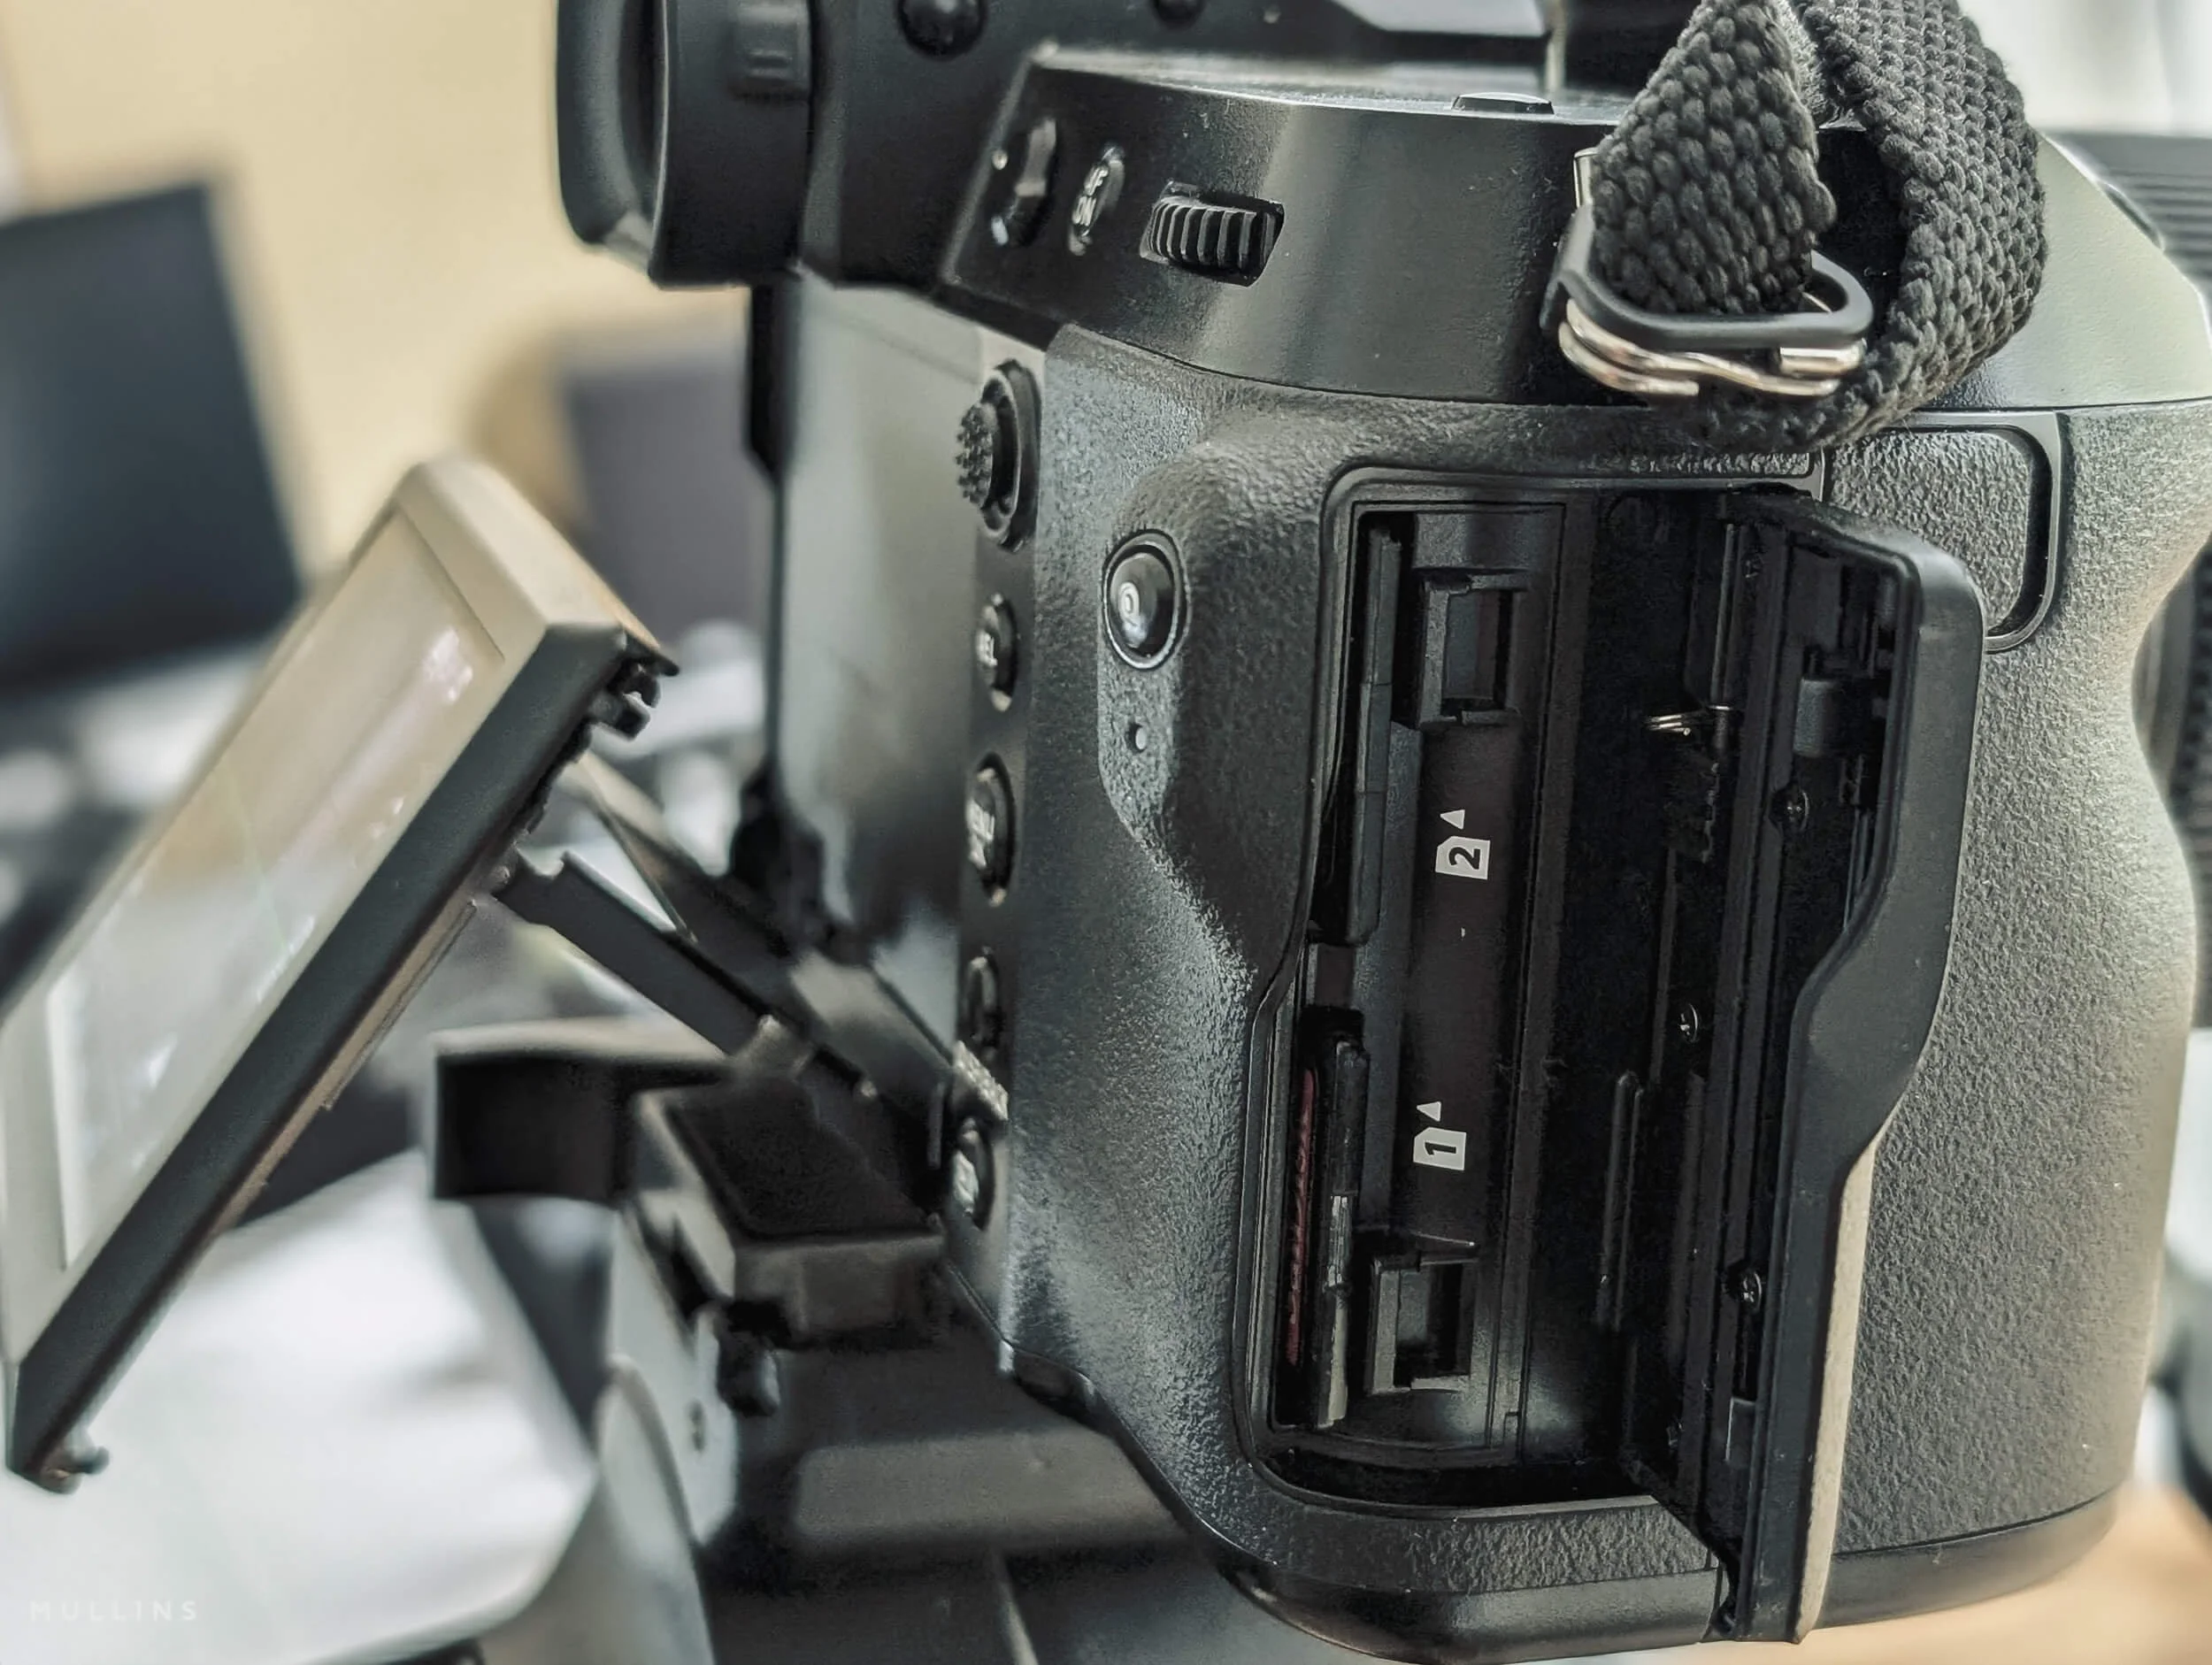
I also always shoot to both cards.
The GFX100S has two memory card slots, and Fujifilm’s card slot settings allow sequential recording, backup recording to both cards, or RAW to one card and JPEG to the other.
For paid portrait work, I want a backup recording. Every frame is written twice. Simple as that.
Card failure has never happened to me, thankfully, but the whole point of a backup is to do it before you need it, not afterwards, when you are explaining to somebody why their photographs have vanished. If I am photographing a client in the studio, especially a paying client, redundancy matters.
It is just professional practice.
I am also slightly fussy about the cards themselves. I always try to use cards that are:
the same brand
the same speed
the same capacity
That keeps things tidy and easier to manage. I use UHS-II cards, and I keep both cards matched rather than mixing capacities or speeds. The GFX100S supports UHS-II media, so there is no reason, in my view, to create a bottleneck with mismatched cards when the camera is capable of better.
It is one of those small habits that I have. The camera behaves consistently, buffer behaviour is predictable, and I am not left wondering whether one slower or smaller card is causing write issues.
Practical summary
Tripod: keeps framing consistent and slows the session down in a good way
16-bit RAW: gives me the fullest file for editing and monochrome work
Dual cards: gives me immediate in-camera backup
Matched UHS-II cards: keeps the workflow predictable and avoids unnecessary bottlenecks
And because I am already working manually, with controlled light, and usually viewing the scene through a monochrome film simulation, all of this becomes part of the same overall method.
| Part of the workflow | What I do | Why I do it | Trade-off |
|---|---|---|---|
| Tripod | I keep the camera locked off for most studio portrait work. | It helps me refine composition, keep framing consistent, and work at a calmer, more deliberate pace. | Less freedom to move instinctively, though that is rarely a problem in the studio. |
| 16-bit RAW | I shoot full-quality RAW rather than trimming file quality for convenience. | It gives me the best possible file for tonal work, skin, shadow detail and monochrome conversion. | Larger files and a slightly heavier workflow. |
| Dual UHS-II cards | I record to both cards and use cards that are the same speed and same capacity. | It gives me in-camera backup and keeps the workflow consistent and predictable. | Higher media cost, but that is a small price compared to lost files. |
My typical camera settings for studio portraits
My camera settings in the studio are not particularly exciting. In fact, I would say the opposite. They are deliberately boring.
When I am making portraits in the studio, I do not want the camera making decisions for me, and I do not want the settings changing from frame to frame unless I change them myself. The light, environment, and pace are controlled, so there is really no reason for the camera to guess.
I always shoot manually.
That means manual exposure and, very often, manual focus point placement too, depending on the portrait and how still the subject is. I want consistency above all else. If I move the light, I know why the image changed. If I alter the aperture, I know why the look changed. Nothing is happening by accident, and that gives me a much clearer link between what I am doing in the studio and what I later see on the computer.
Manual exposure, always
I do not really see a reason to use anything other than manual exposure in the studio.
Once the lights are placed where I want them, I want the exposure to stay where I put it. I am not wandering through changing light. I am not dealing with clouds moving across the sun. I am in a studio with lights, positioned to photograph a subject in a relatively fixed space.
So I choose the shutter speed, aperture, and ISO, and I leave them there until I have a reason to change them.
That strategy helps in a few ways:
The files are easier to edit in batches
The session feels more controlled
I am not second-guessing what the camera may have decided to do
Subtle changes in pose or expression are not confused with exposure shifts
My general approach to shutter speed, aperture and ISO
I tend to think of the settings in terms of priorities rather than fixed numbers.
The first priority is the look I want. The second is keeping the file clean and workable. The third is ensuring I have enough shutter speed to keep the subject sharp.
Because I use continuous lighting rather than flash, I do have to pay attention to shutter speed in a slightly different way than some studio photographers do. I still want the subject to feel settled and sharp, especially with the level of detail a GFX file can capture, so I am not casually drifting into silly shutter speeds unless there is a specific creative reason.
In broad terms:
Aperture controls the feel of the portrait
Shutter speed protects sharpness
ISO is adjusted only as needed to support the first two
That is how I think about it.
I often want a more open, softer portrait with a slightly shallower depth of field, so I may open up the aperture. If the subject is moving even slightly, or if I want to avoid motion softness, I will make sure the shutter speed is fast enough to keep everything stable. ISO is then simply the setting that helps hold everything together.
I do not chase the lowest ISO at all costs if it means compromising the image elsewhere. But equally, because this is a studio and I am controlling the light, I try to keep ISO as low as possible and avoid pushing it higher than needed.
White balance and consistency
I also like to keep white balance consistent.
Again, that sounds obvious, but it is amazing how much unnecessary mess can creep into a session if white balance is left floating around. In a controlled studio setup, consistency is your friend. I would rather choose a white balance that suits the lights and keep the session coherent than have tiny shifts from frame to frame that I then have to tidy up later.
Practical summary
I shoot in manual exposure
I use a black and white film simulation while shooting so I can judge light and shadow more clearly
I keep white balance consistent
I adjust aperture for the look I want, shutter speed for stability, and ISO only as needed
I aim for predictable files, not clever settings changes from shot to shot
| Setting / approach | What I do | Why I do it | Trade-off |
|---|---|---|---|
| Exposure mode | Manual exposure | Keeps the session consistent and stops the camera making unwanted decisions in controlled light. | Requires a bit more attention up front, but far less correction later. |
| Viewing mode | Black and white film simulation while shooting RAW | Helps me judge light, shadow and tonal structure more clearly while still keeping full RAW flexibility. | The preview is monochrome, so I am not evaluating colour in-camera in the same way. |
| Aperture / shutter / ISO | Set deliberately based on look, sharpness and available light | Gives me control over depth of field, subject sharpness and file quality. | Less forgiving than relying on an automatic mode, but much more consistent. |
| White balance | Kept consistent rather than left to drift | Makes the files easier to manage and edit as a coherent set. | May need a small adjustment later if I deliberately change the look of the light. |
How I direct and work with the subject
However good the camera is, and however carefully the light is set, a portrait session still comes down to the person in front of you feeling comfortable enough to give you something real.
That part matters just as much as the technical setup. In fact, probably more.
My own approach in the studio is quite gentle. I am not trying to over-direct people or force them into something unnatural. Most people are not professional models, and even the ones who are often respond better to gentle direction than to constant instruction. So I try to keep things simple, positive and very easy to follow.
One of the main things I do is use a mirroring technique.
By that, I mean I will often show the pose or movement myself rather than just describe it. If I want the subject to turn their head slightly, lift their chin, soften their eyes, or change the angle of their shoulders, I will usually demonstrate it with my own body and face first. People tend to follow movement far more easily than they follow a string of spoken instructions. It can feel more natural, and it removes a lot of awkwardness.
It also helps that I shoot using the LCD rather than burying my face in the camera all the time. Because of that, the subject can still see me. I am still present. I can keep eye contact, keep smiling, keep talking, and keep the whole thing feeling connected. There is less of a barrier between photographer and subject, and I think that helps with confidence.
When somebody can still see your face, they generally feel less as though they are being inspected and more as though they are being guided.
I will also use my hands a lot while directing. Small motions to suggest where the head should turn, where the eyes should go, whether the chin needs to come up or down slightly.
Sometimes a subject only needs a couple of quiet prompts:
turn a touch towards me,
eyes here,
chin slightly down,
hold that.
That is often enough.
Why this works well with GFX
This slower, more deliberate way of working suits the GFX system very well.
I am not machine-gunning through dozens of frames hoping one works. I am building the portrait carefully, watching the expression settle, refining small things, and making frames when everything feels good. The pace of the camera, the tripod-based setup, the controlled lighting, and the live LCD view all support that way of working.
And because I can see the scene clearly on the LCD, with the black and white preview showing me the light and shadow, I am not wrestling with the camera while trying to direct. I can stay engaged with the person in front of me and make quicker, more confident decisions.
What I am looking for as I direct
When I am guiding someone in front of the camera, I am usually paying attention to a few simple things:
the angle of the head
the direction of the eyes
the shape of the jawline
the line of the shoulders
the way the light is falling across the face
whether the expression feels natural or forced
None of that is especially complicated. The trick is to make those adjustments without making the sitter feel self-conscious. That is why I prefer gentle, visual guidance over too much talking.
The less the session feels like instruction, the better the portrait usually becomes.
A few practical things I keep in mind
I try to keep my direction simple and clear
I demonstrate movements rather than over-explaining them
I keep my face visible by working on the LCD
I use small hand gestures to guide head and eye movement
I watch for confidence levels and adjust the session accordingly
I make small refinements rather than big changes

Gentle guidance can help bring the sitters character out.
My computer setup and editing workflow for GFX files
Once the photographs are made, the next part of the process is just as important. There is not much point creating huge, flexible GFX files if the computer setup behind them is struggling all the way through the edit.
That is one reason I have always taken this side of the workflow quite seriously.
GFX files are not small. They are wonderfully rich to work with, but they do ask a bit more from your machine, especially once you start building previews, jumping between Lightroom and Photoshop, or working on multiple images from the same session. I would not say you need a monster computer to edit them well, but something a bit substantial helps. Quite a lot, actually.
My main editing machine is a Windows 11 desktop built around an AMD Ryzen 9 7950X, with 64GB of DDR5 RAM and an AMD Radeon RX 6800 XT. Storage-wise, I have a 1TB Seagate FireCuda Gen 4 NVMe, a 2TB Solidigm Gen 4 NVMe, and a pair of 20TB Seagate IronWolf Pro drives for deeper storage. In practical terms, that means I can keep the working side of the edit fast, while still maintaining a more permanent archive once the job is complete.
For screens, I use a Dell U4021QW as my main monitor and an LG 4K HDR display as the second screen. The Dell is the one I rely on most for the actual editing. The second screen is useful for panels, secondary views, general workspace clutter, that sort of thing. I like having the room. It makes the whole process feel easier.
The software side of the workflow
My workflow is fairly settled now.
I use Photo Mechanic for culling first. That keeps the initial selection process quick and direct, which is important with large portrait sessions and high-resolution files. I would much rather do the first pass there than bog Lightroom down with work it does not need to be doing yet. In fact, I strongly encourage you to never cull anything in Lightroom.
Once the selections are made, the edit happens in Lightroom Classic, using my own Lightroom presets. That gives me a consistent foundation, which is especially useful when I am working through a full portrait session where I want the set to feel cohesive. From there, if an image needs more involved work, I take it into Photoshop for things like fine retouching or background extensions.
So the chain is quite simple:
Photo Mechanic for culling
Lightroom Classic for the main edit
Photoshop for anything more detailed
Why I edit from an internal drive
The active edit is done from one of the internal drives for a good reason.
Again, this comes back to keeping the working process fast and dependable. GFX files are big enough that it makes sense to give Lightroom and Photoshop the quickest possible access to the files while I am actively working on them. There is less waiting around, less file transfer, etc.
Once the edit is complete, all exported images are preserved in a long-term, always-available archive catalogue. That part is important to me. I do not like finished work floating around in half-organised folders.
My backup approach
I also keep the editing catalogue zipped and stored in the cloud, specifically on OneDrive and Backblaze. That gives me another layer of protection around the work, which is especially important when you are dealing with client portrait sessions and large amounts of time invested in the edit.
This ties in with the way I shoot as well. Just as I like dual-card recording in the camera, I like redundancy once the files reach the computer.
Why this setup suits GFX work
What I want from the computer side of the process is actually very similar to what I want from the camera side.
I want it to be stable.
I want it to be quick enough that it does not interrupt thought.
And I want it to cope comfortably with the files I am throwing at it.
That is really it.
I just want something that lets me move through GFX files without the machine becoming part of the problem. With 102MP RAW files, a decent processor, enough RAM, fast internal storage and a sensible archive system make a real difference.
Could you edit GFX files on something smaller? Of course, you could, but if you are doing this often, and especially if you are doing it professionally, the extra headroom is welcome.
Practical summary
I cull in Photo Mechanic
I do the main edit in Lightroom Classic
I use Photoshop for retouching and background extensions
The live edit is done on a fast internal drive
Finished exports are preserved in a long-term archive catalogue
The editing catalogue is zipped and backed up to OneDrive and Backblaze
Dual monitors make the workflow feel much more efficient
| Part of the workflow | What I use | Why it works | Trade-off |
|---|---|---|---|
| Computer | Windows 11 desktop with Ryzen 9 7950X, 64GB RAM and Radeon RX 6800 XT | Gives me the headroom to work comfortably with large GFX RAW files. | A more powerful setup costs more, obviously, but it makes the workflow much smoother. |
| Monitors | Dell U4021QW main display and LG 4K HDR second screen | The extra screen space makes culling, editing and file management much easier. | It takes up more desk space, but I would not want to go back to one screen. |
| Culling | Photo Mechanic | Fast, direct and ideal for getting through large shoots before the edit begins. | It adds another step to the workflow, though I think it is well worth it. |
| Main editing | Lightroom Classic with my own presets | Keeps the workflow consistent and gives me a strong starting point for the final look. | Some images still need extra work elsewhere. |
| Detailed work | Photoshop | Useful for background extensions, fine retouching and anything more precise. | It is slower than staying entirely inside Lightroom, but sometimes necessary. |
| Storage and backup | Internal SSD for active edits, archive catalogue for finished exports, zipped catalogue backed up to OneDrive and Backblaze | Keeps the active workflow fast while making sure completed work is preserved and backed up. | Requires discipline and a bit of organisation, but that is part of the job. |
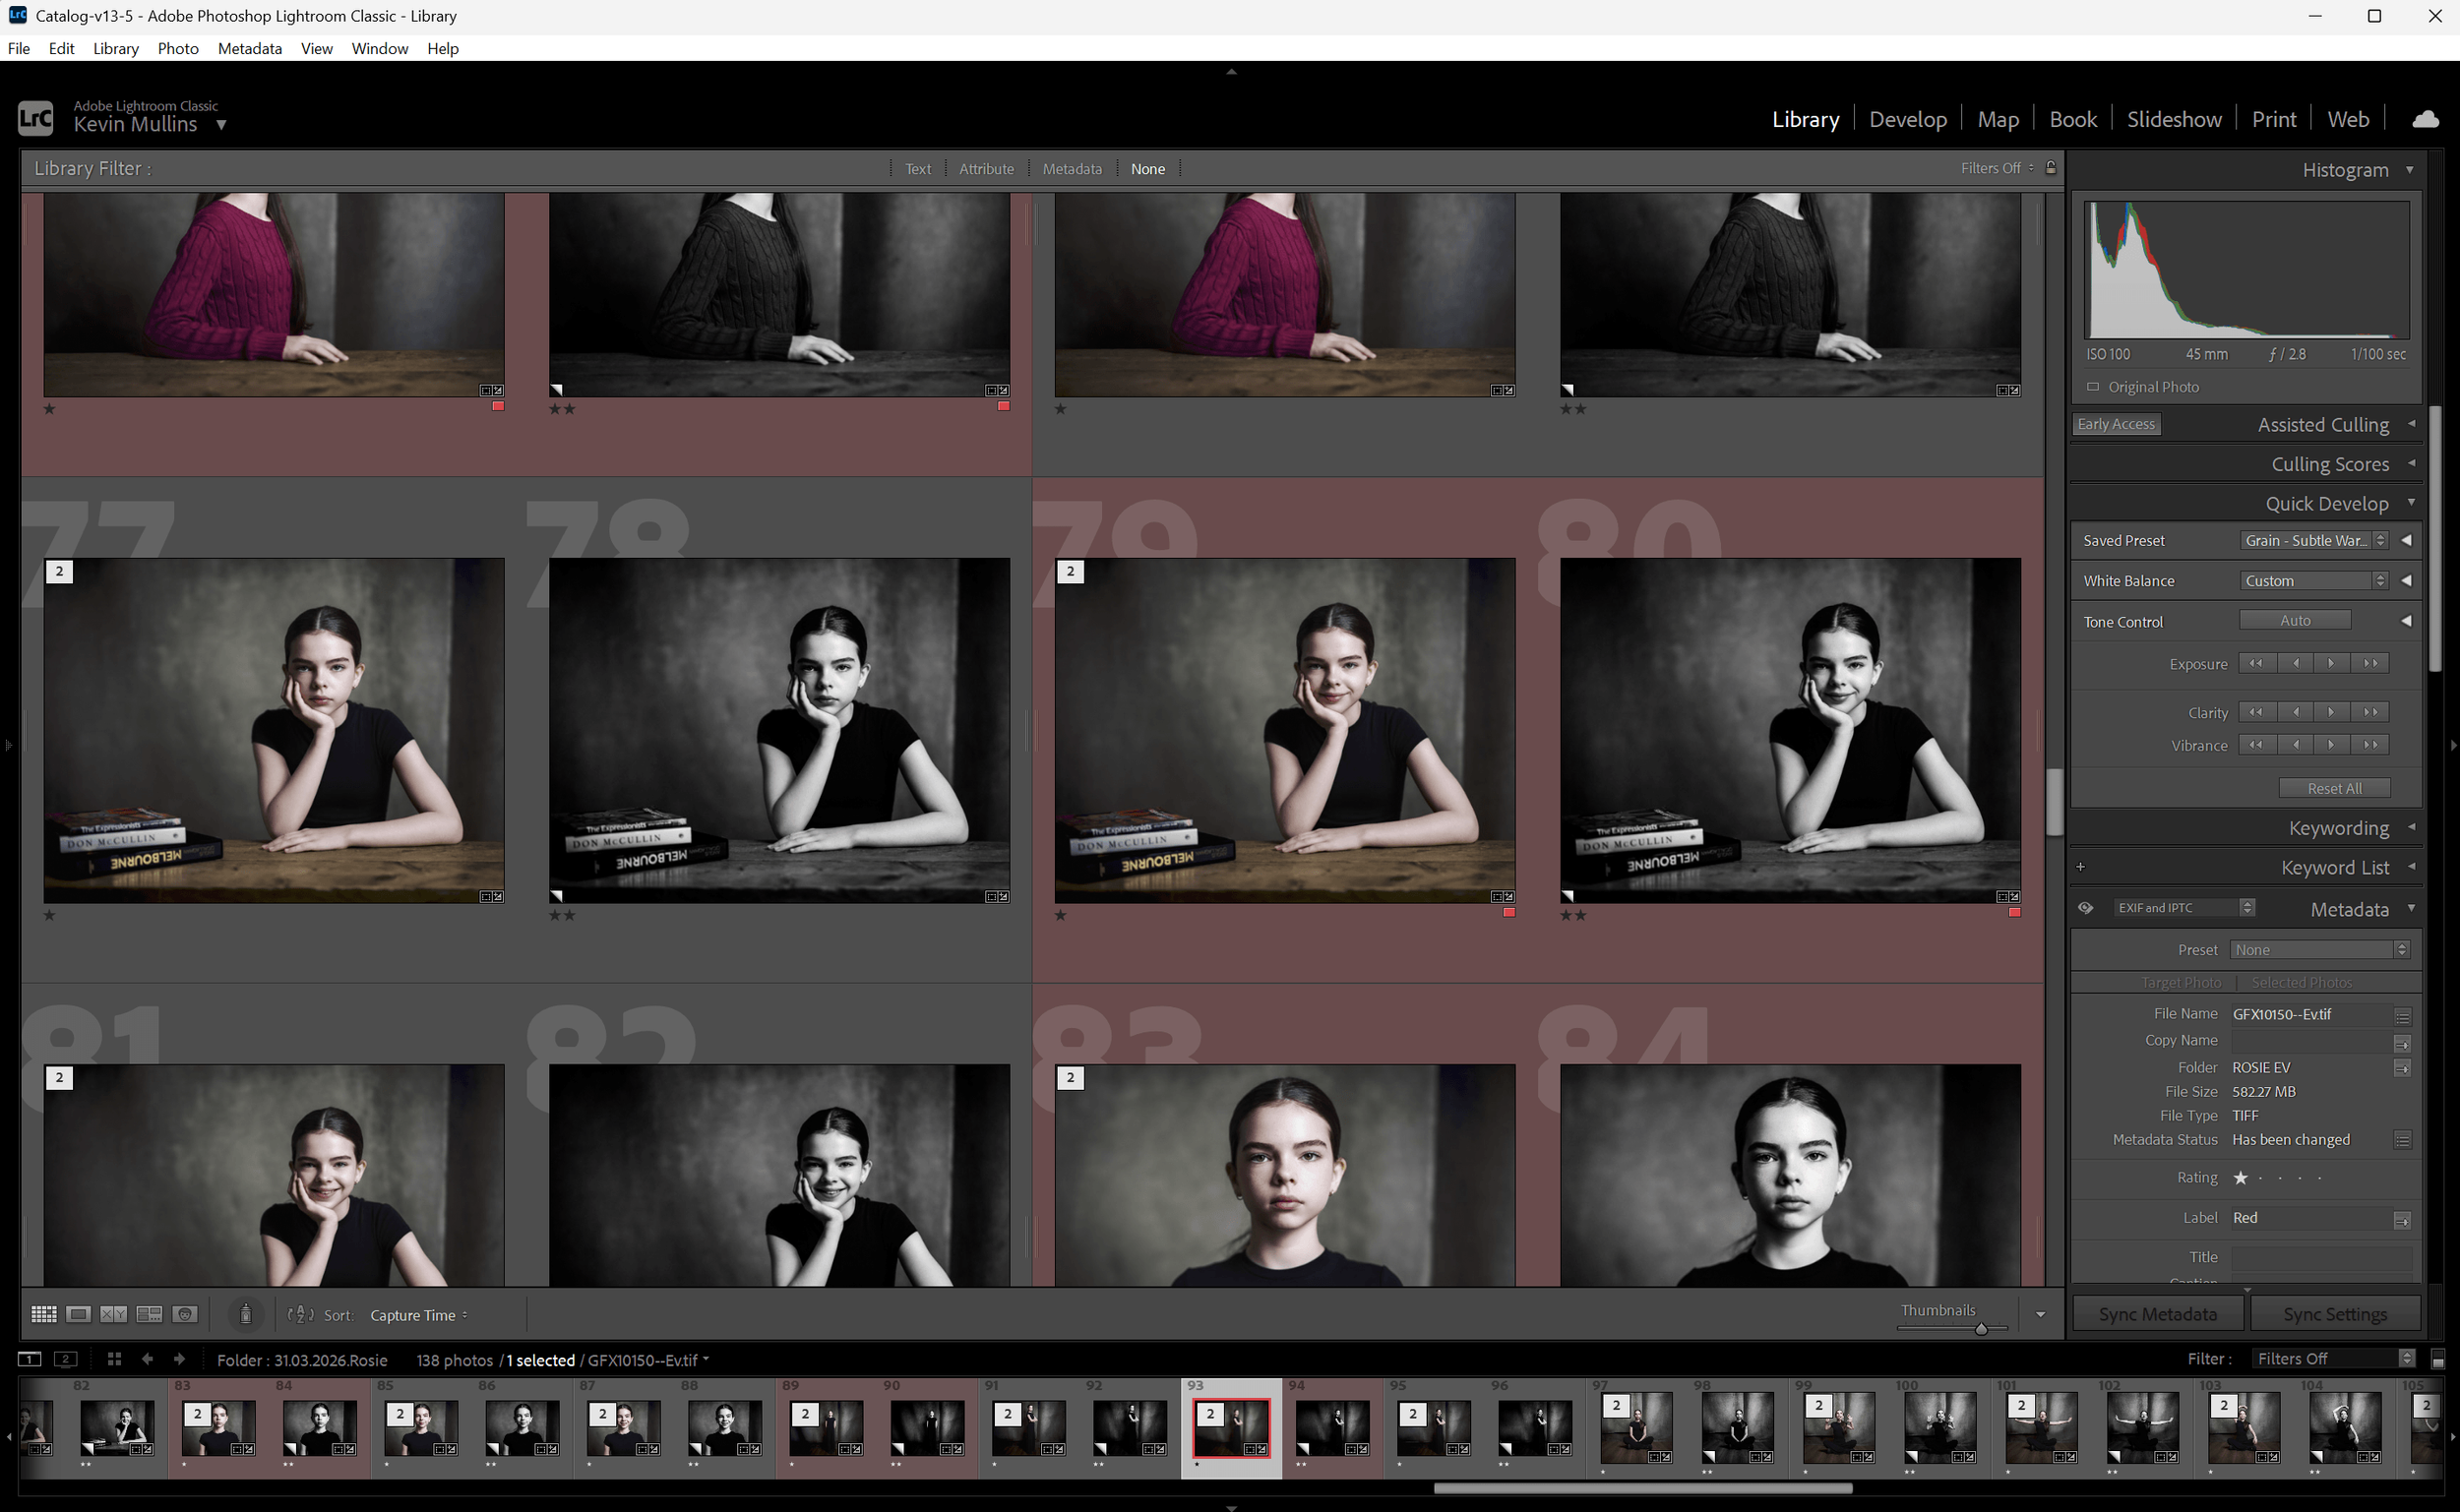
My Lightroom Classic with a Portrait Shoot Edit in process.
A note on the editing and the presets I use
All of the portraits in this article have been edited using my own Lightroom Presets and Profiles.
I use my Profiles first, because they set the underlying tonal character of the image right at the start. From there, I build with my workflow presets to shape contrast, balance and mood in a way that feels consistent with how I want the portrait to sit.
For portrait shoots in particular, I also lean on my AI Mask tools and some of my grain utilities. The AI masks let me work selectively and quickly, so I can guide attention, refine skin tones, control background brightness or shape the face without making the edit feel overworked.
The grain tools are used more carefully, but they matter. I do not want portraits to feel clinically perfect. A little texture, when it suits the image, helps keep things feeling photographic rather than overly polished.
So, although the GFX files are wonderfully rich to begin with, the presets and tools are a real part of how I bring everything together in the final image.

Before and afters
I thought it might be useful to include a few before and after examples here, because sometimes it is easier to show this than explain it.
The finished portrait is never just about one part of the process. It is the combination of the light, the lens, the file, the direction, and then the edit that ties it all together. These examples should give you a clearer sense of how the RAW files begin, how much shape is already there straight out of camera, and how I then use my profiles, presets and local tools to bring the image to its final form.

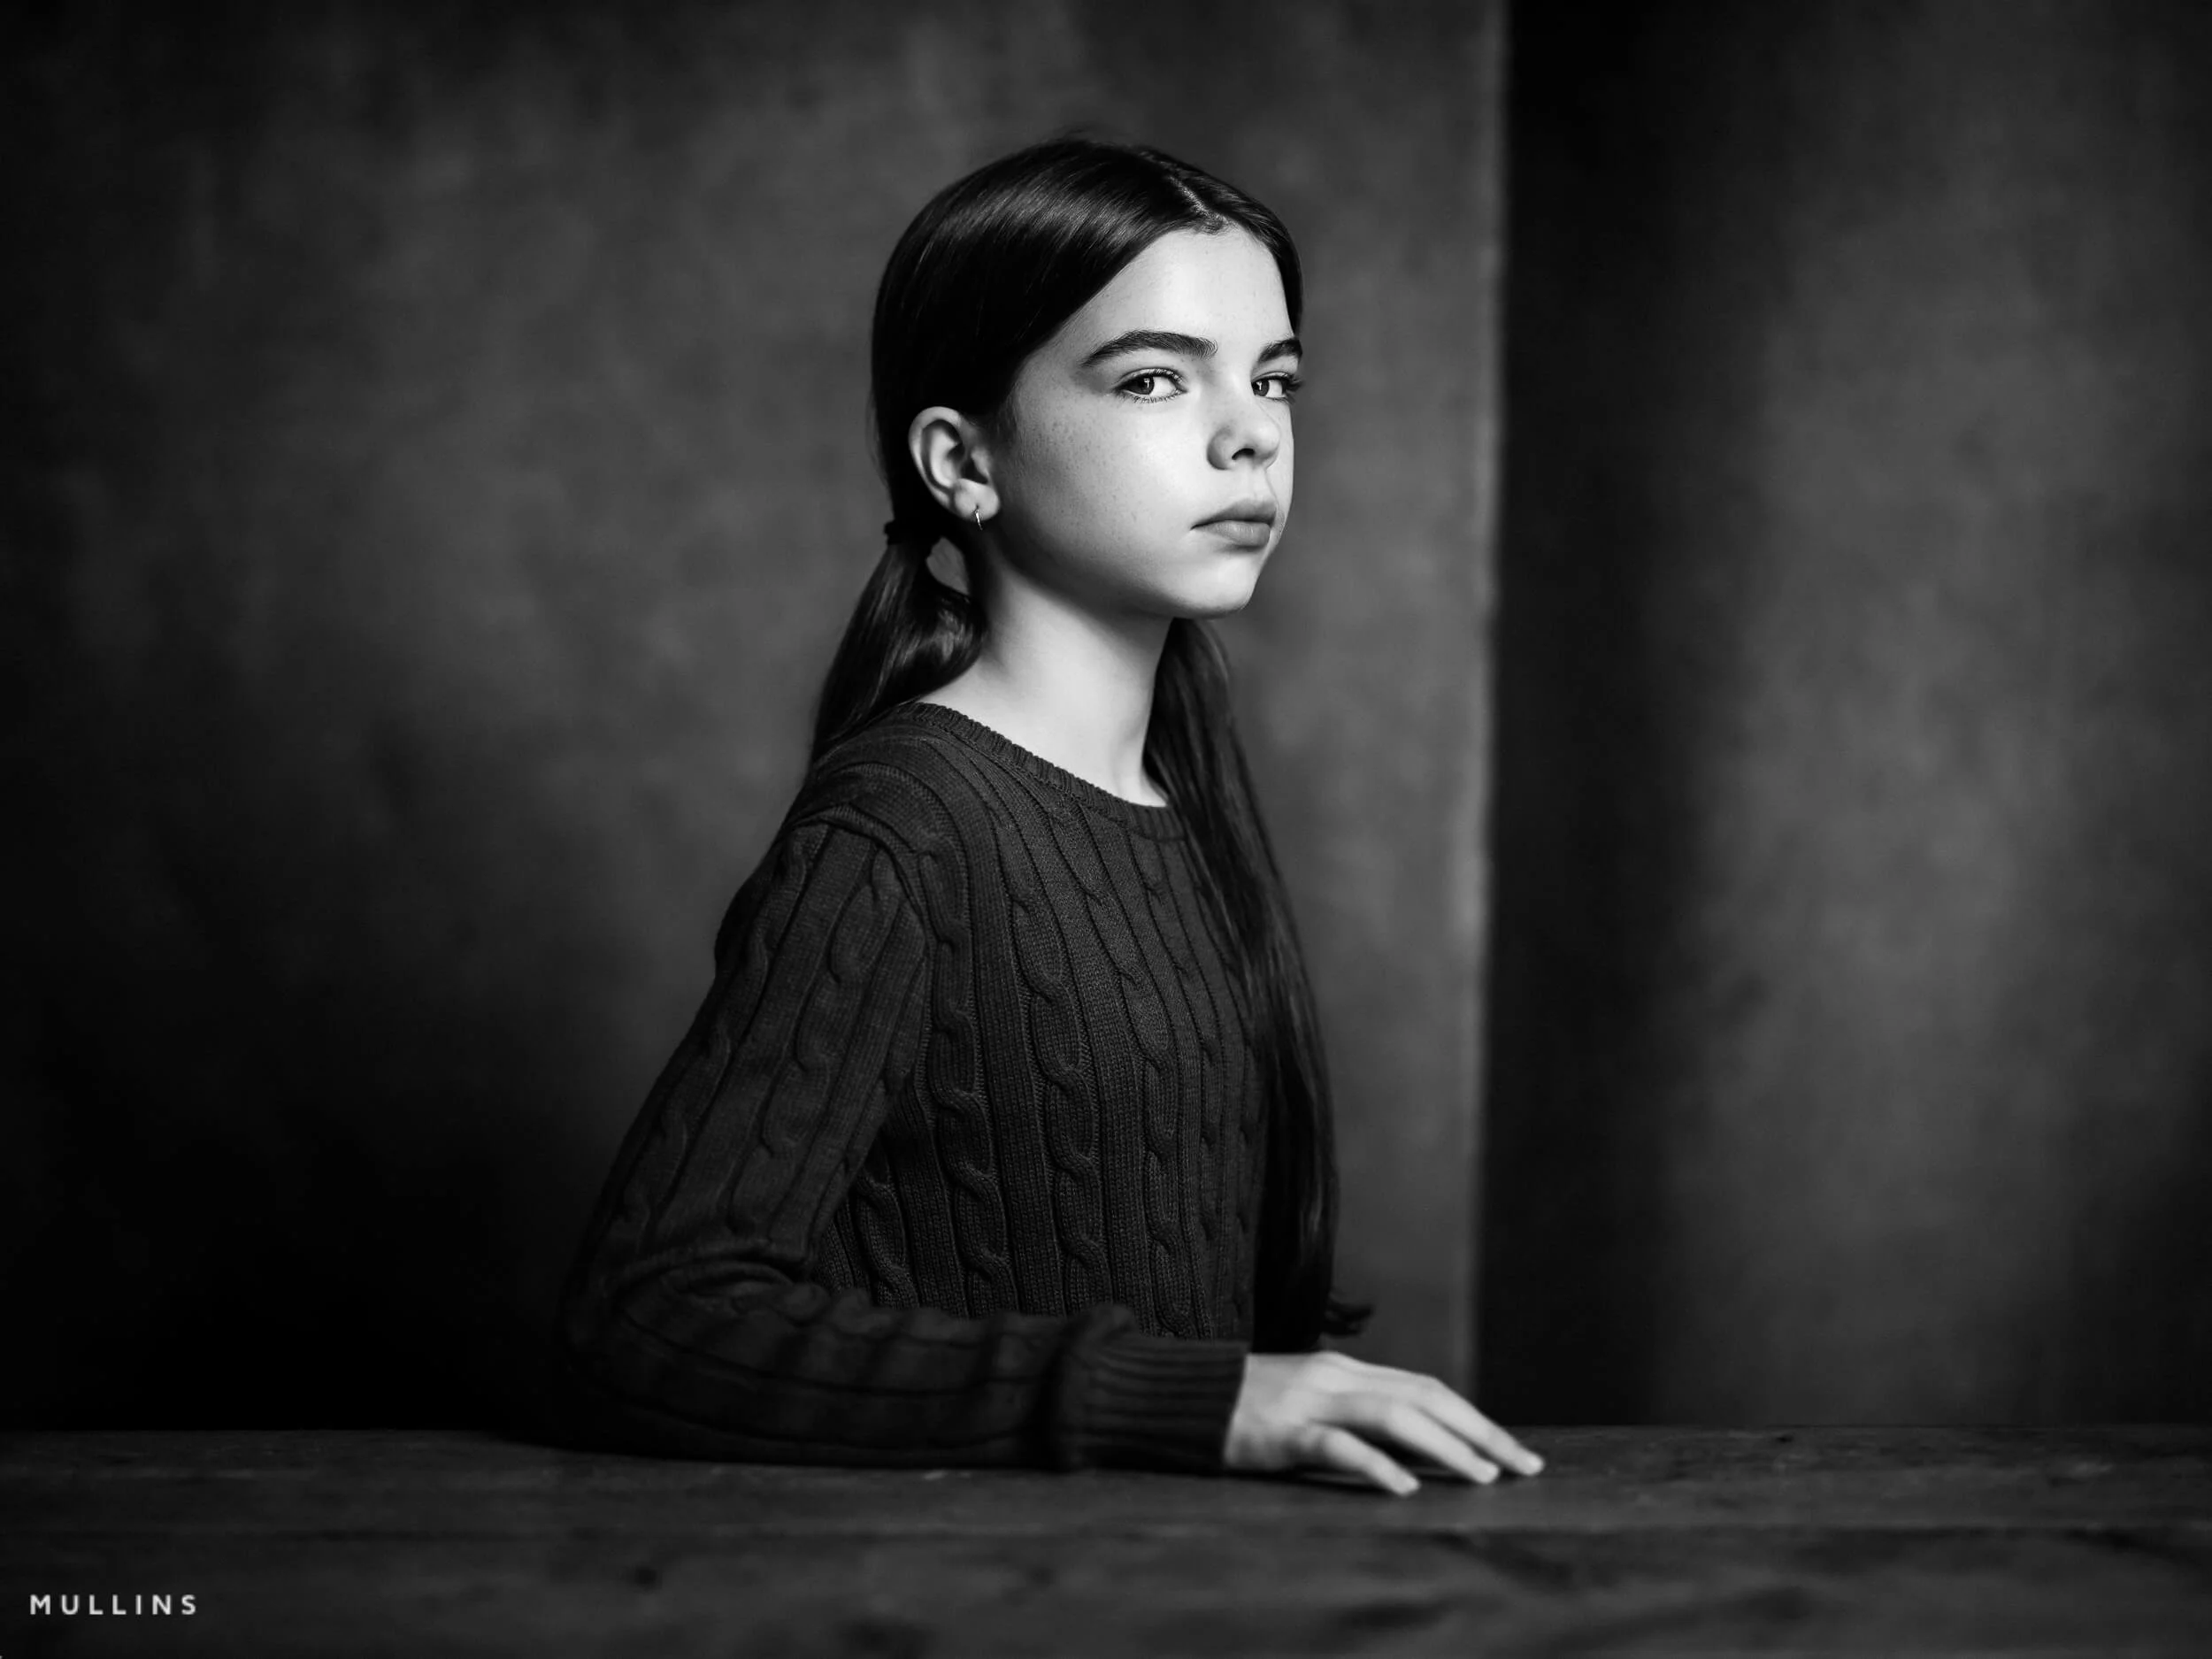
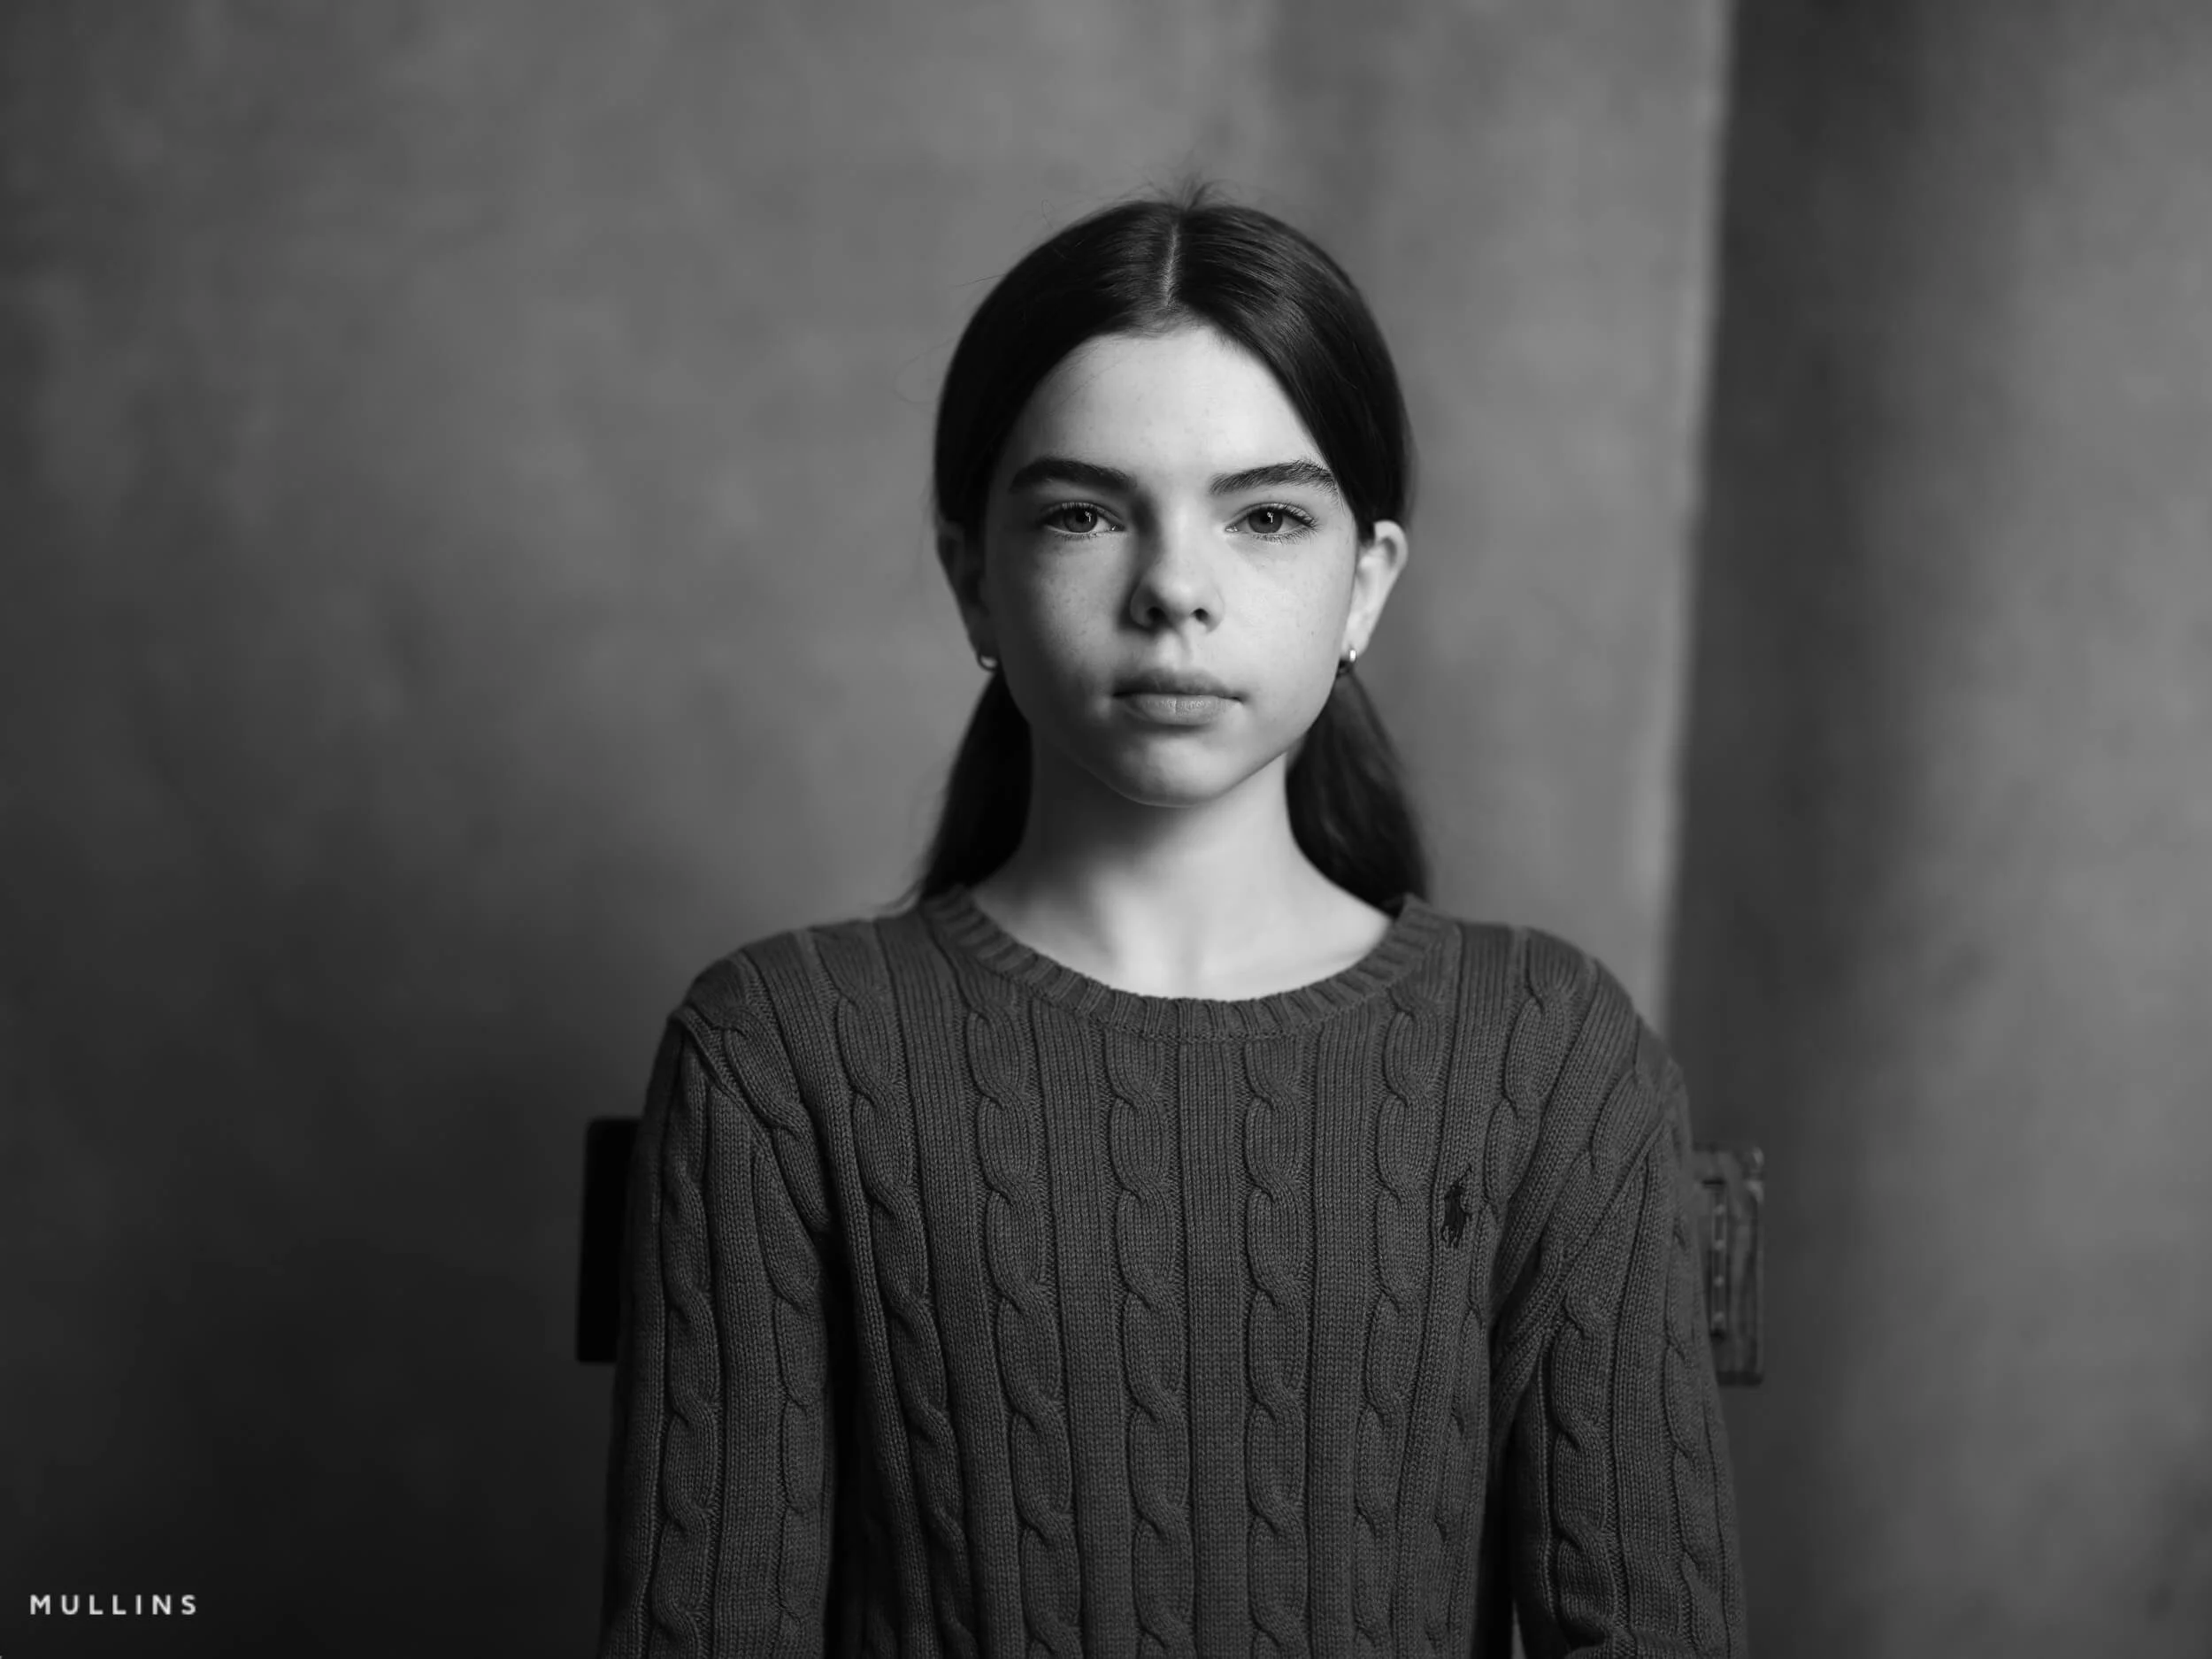
Before and after 1 - straight RAW file to finished portrait edit.
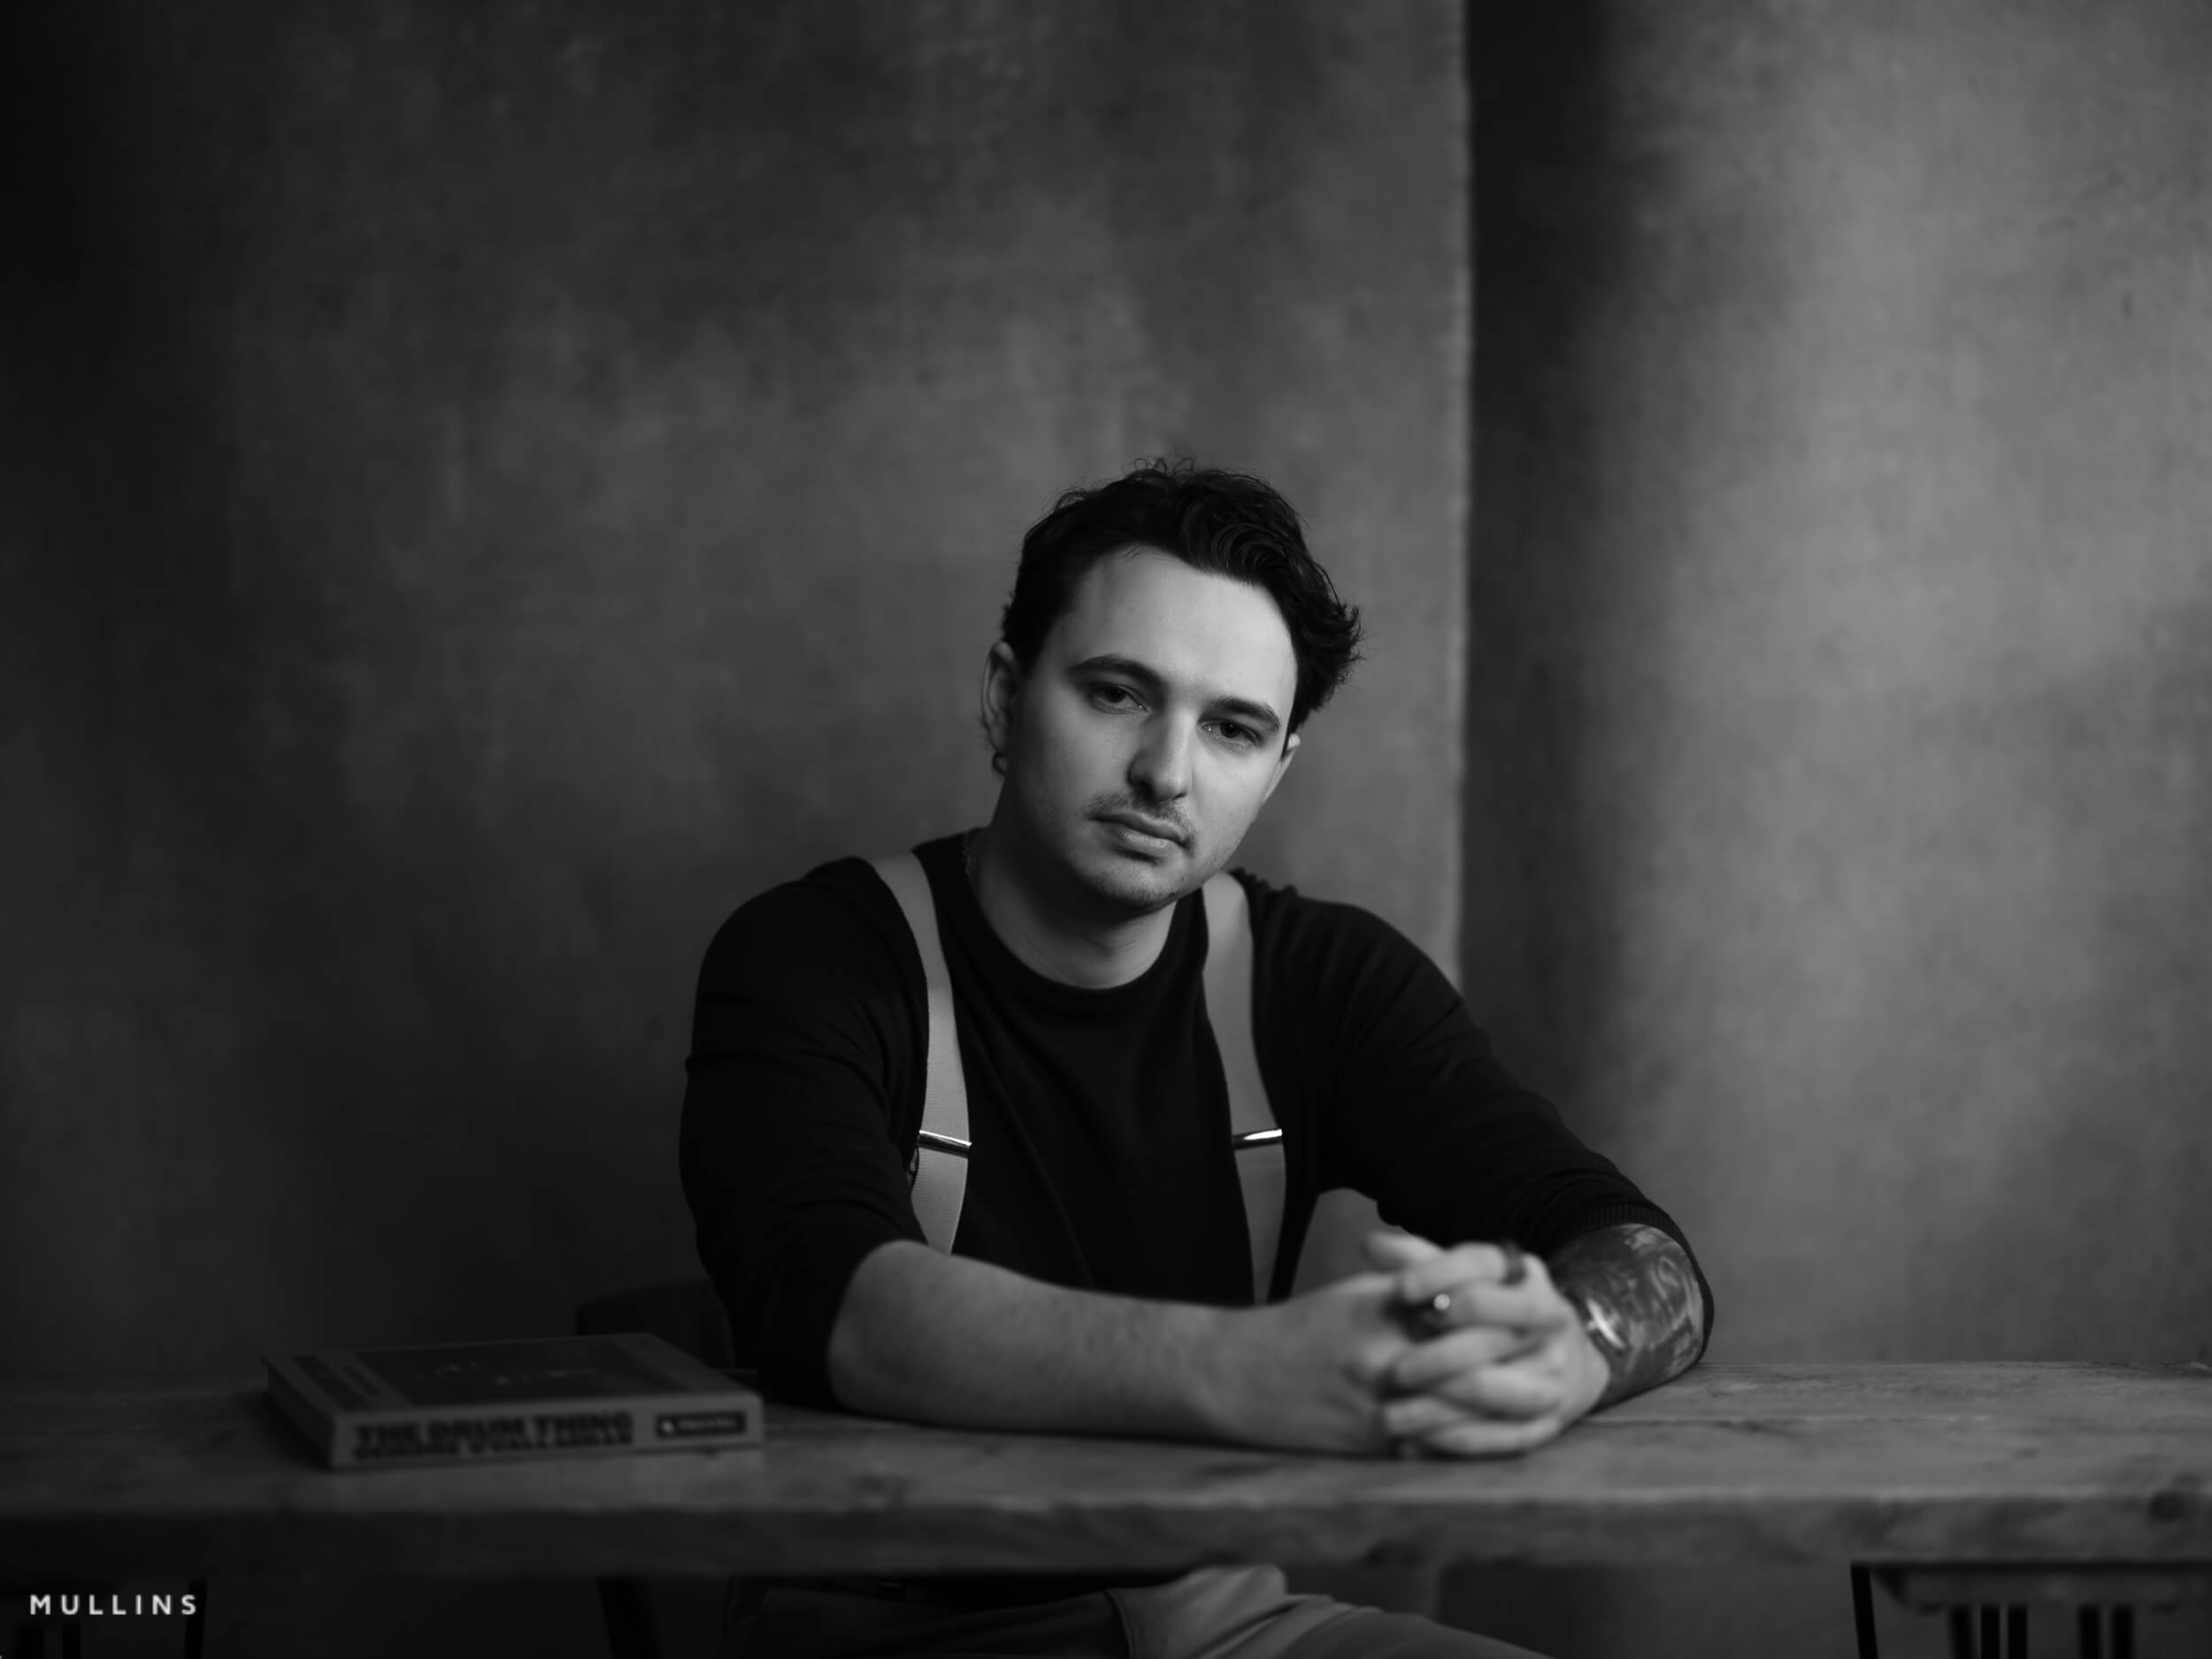
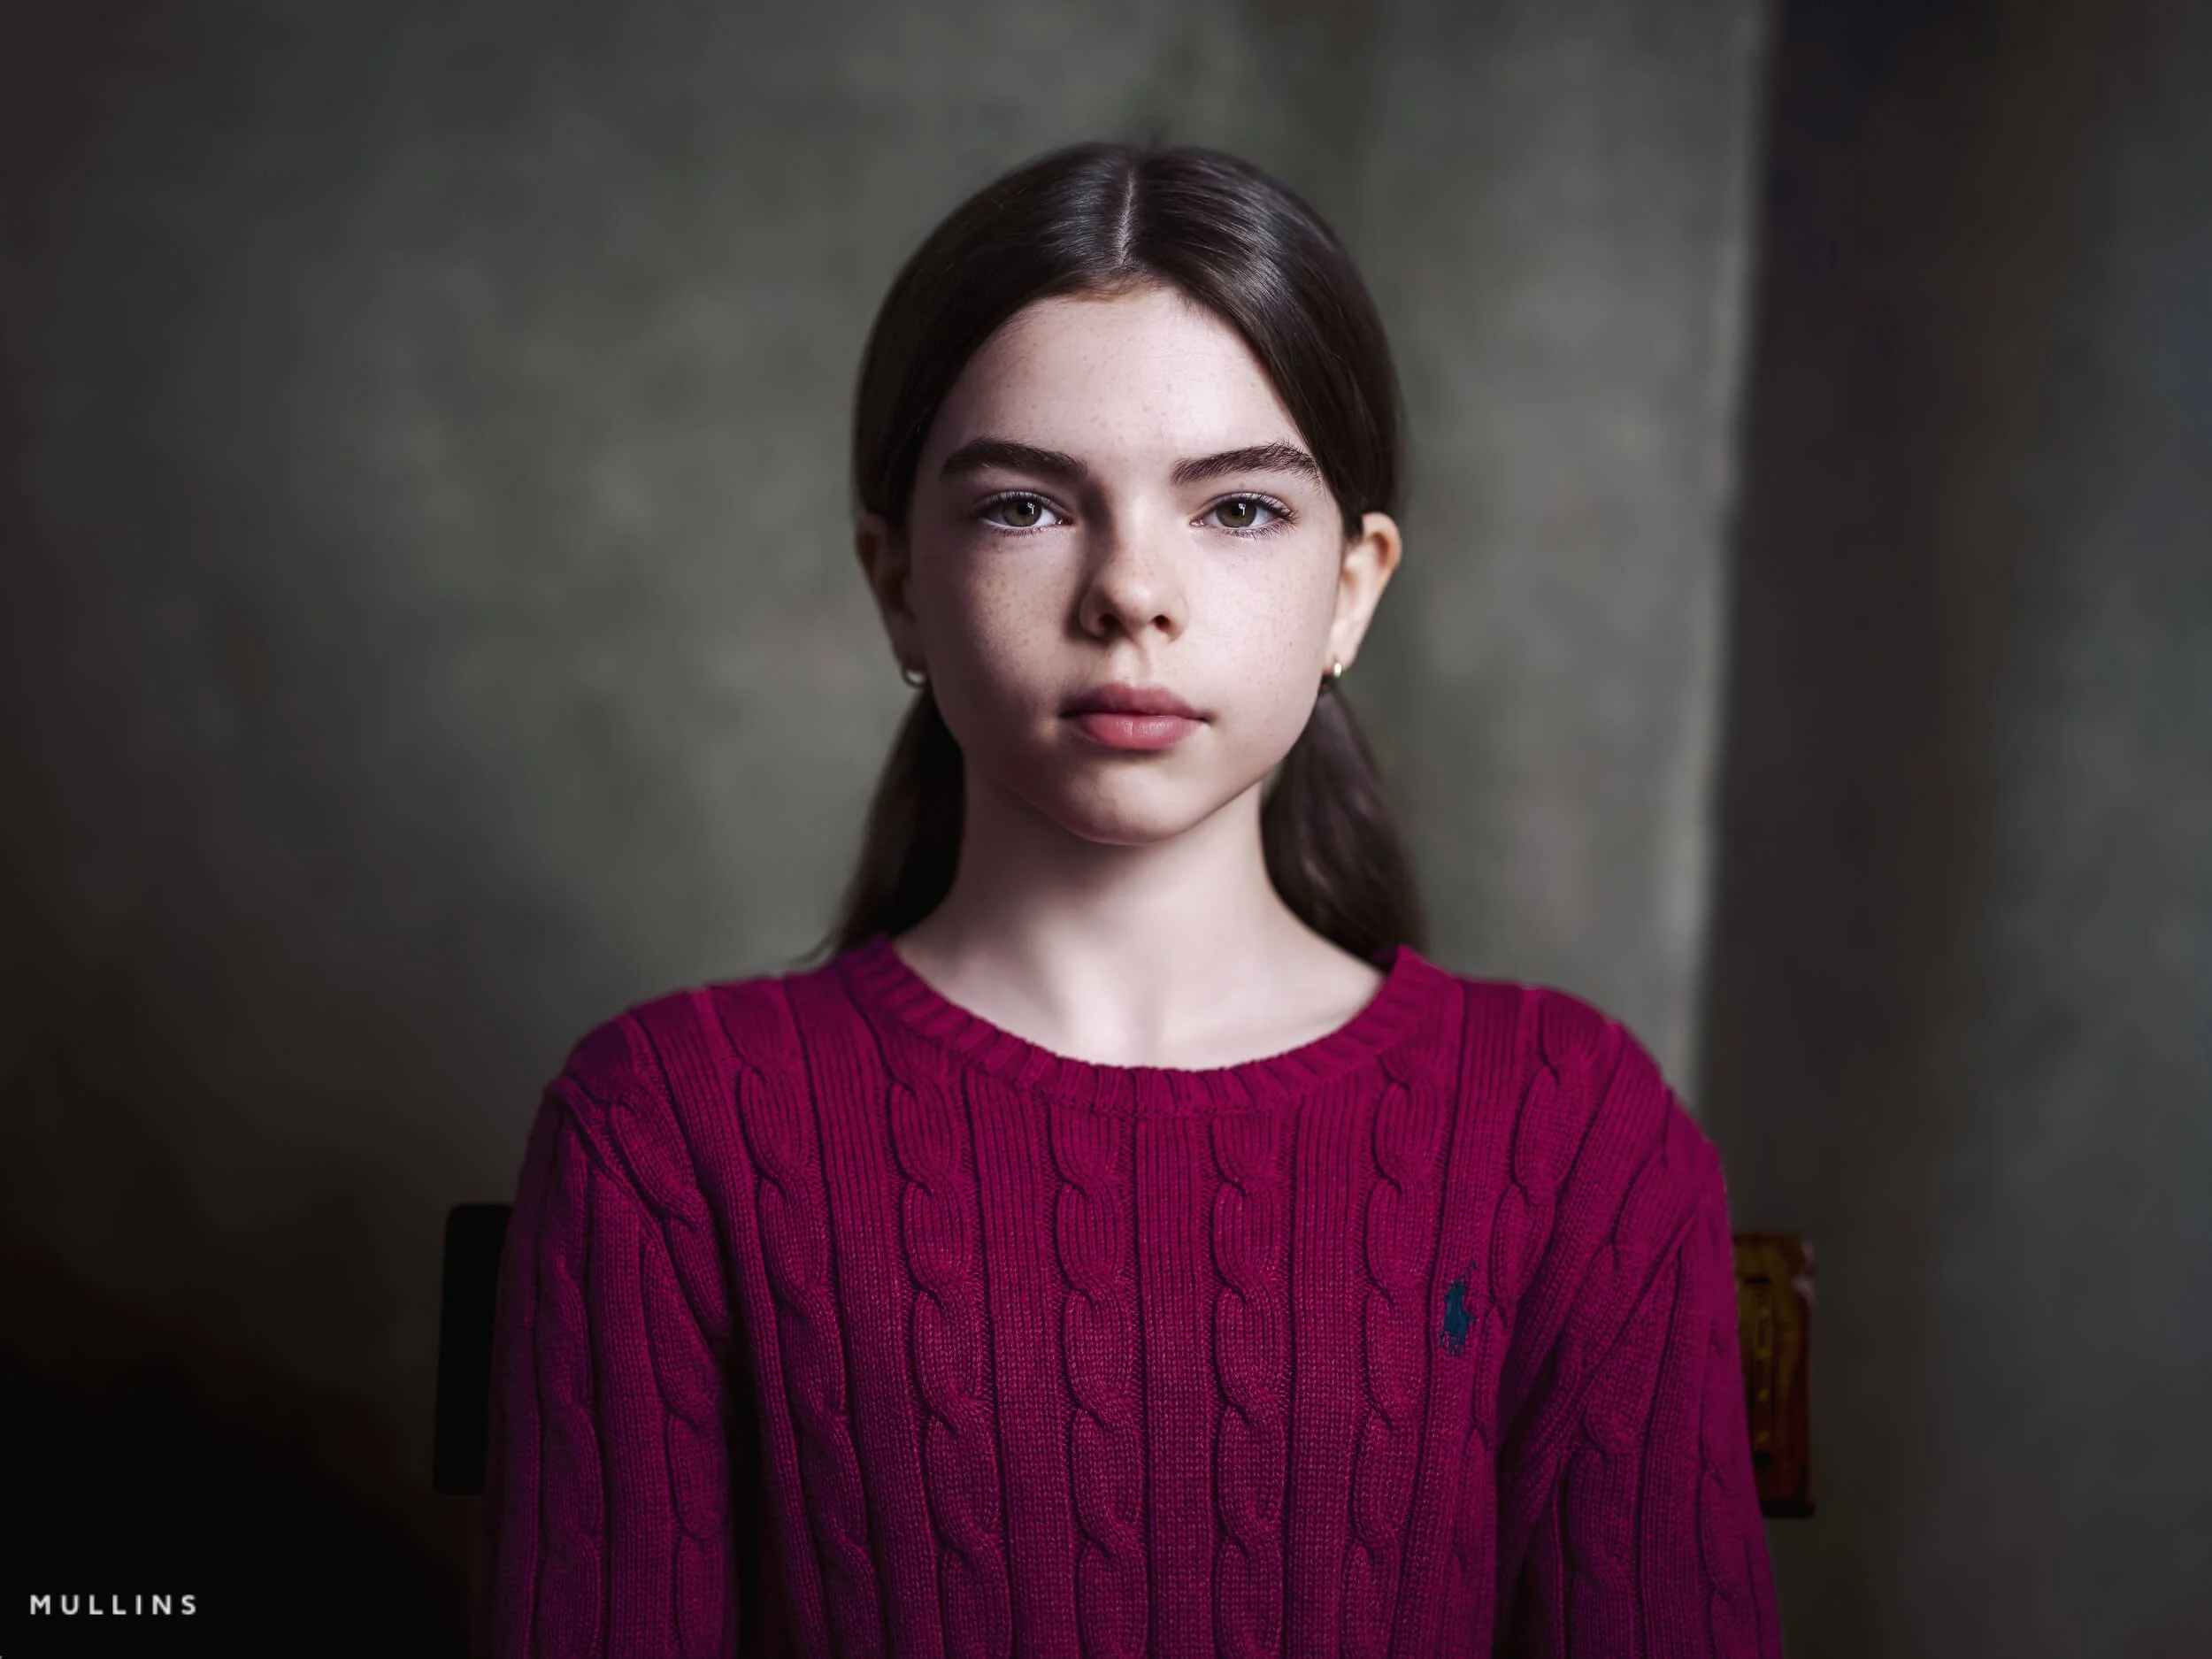
Before and after 2 - a more refined final edit from the original GFX RAW.
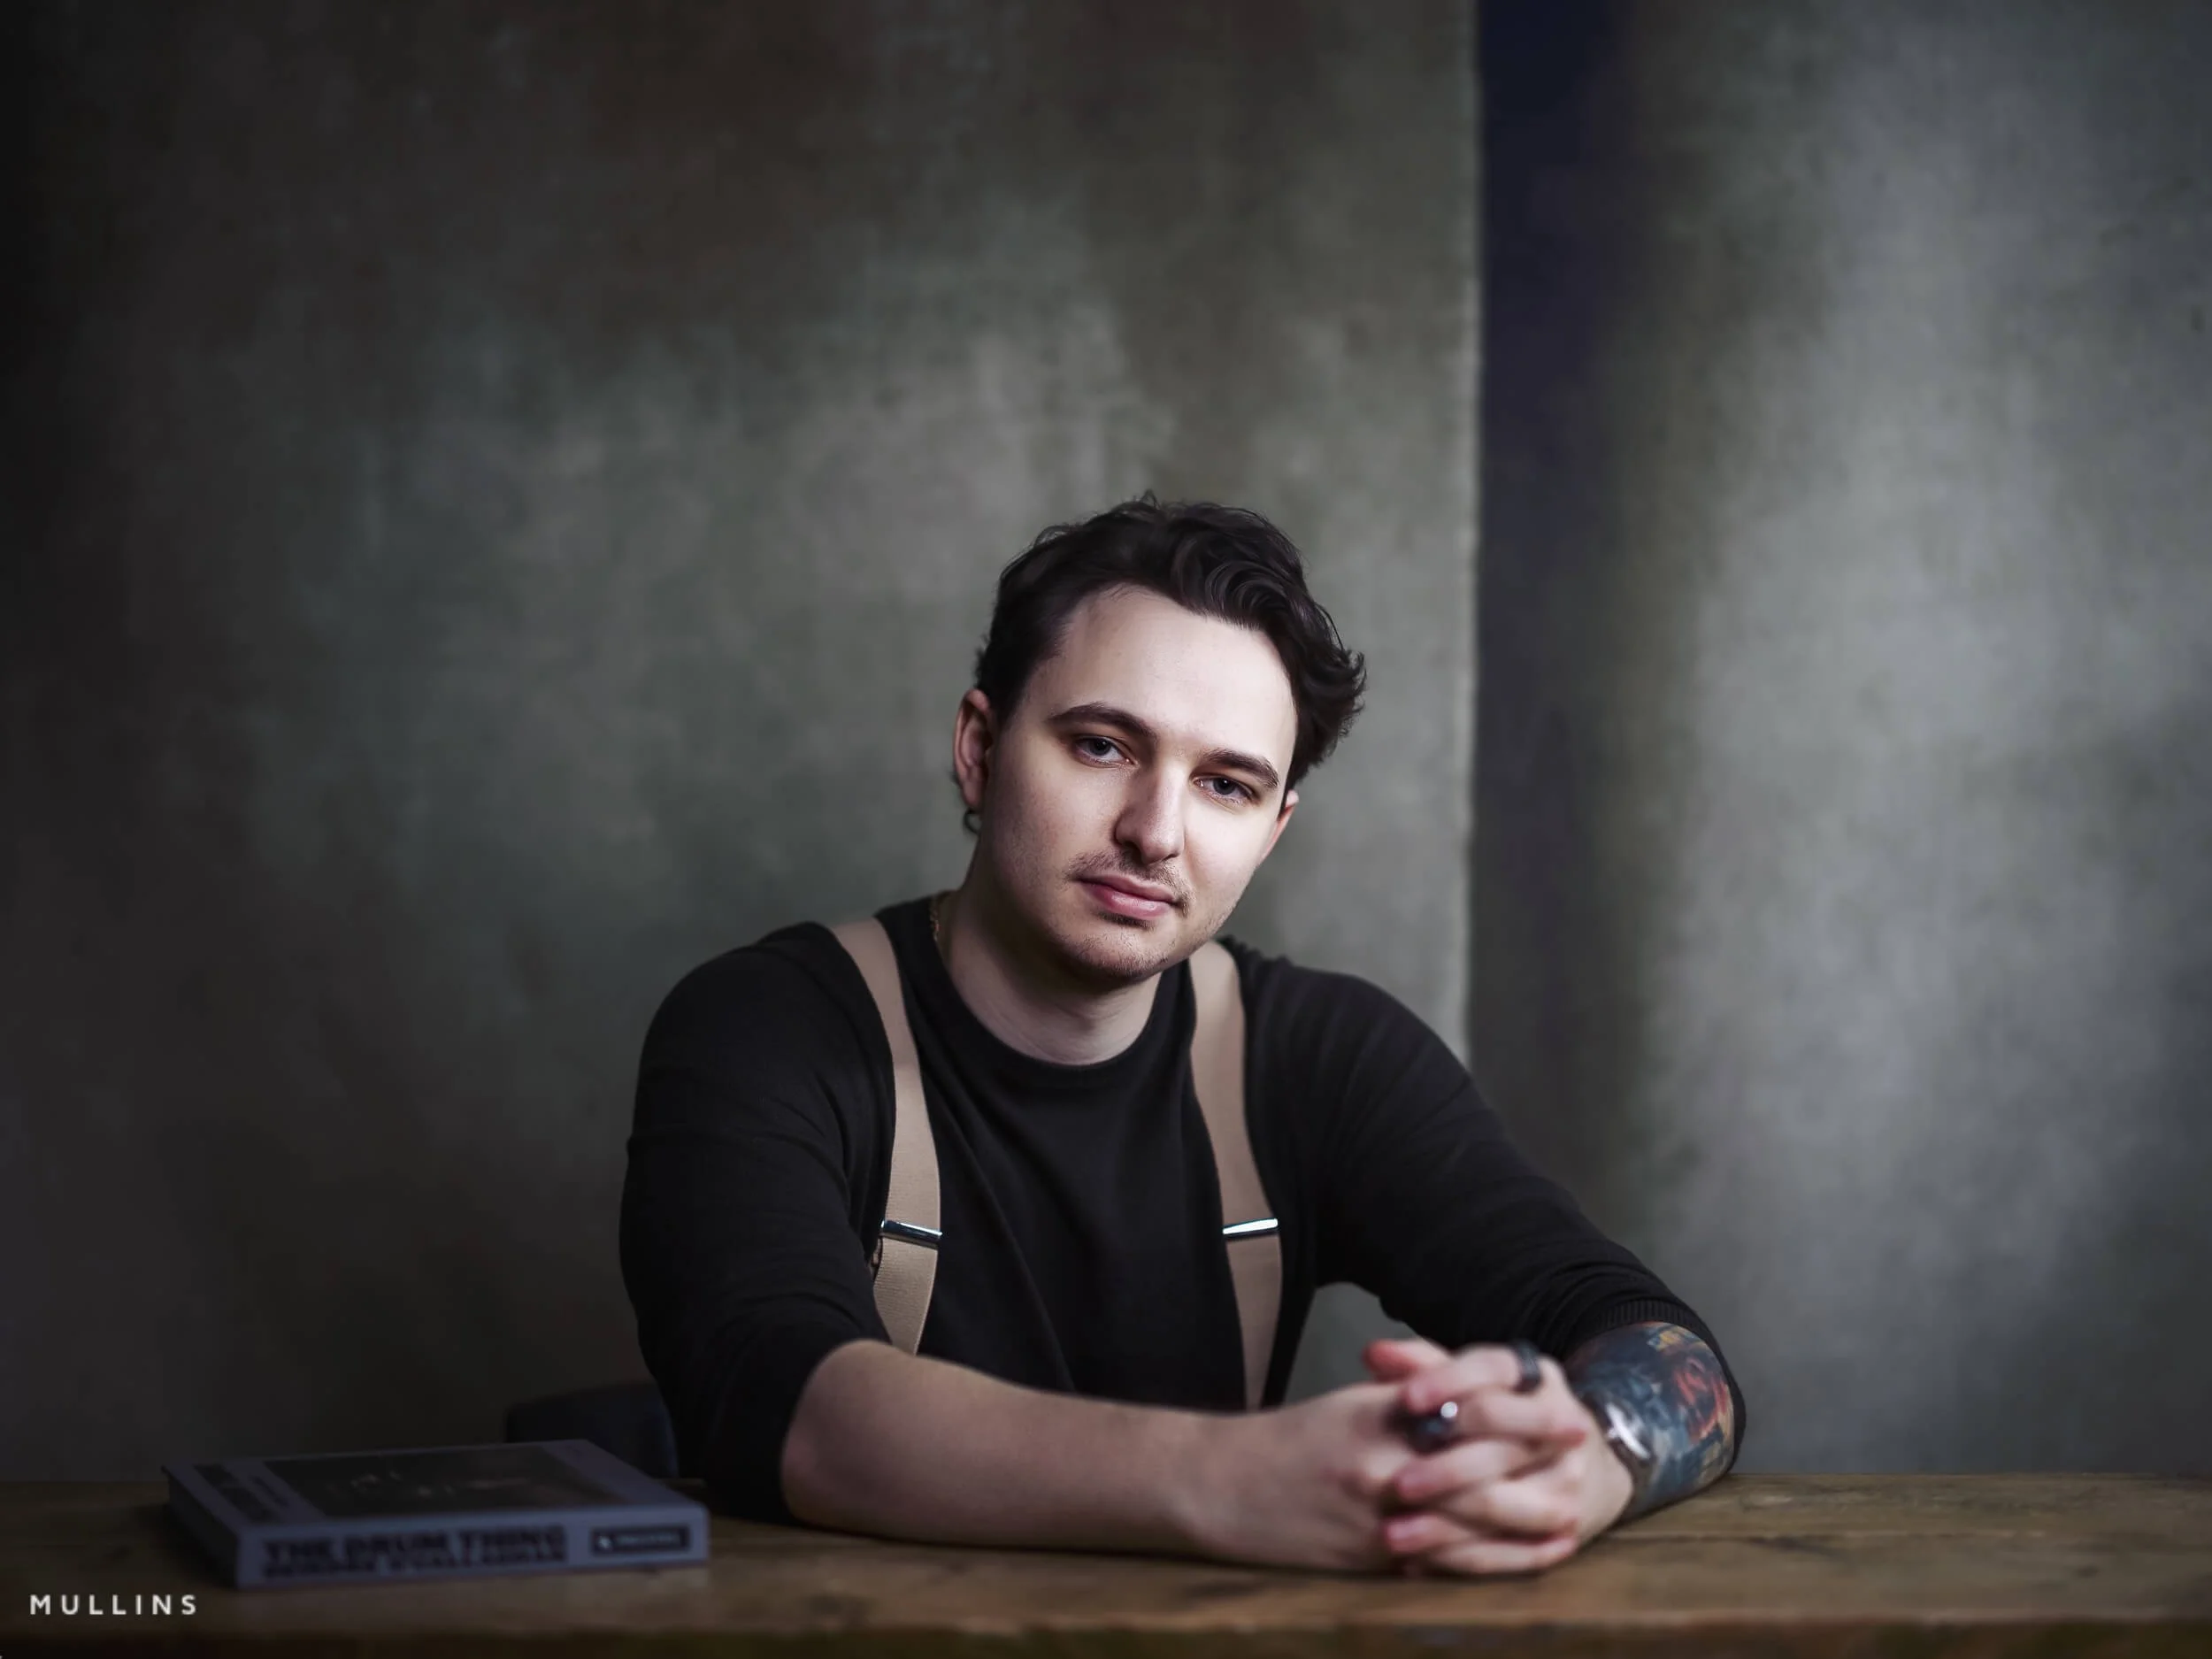
Before and after 3 - showing how the final portrait is shaped in post-production.
FAQ: Fujifilm GFX for Portrait Photography
-
No, not at all. You can make beautiful portraits on all sorts of cameras. GFX is not a requirement. What it gives me is a particular way of working and a file that I enjoy using in the studio. The portraits are still about the light, the expression, the pose and the connection. The camera simply supports that.
-
Because it already does everything I need it to do. In the studio, I am working slowly and deliberately. I am not asking the camera to track fast-moving subjects or behave like a sports body. The GFX100S gives me excellent files, plenty of resolution, and a workflow I know well. Newer cameras may well be better on paper, but that does not automatically mean I need one.
-
The lens I use most is the GF80mm. That is the one I tend to start with for straightforward portrait work. I also use the GF110mm for tighter framing and the GF45mm when I want wider, more environmental portraits. Those three lenses do most of the real work for me.
-
Most of the time in the studio, yes. I find a tripod helps me slow down, refine the composition, and keep the framing consistent while I direct the subject. It suits the way I work. I am not using it because I cannot handhold the camera. I use it because it helps me be more deliberate.
-
Because the light is controlled, so I want the exposure to be controlled too. Once I have the lighting where I want it, I do not need the camera making decisions for me. Shooting manually gives me consistency from frame to frame, and that makes both the session and the edit much cleaner.
-
Because it helps me see the light and shadow more clearly. I still shoot RAW, so I am not baking that monochrome look into the file. I am just using the preview as a way of judging shape, contrast and tone while I work. For portraiture, I find that incredibly useful.
-
For me, yes, though perhaps not in a dramatic, flashy way. It is more about giving myself the best possible file to work with. GFX portraits often involve careful tonal work, skin, shadow detail and sometimes monochrome conversion, so I would rather start with the fullest file I can get than trim quality for convenience.
-
Because portrait sessions are paid work, and I want the files backed up in-camera as I shoot. Card failure is rare, but rare is not the same as impossible. Dual-card recording gives me peace of mind, and I think that is just sensible professional practice.
-
For the way I work, I prefer continuous lighting. I like being able to see exactly what the light is doing in real time. It feels intuitive, and it helps me make small adjustments as I go. That suits my studio work very well, especially when I am shaping portraits quite carefully.
-
Usually less than people might think. The aim is not to rescue the file. It is to refine it. If the light and the portrait are working properly at the point of capture, the edit becomes about tone, balance, finishing touches and consistency. I do use my own profiles, presets, AI Mask tools and grain utilities, but the edit is there to complete the image, not reinvent it.
-
Not for the sort of portrait photography I do. If I were photographing fast action or something more reactive, I might have a different answer. But in the studio, where the session is paced and controlled, the GFX100S is absolutely fine. In fact, its slower, more deliberate feel is part of why I enjoy using it.
-
Yes, very much so. That is really where I think it shines for my kind of work. In a controlled environment, with thoughtful lighting and a subject who is being guided carefully, the GFX system gives me wonderful files and a pace of shooting that feels very natural.
Final thoughts on using Fujifilm GFX for portrait photography
I do not use the Fujifilm GFX system for portrait work because I think everybody should. In fact, you might not be able to tell the difference between GFX files and the Fujifilm X-E5.
I use it because it suits the way I like to work.
For me, the GFX100S still hits a very sweet spot. It gives me all the quality I need, all the control I want. The lenses I use most, particularly the 80mm, 110mm, and 45mm, let me capture the portraits I want without overthinking. The lighting setup is simple, repeatable and effective. The tripod slows me down in the right way. Manual exposure keeps everything consistent. The black-and-white film simulation helps me see the light properly. And the workflow afterwards, from culling to editing to archiving, all fits together in a way that feels calm and dependable.
Not that Fujifilm GFX is magical. Not that it is the only route to a good portrait. But that, in my studio and in my way of working, it makes sense.
If you are considering GFX for portrait photography, I hope this has shown you that the system is not just about megapixels. It is about process. It is about how you shoot, how you light, how you direct, and how you want the files to behave once you begin shaping them into finished photographs.
And if you are already using GFX, perhaps this has given you a few ideas of your own. Or at least reassured you that you do not need to complicate things unnecessarily.