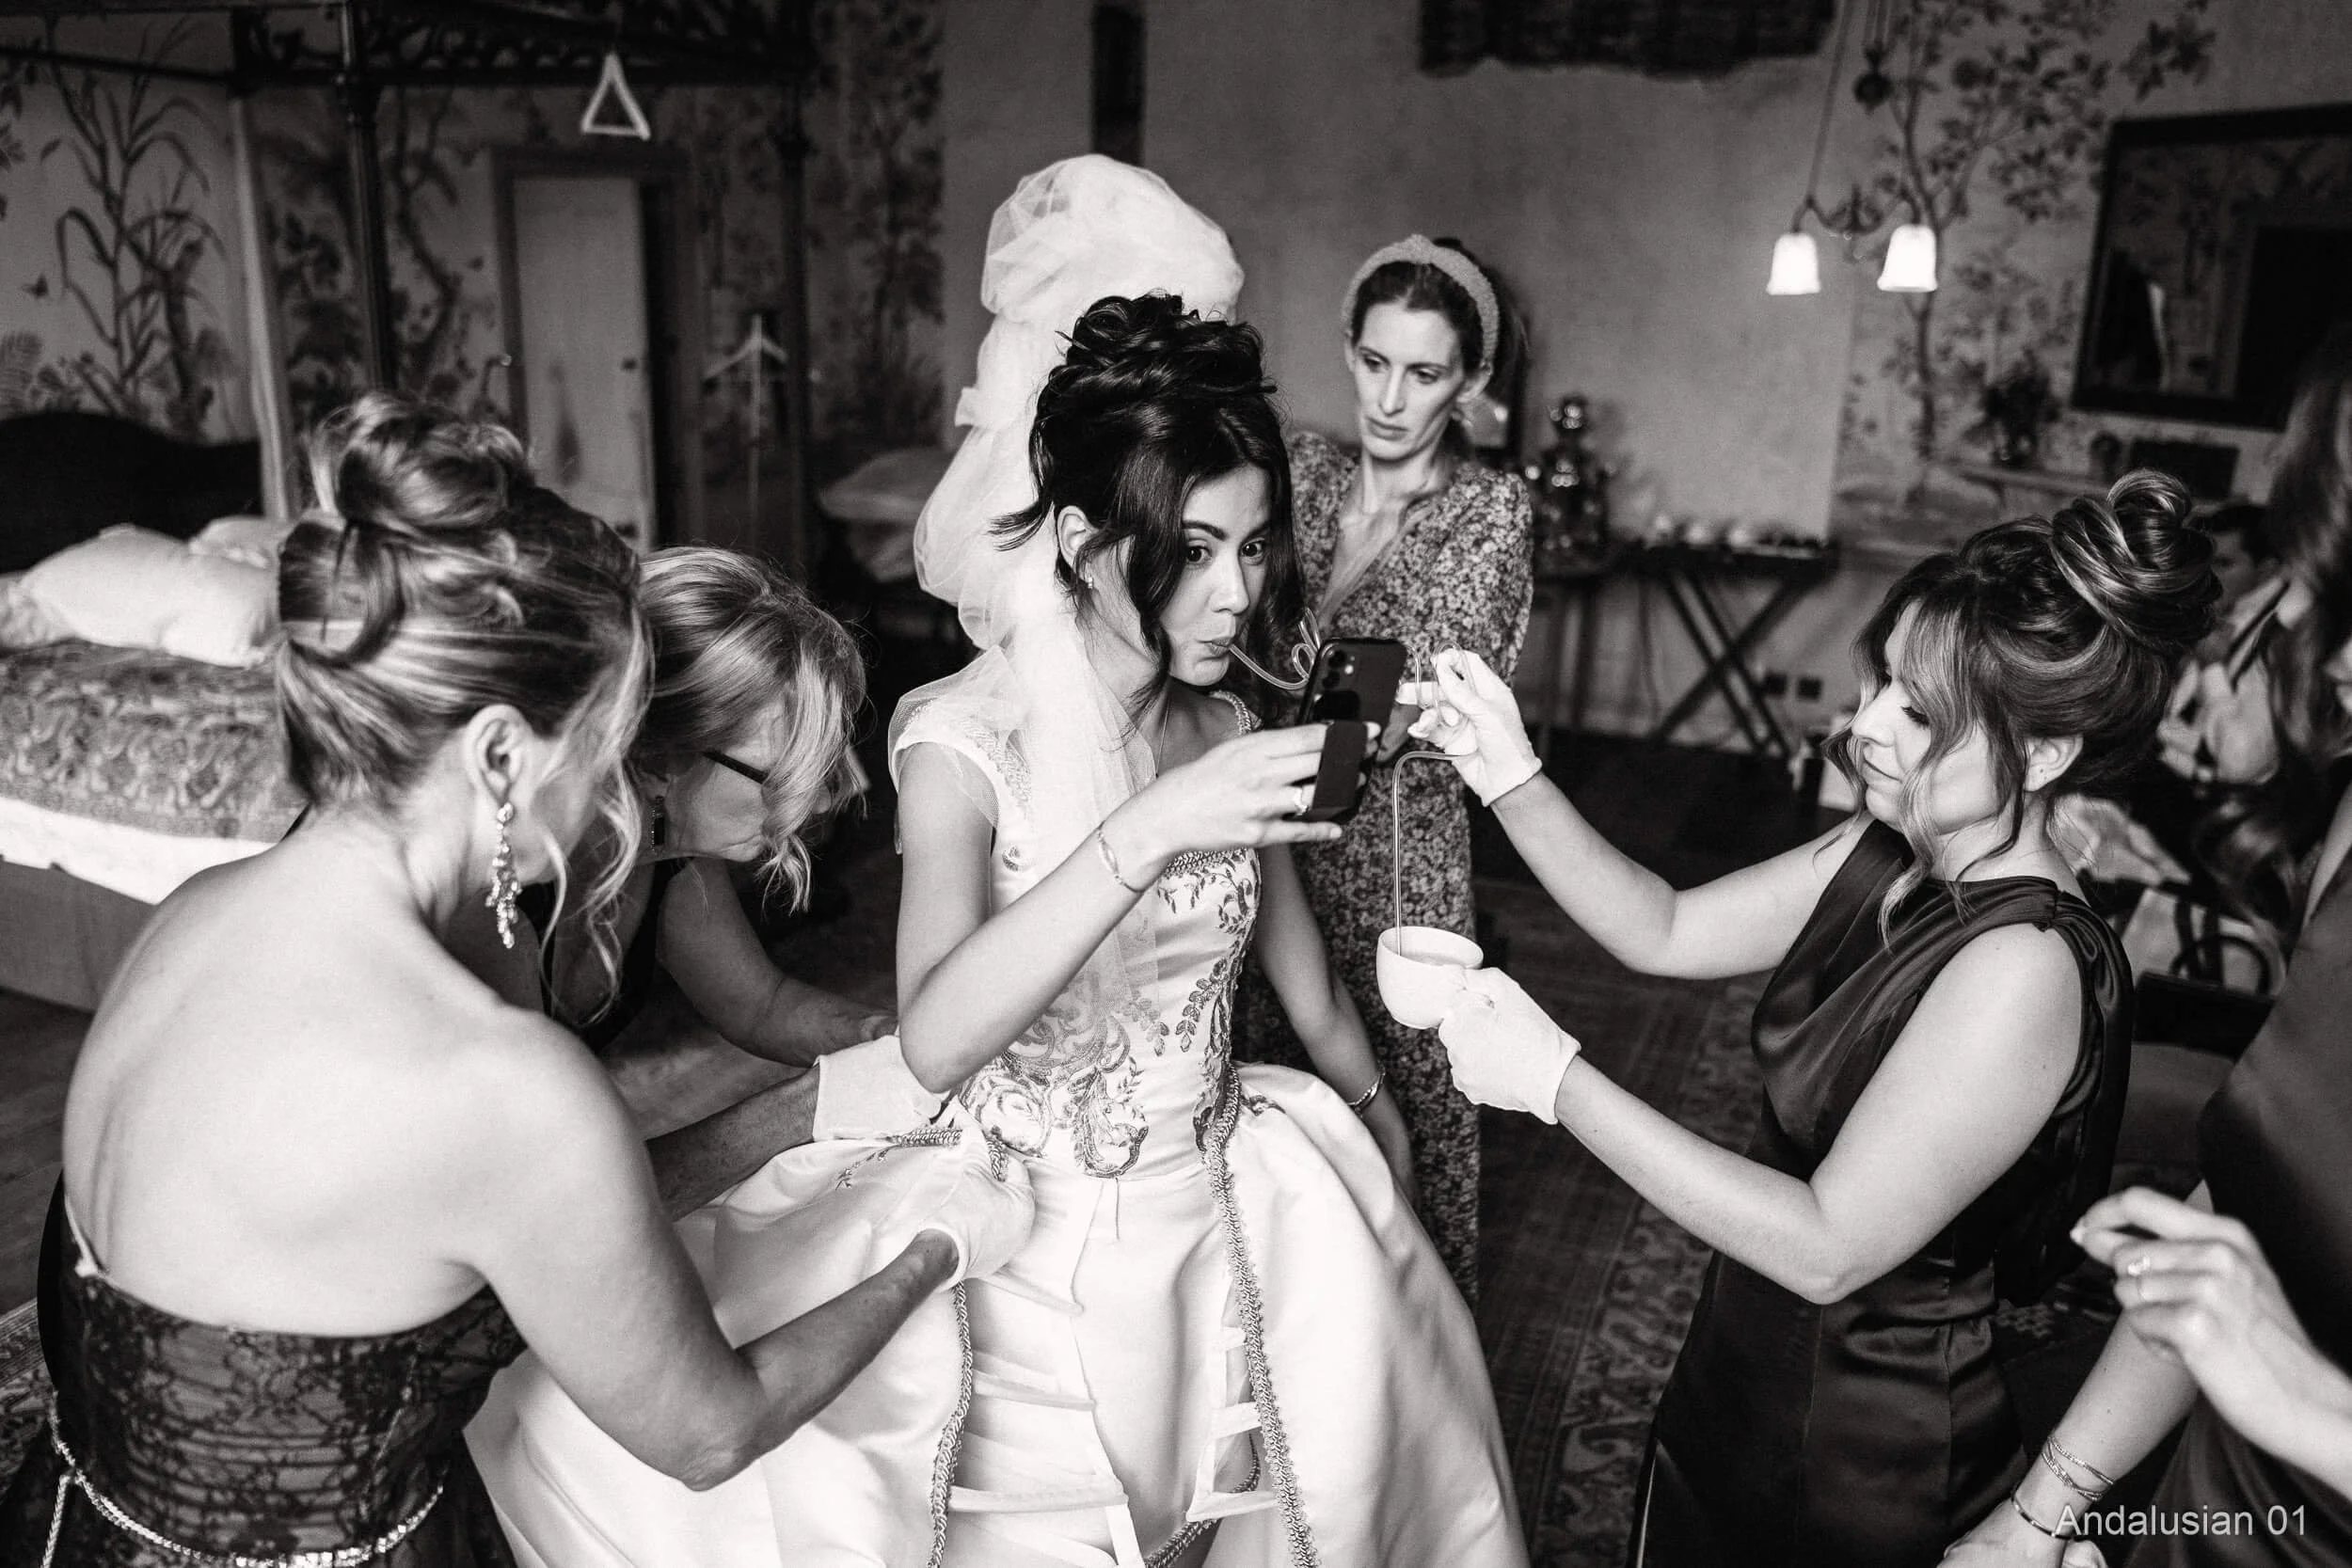
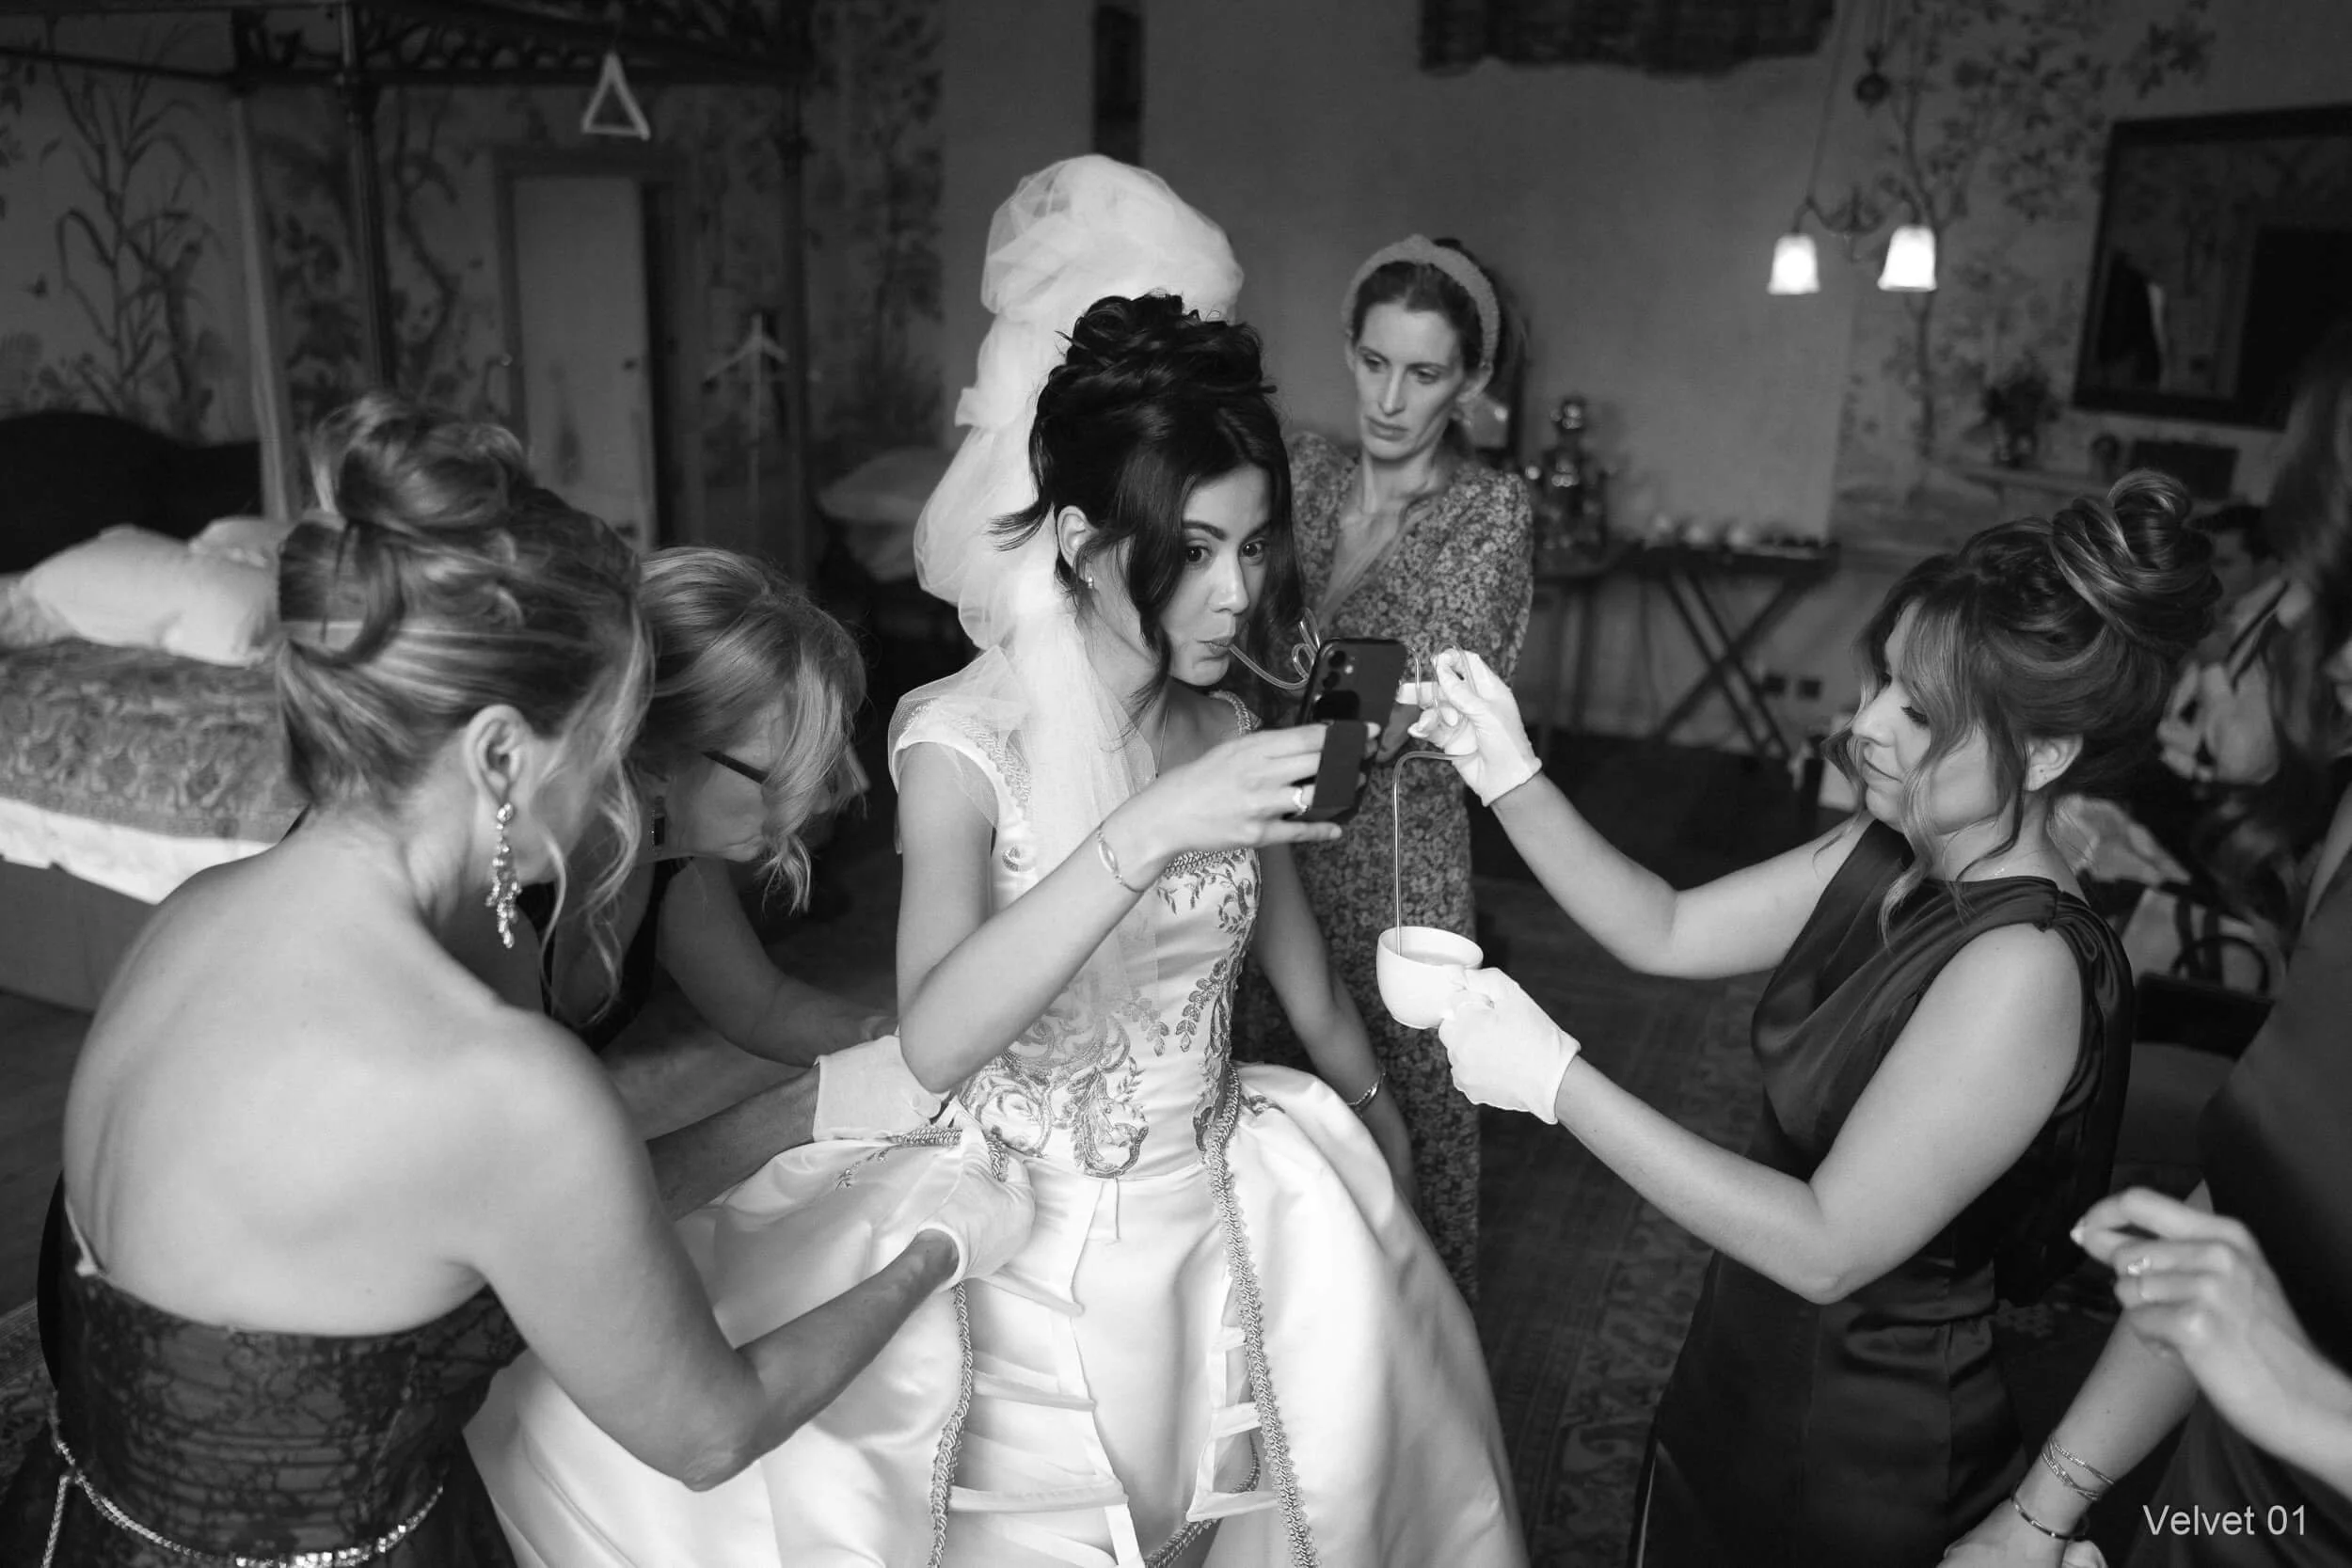
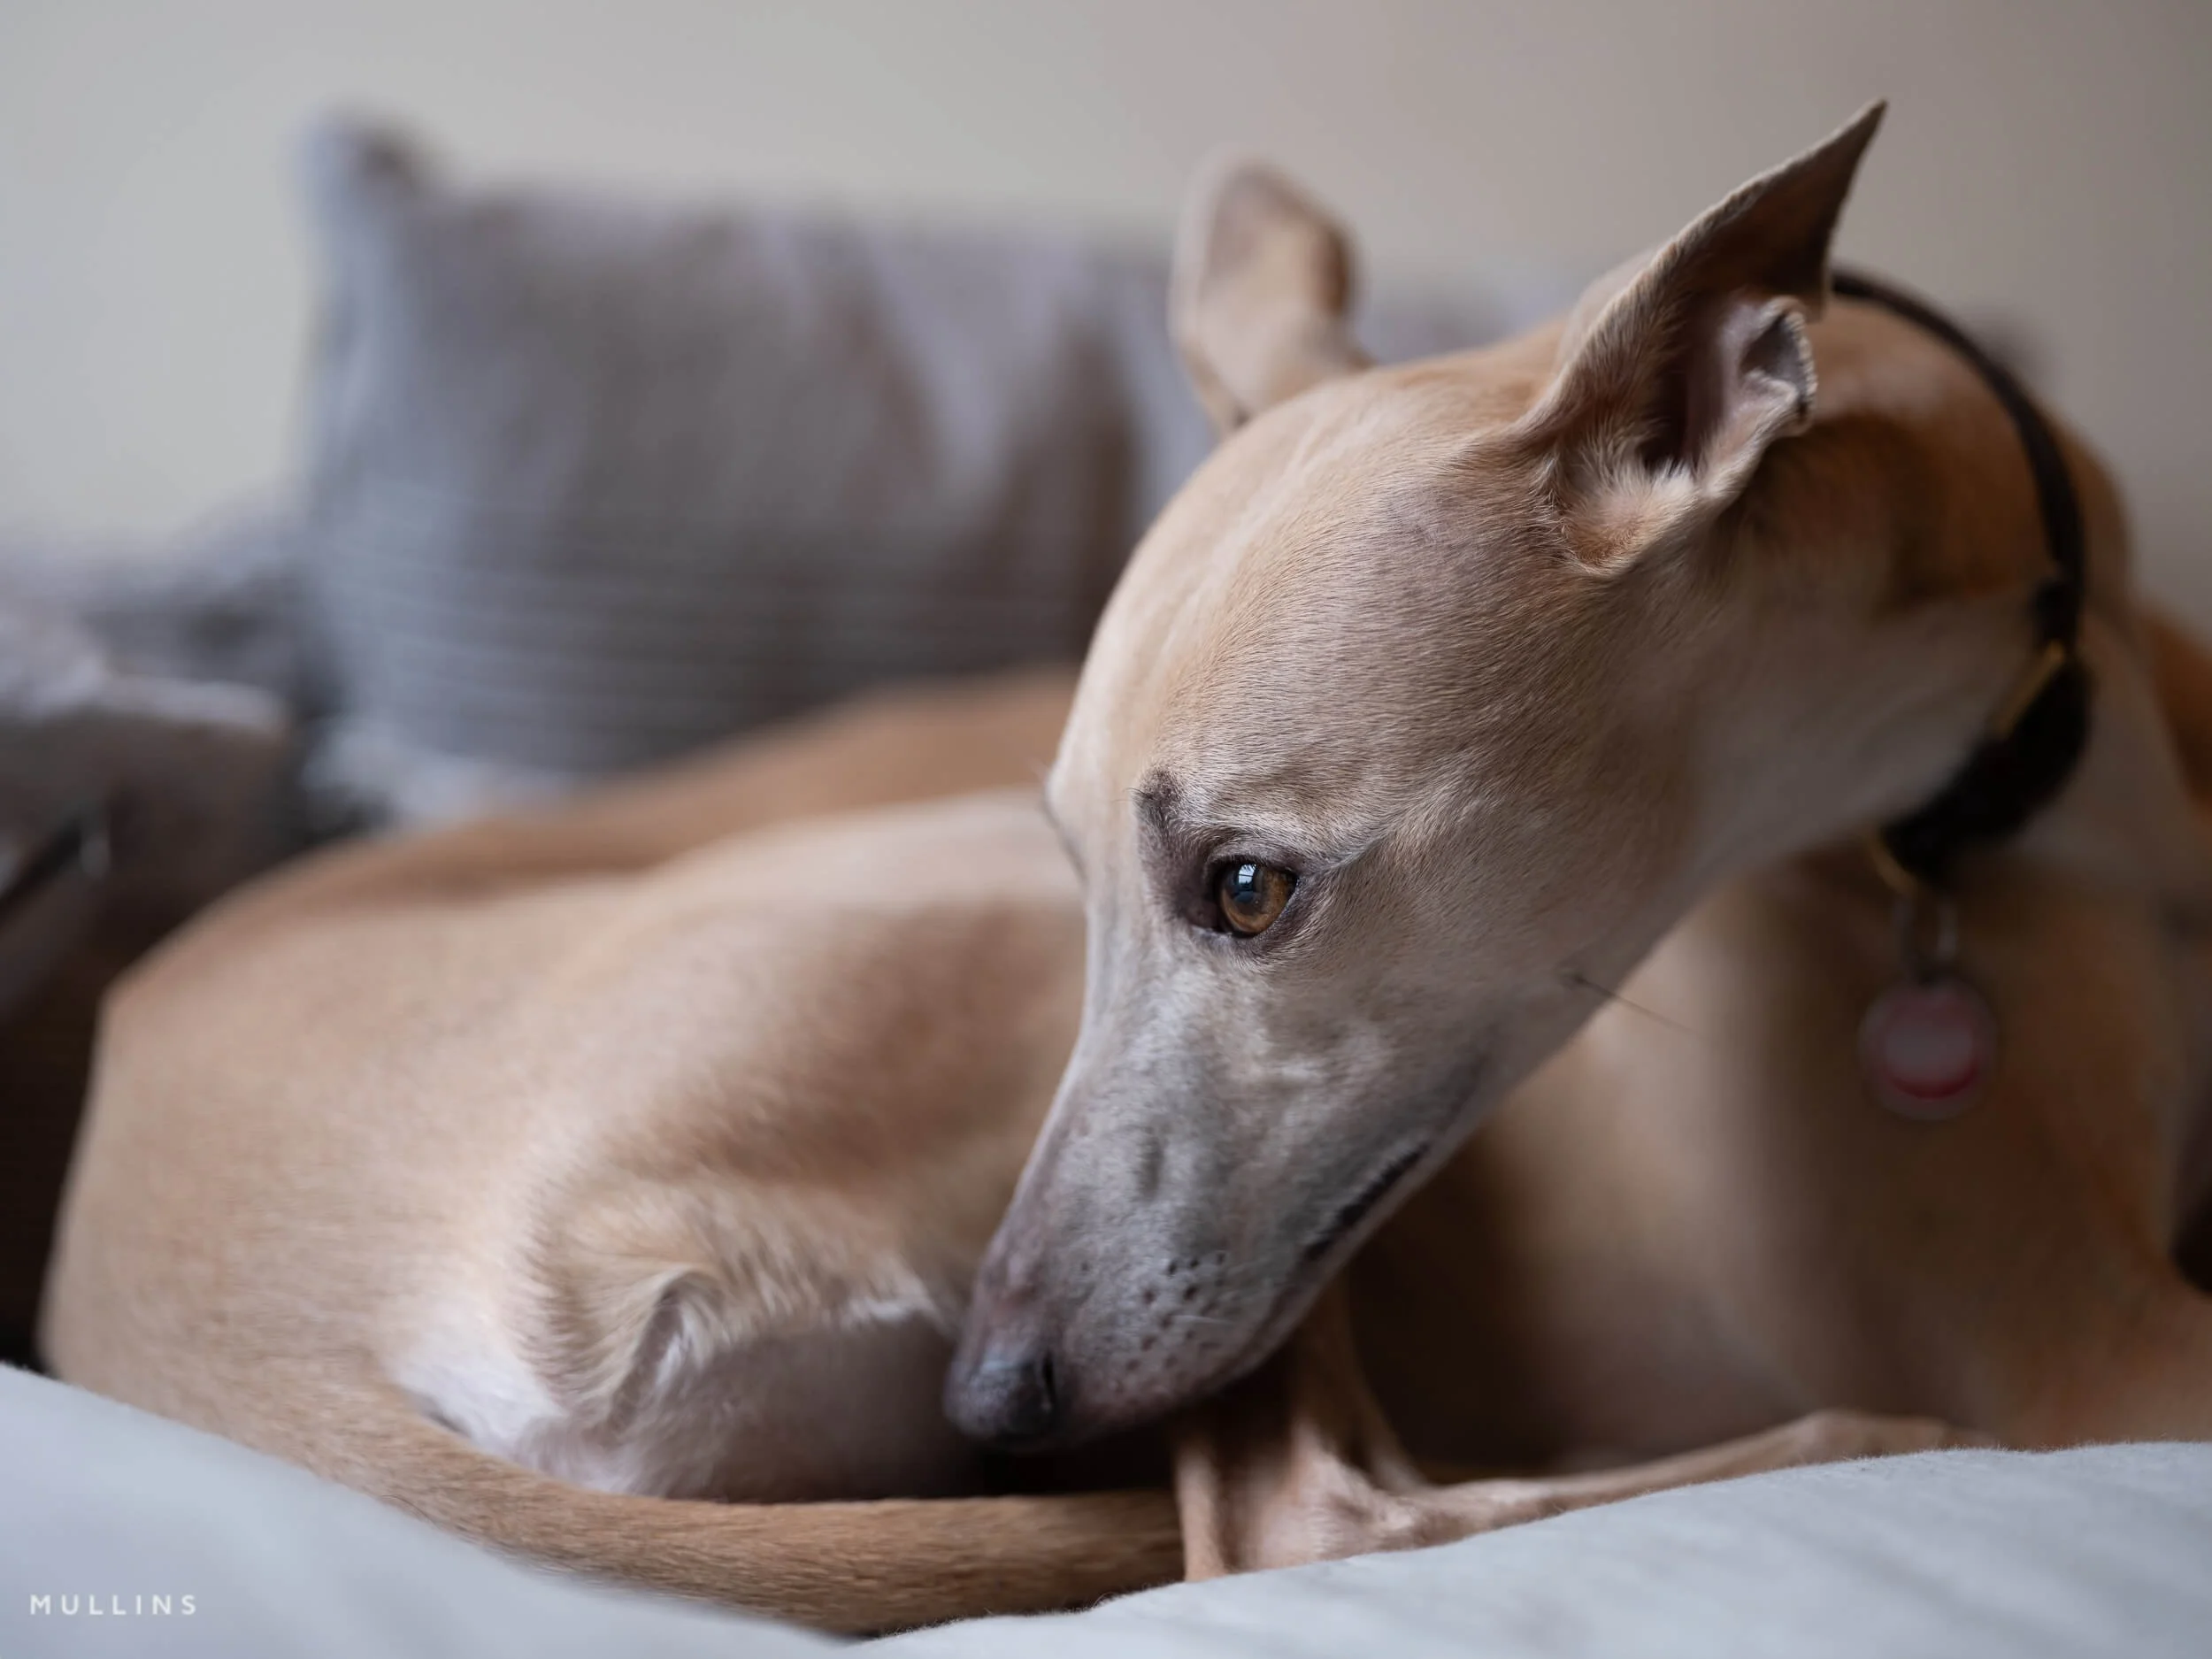
 Image 1 of 5
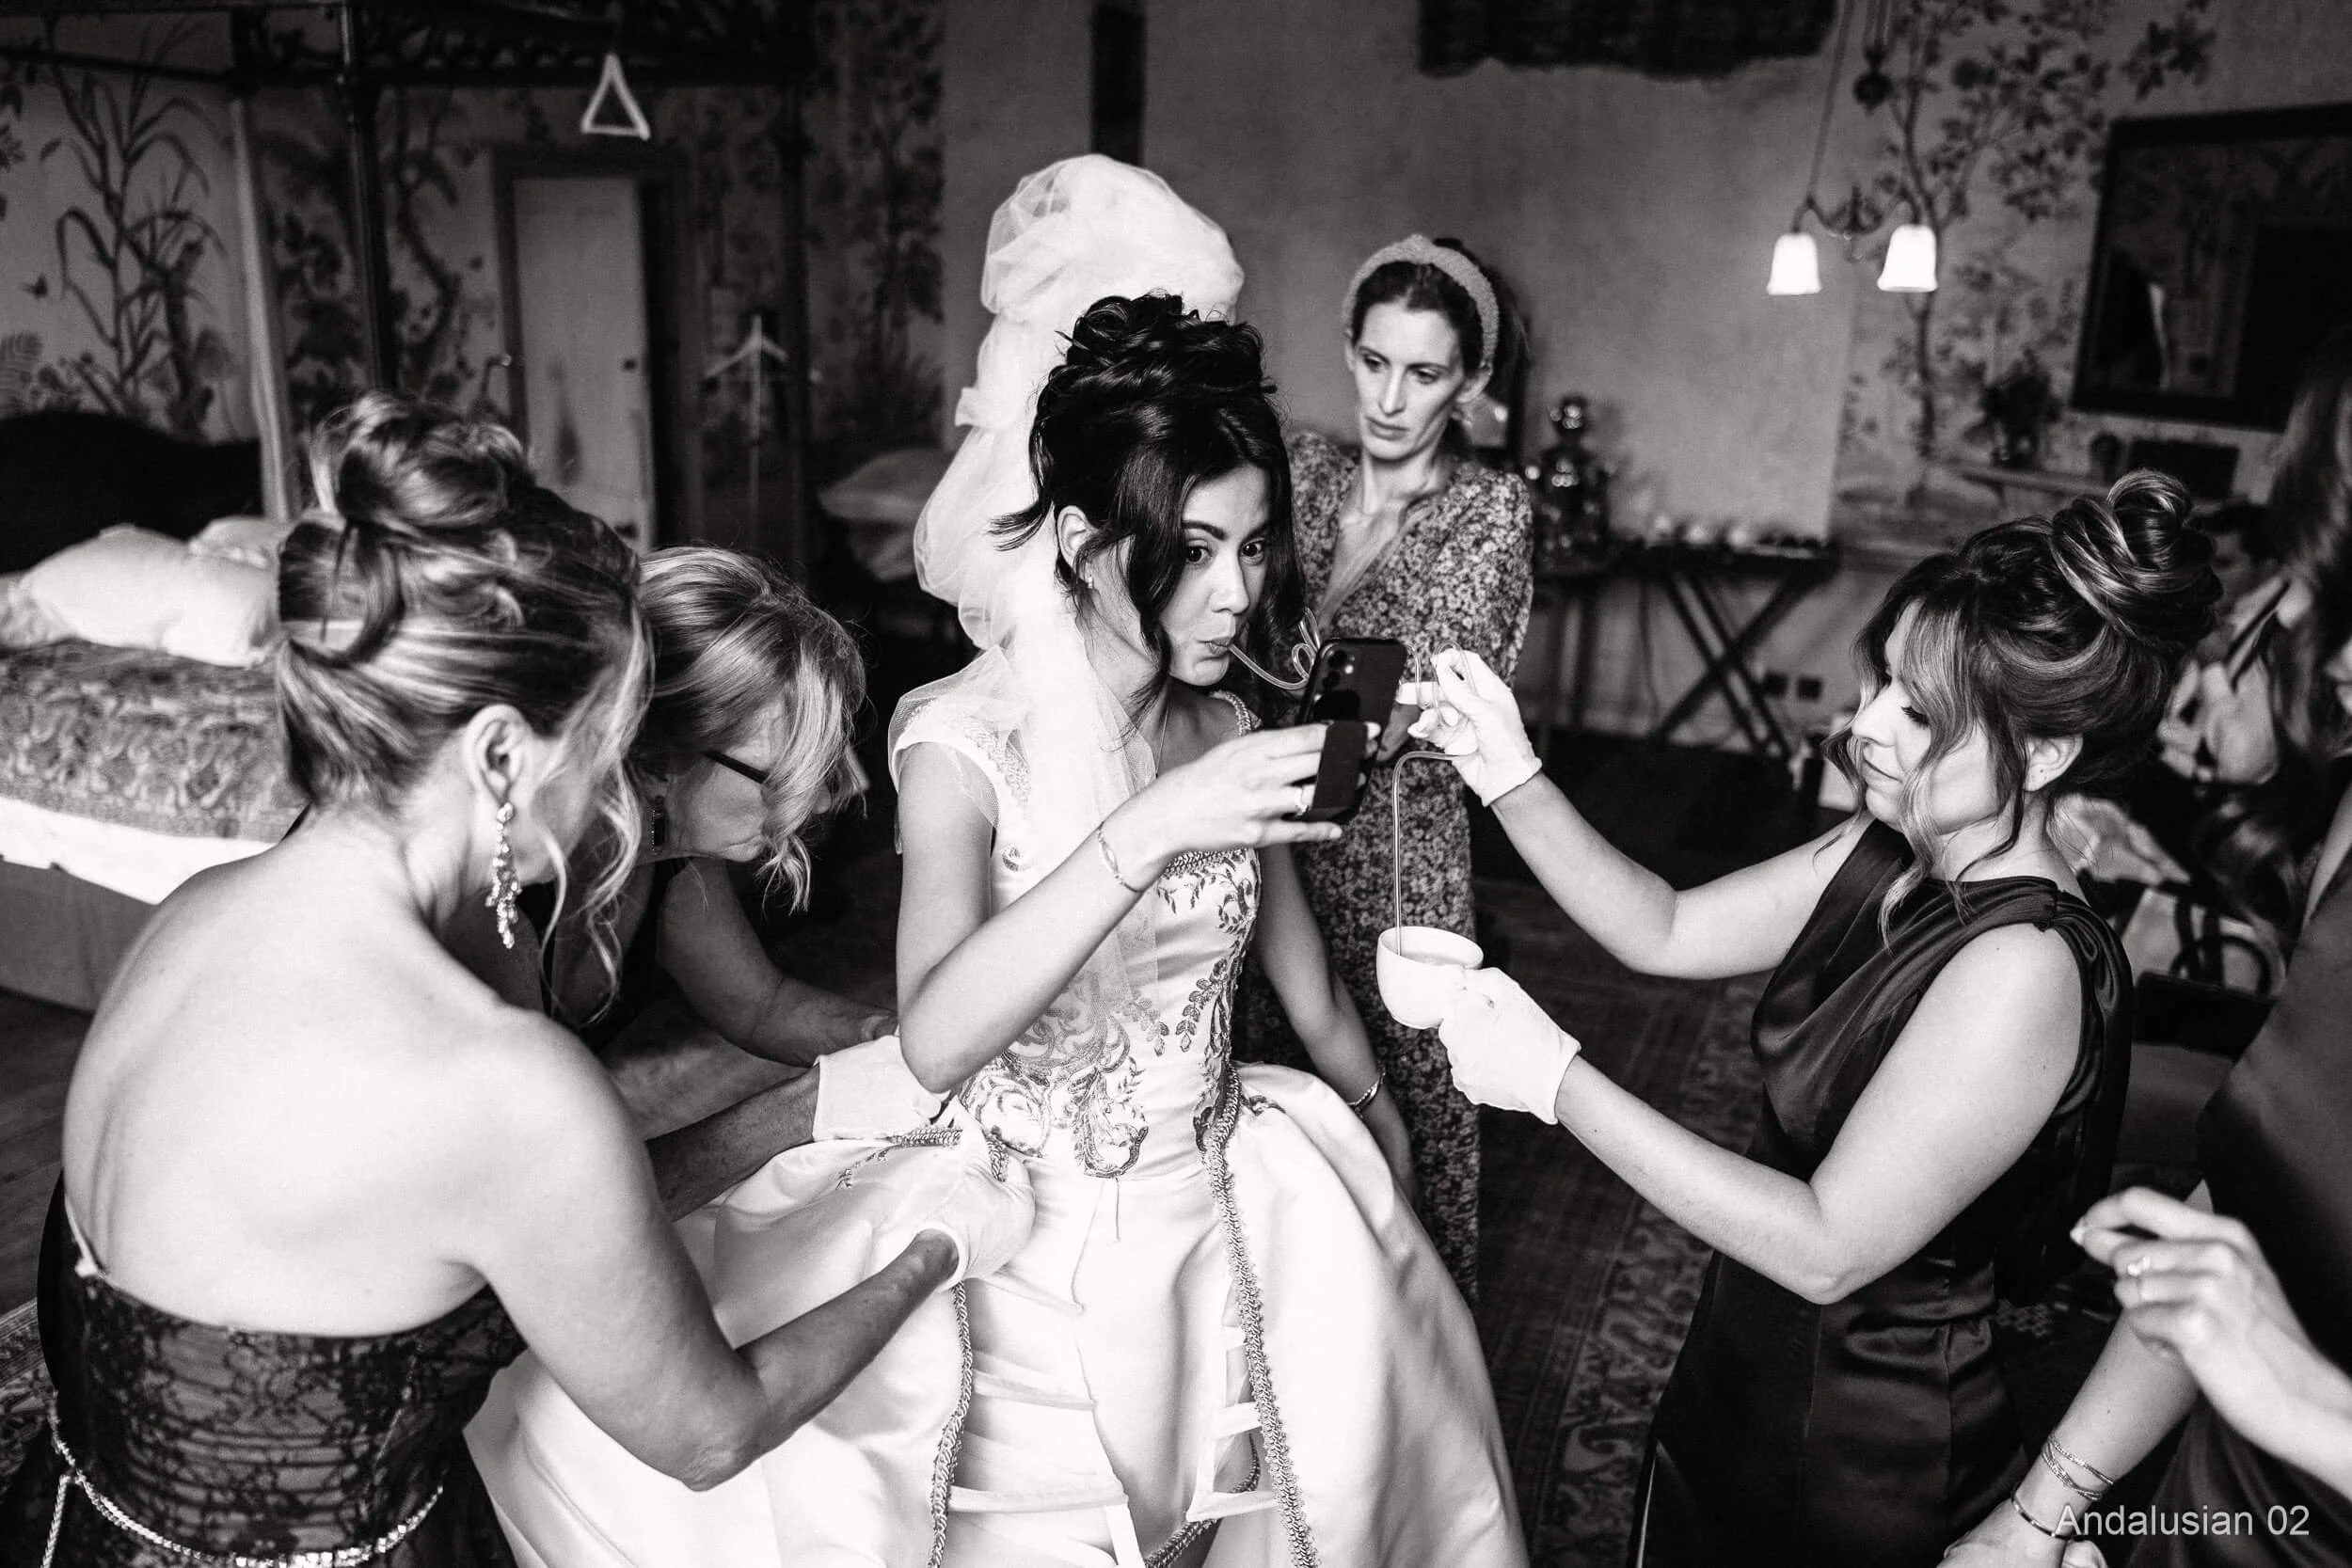
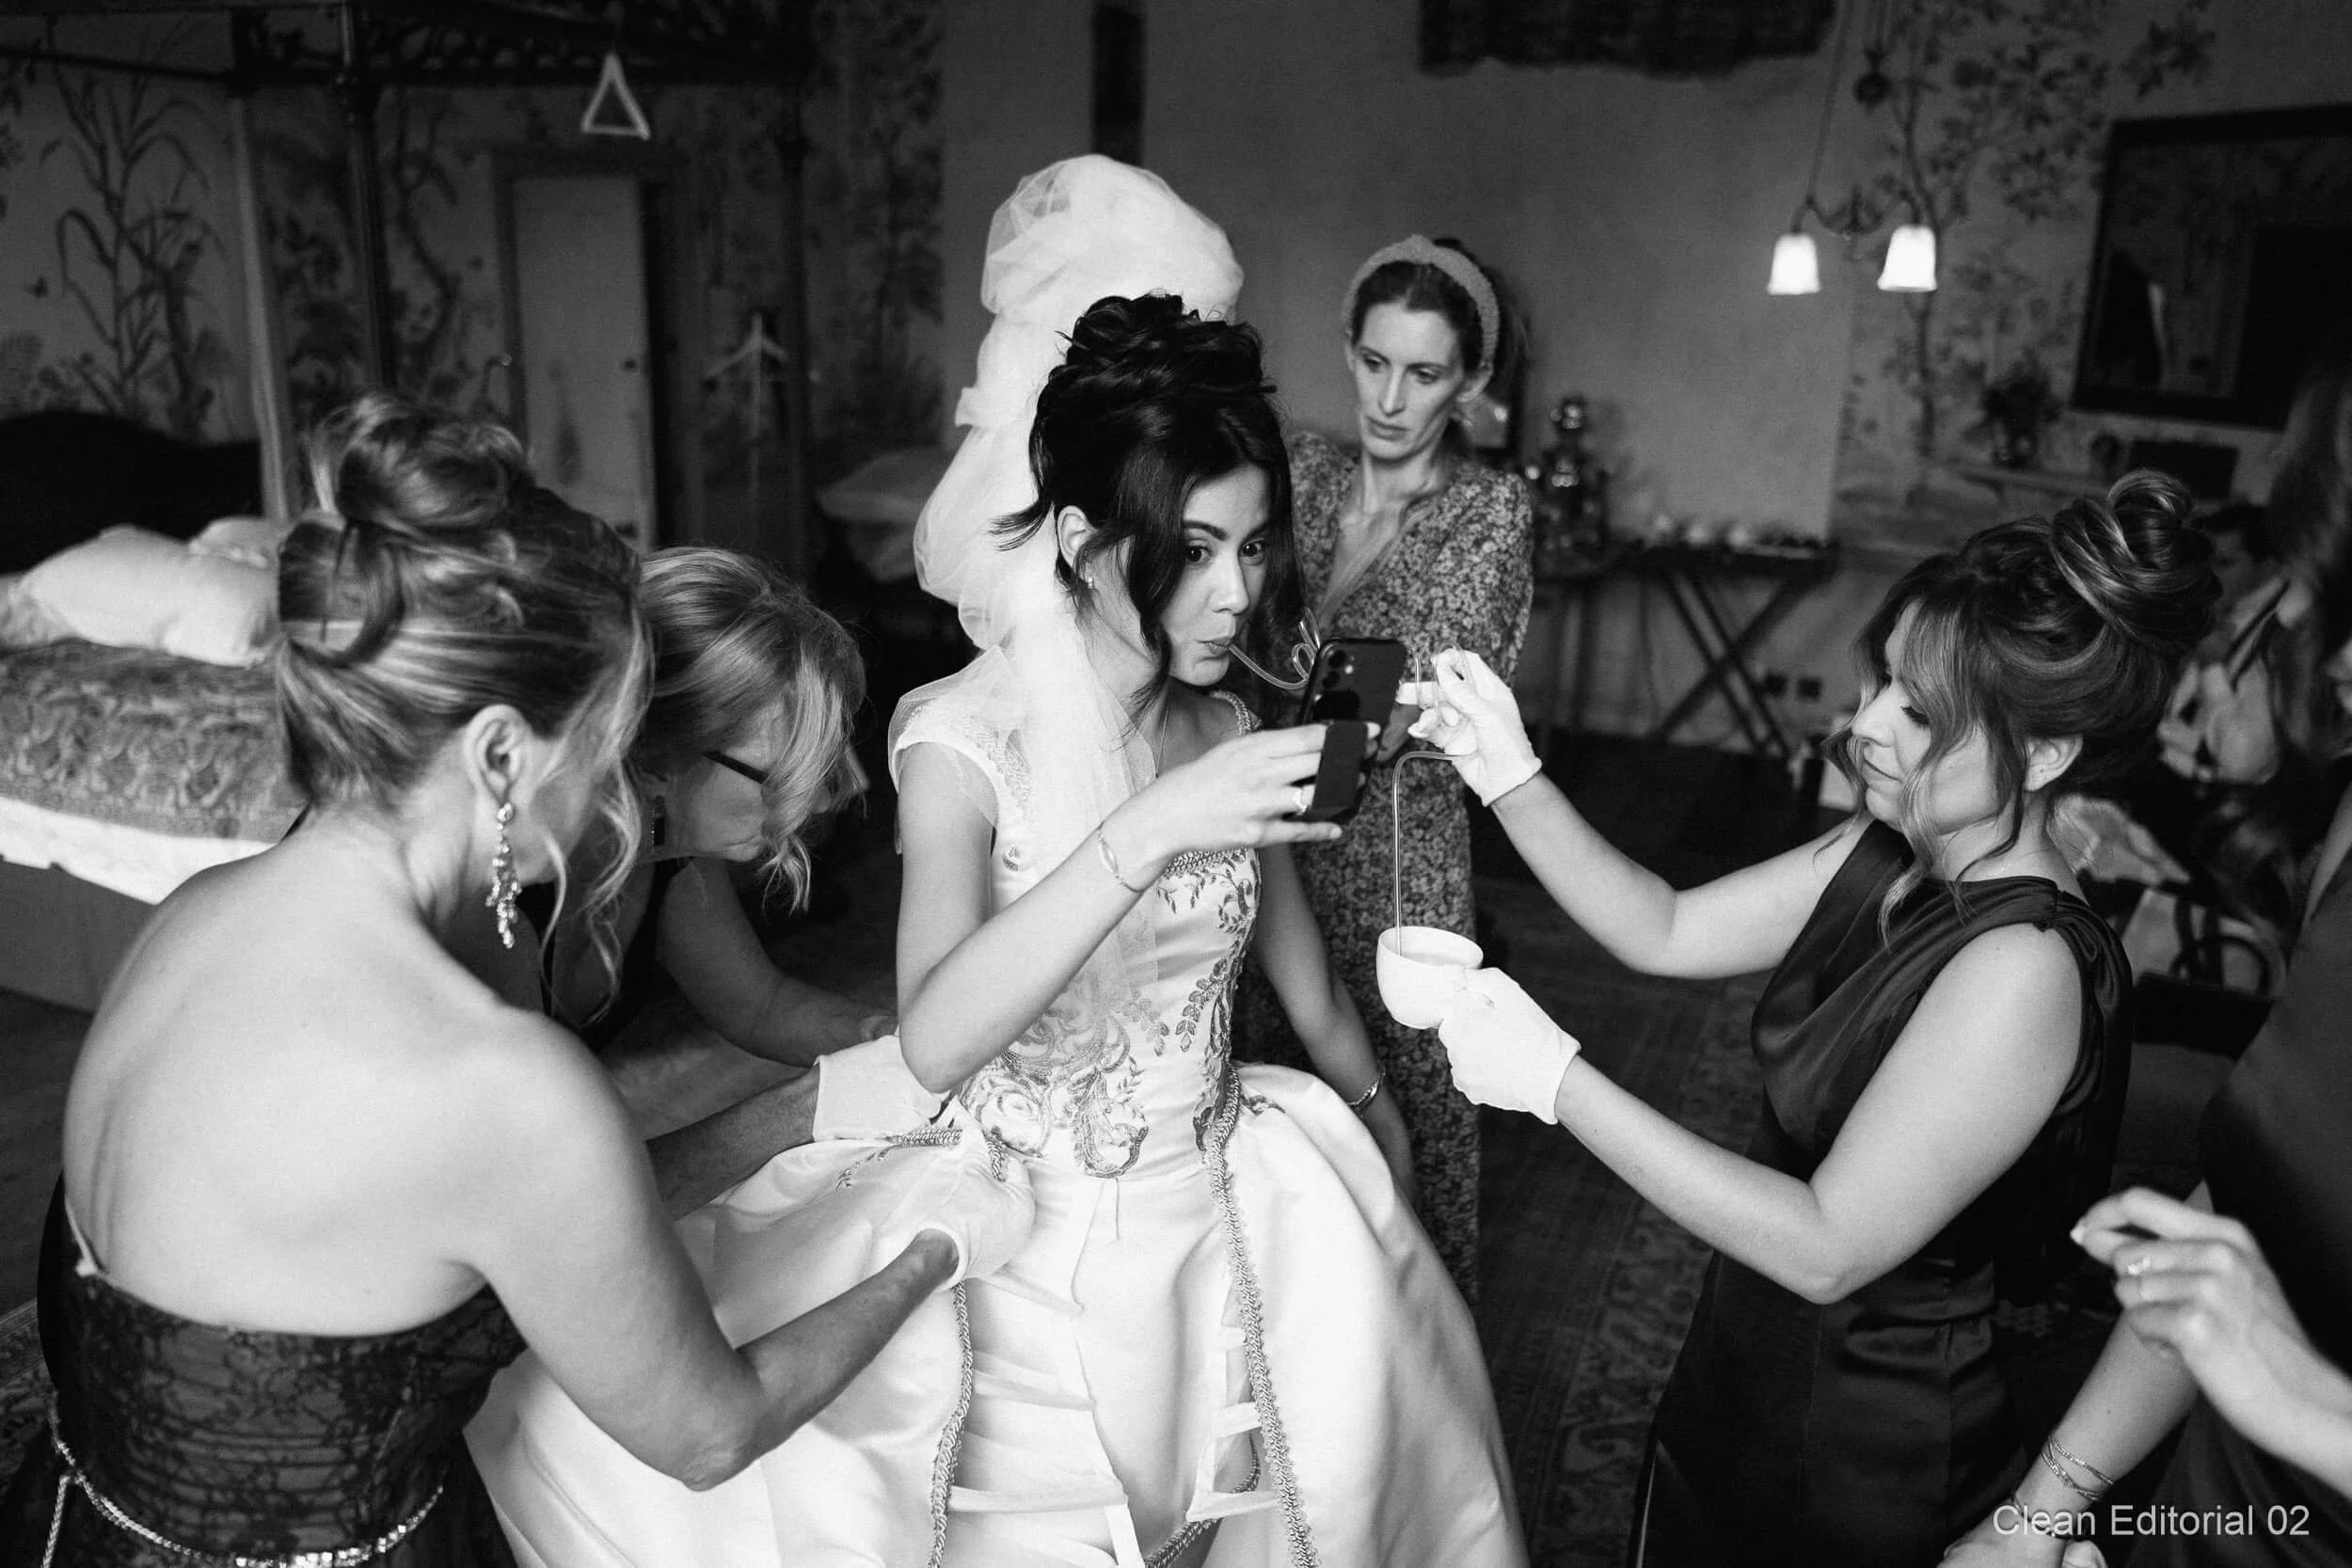
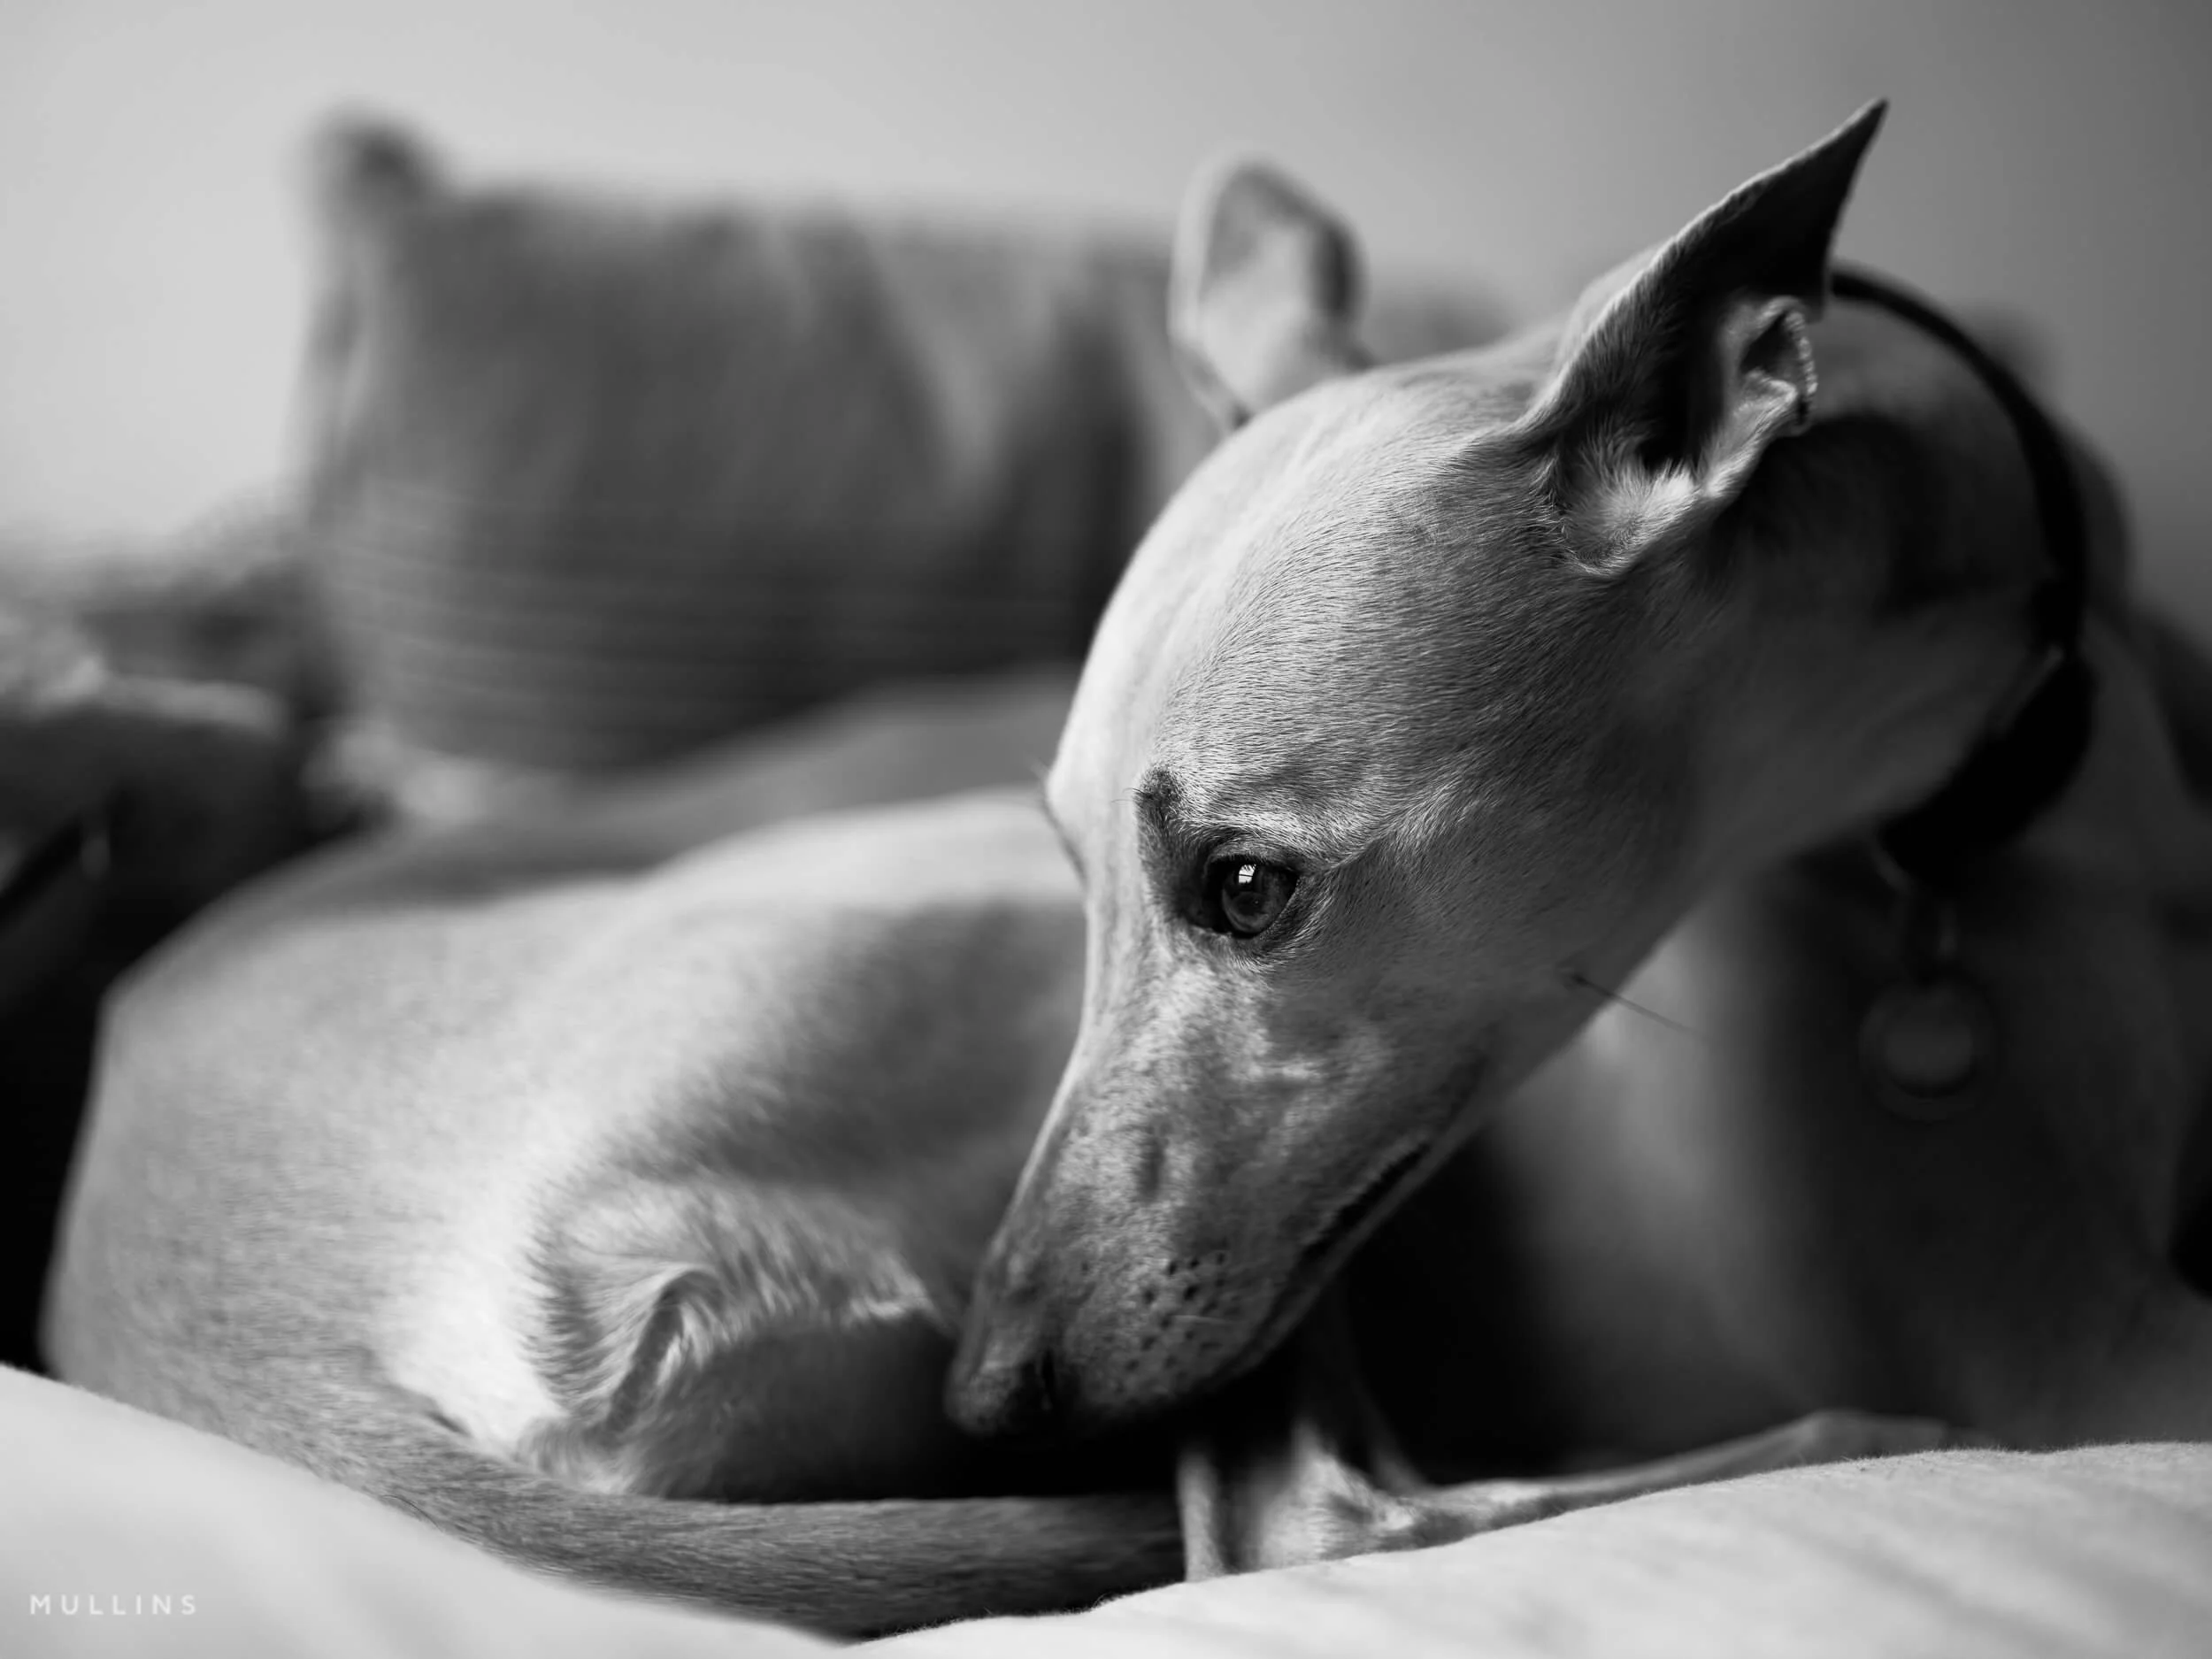
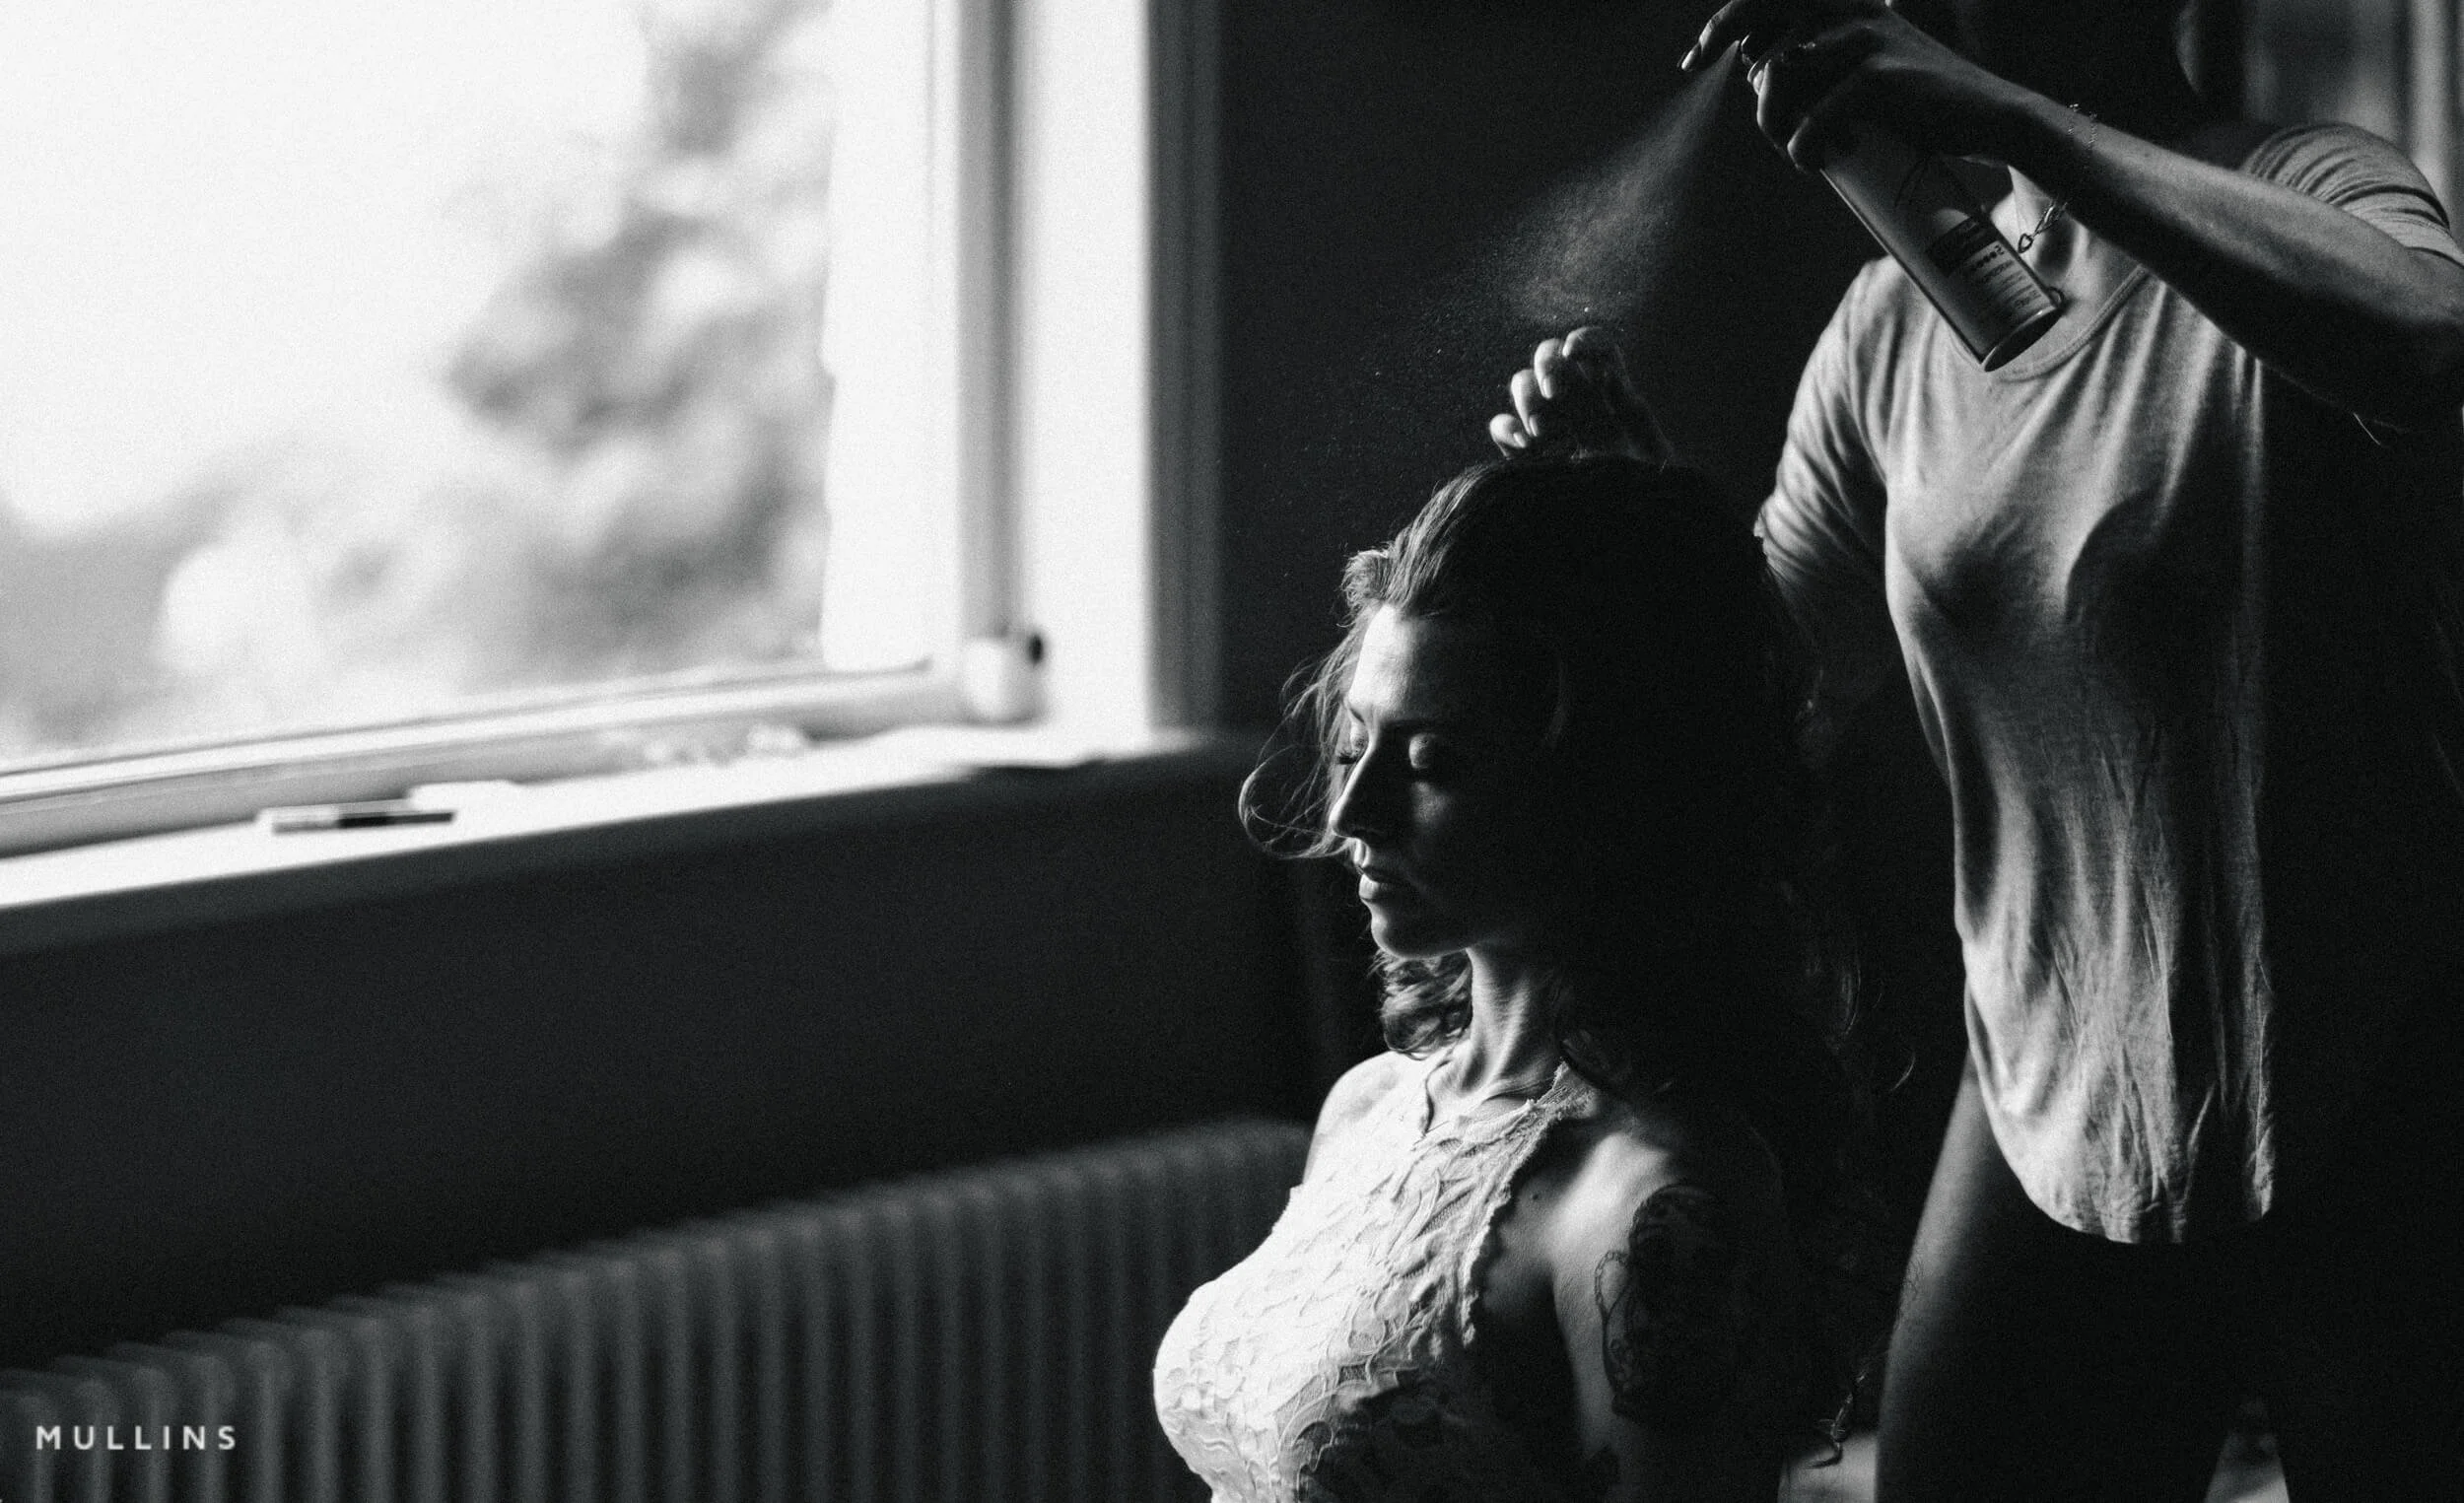 Image 2 of 5
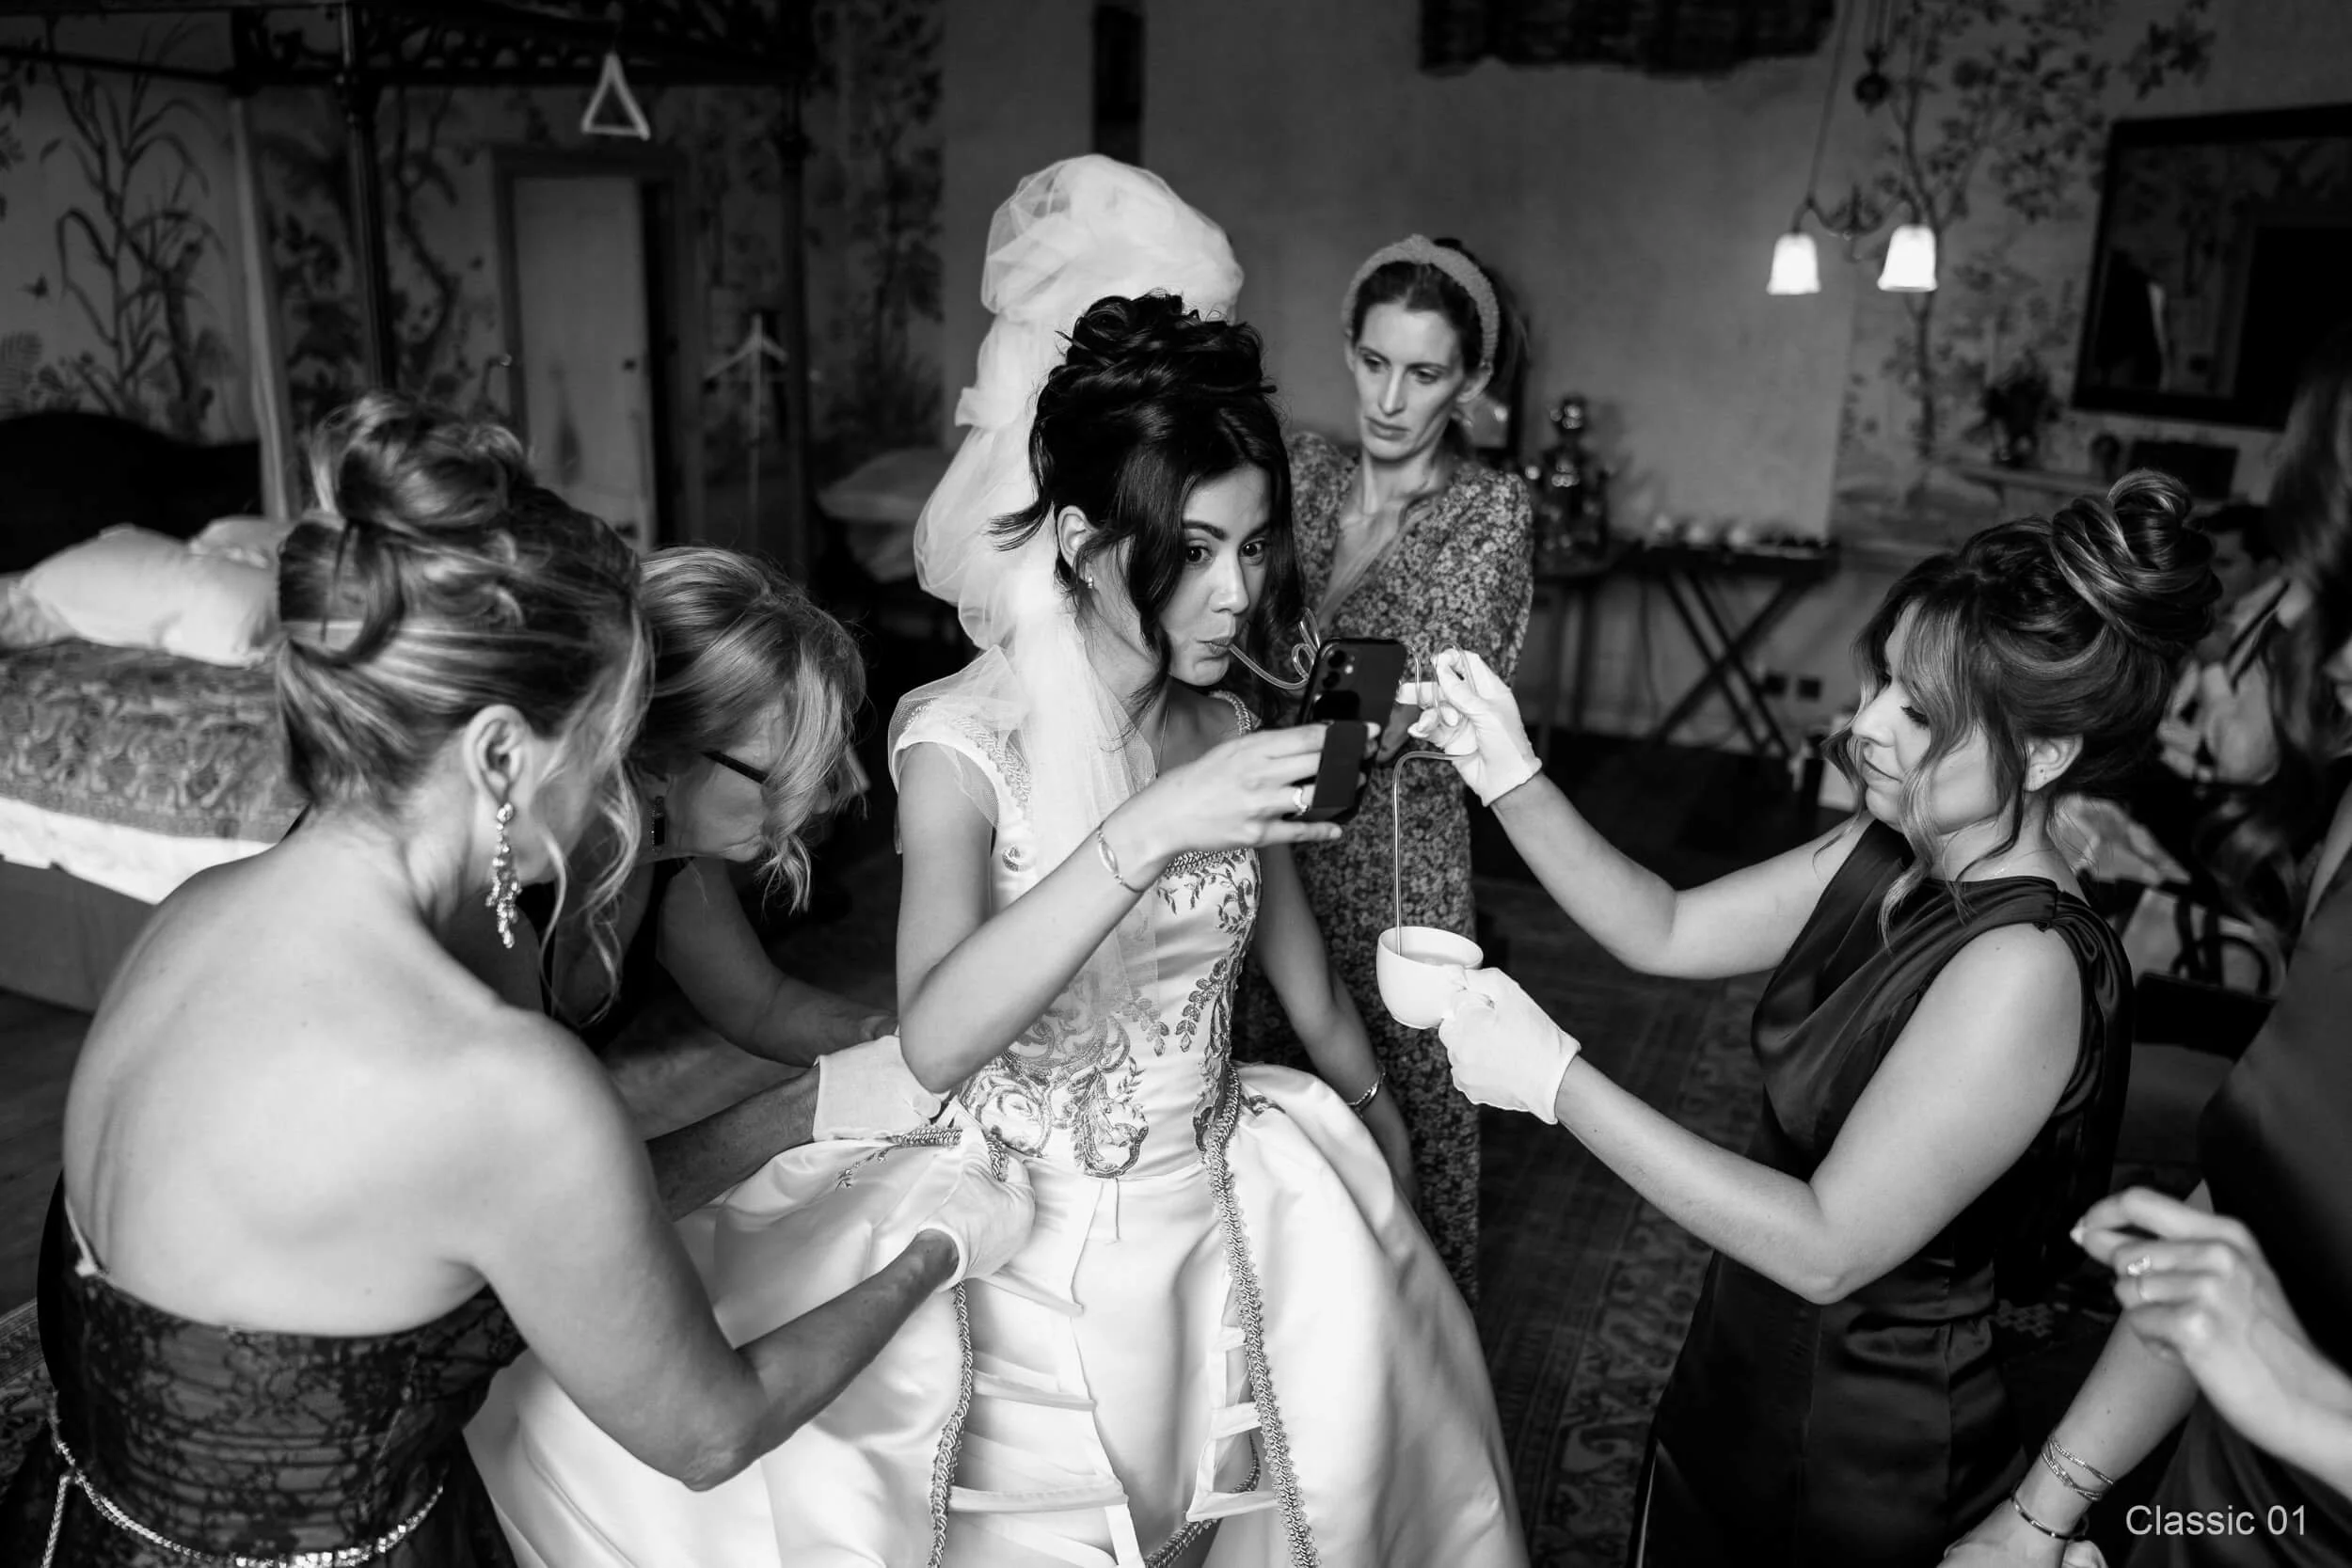
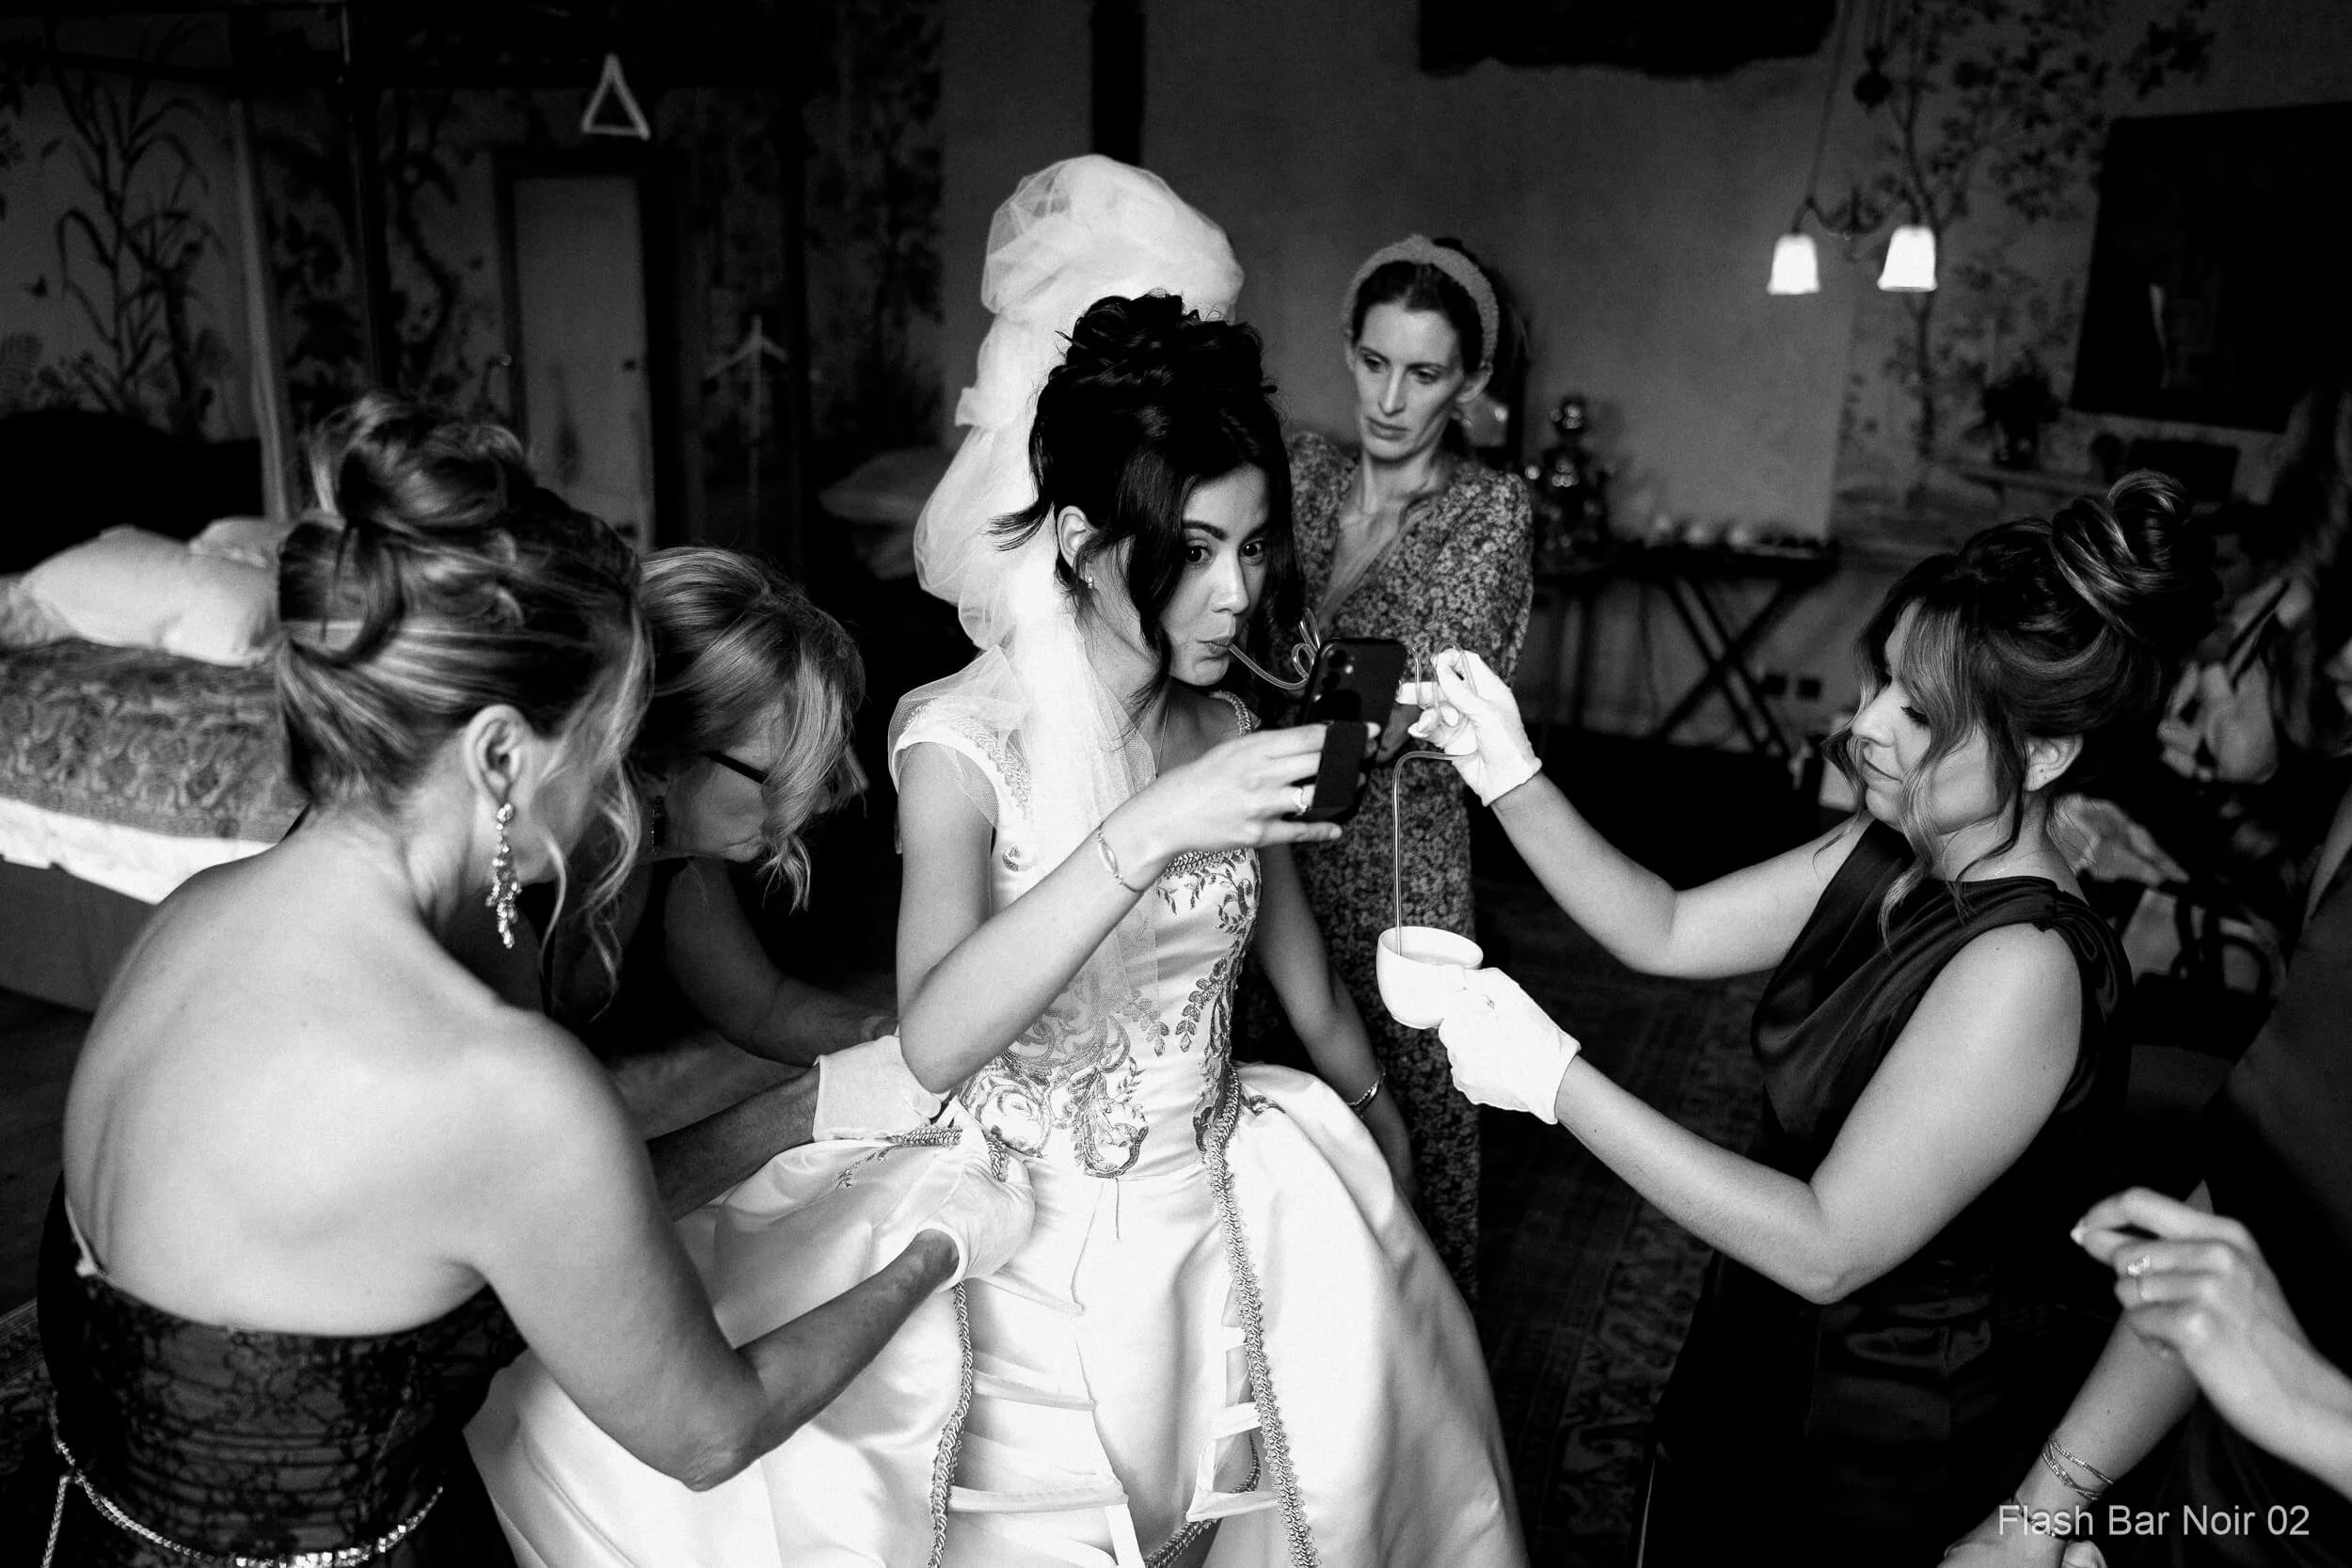
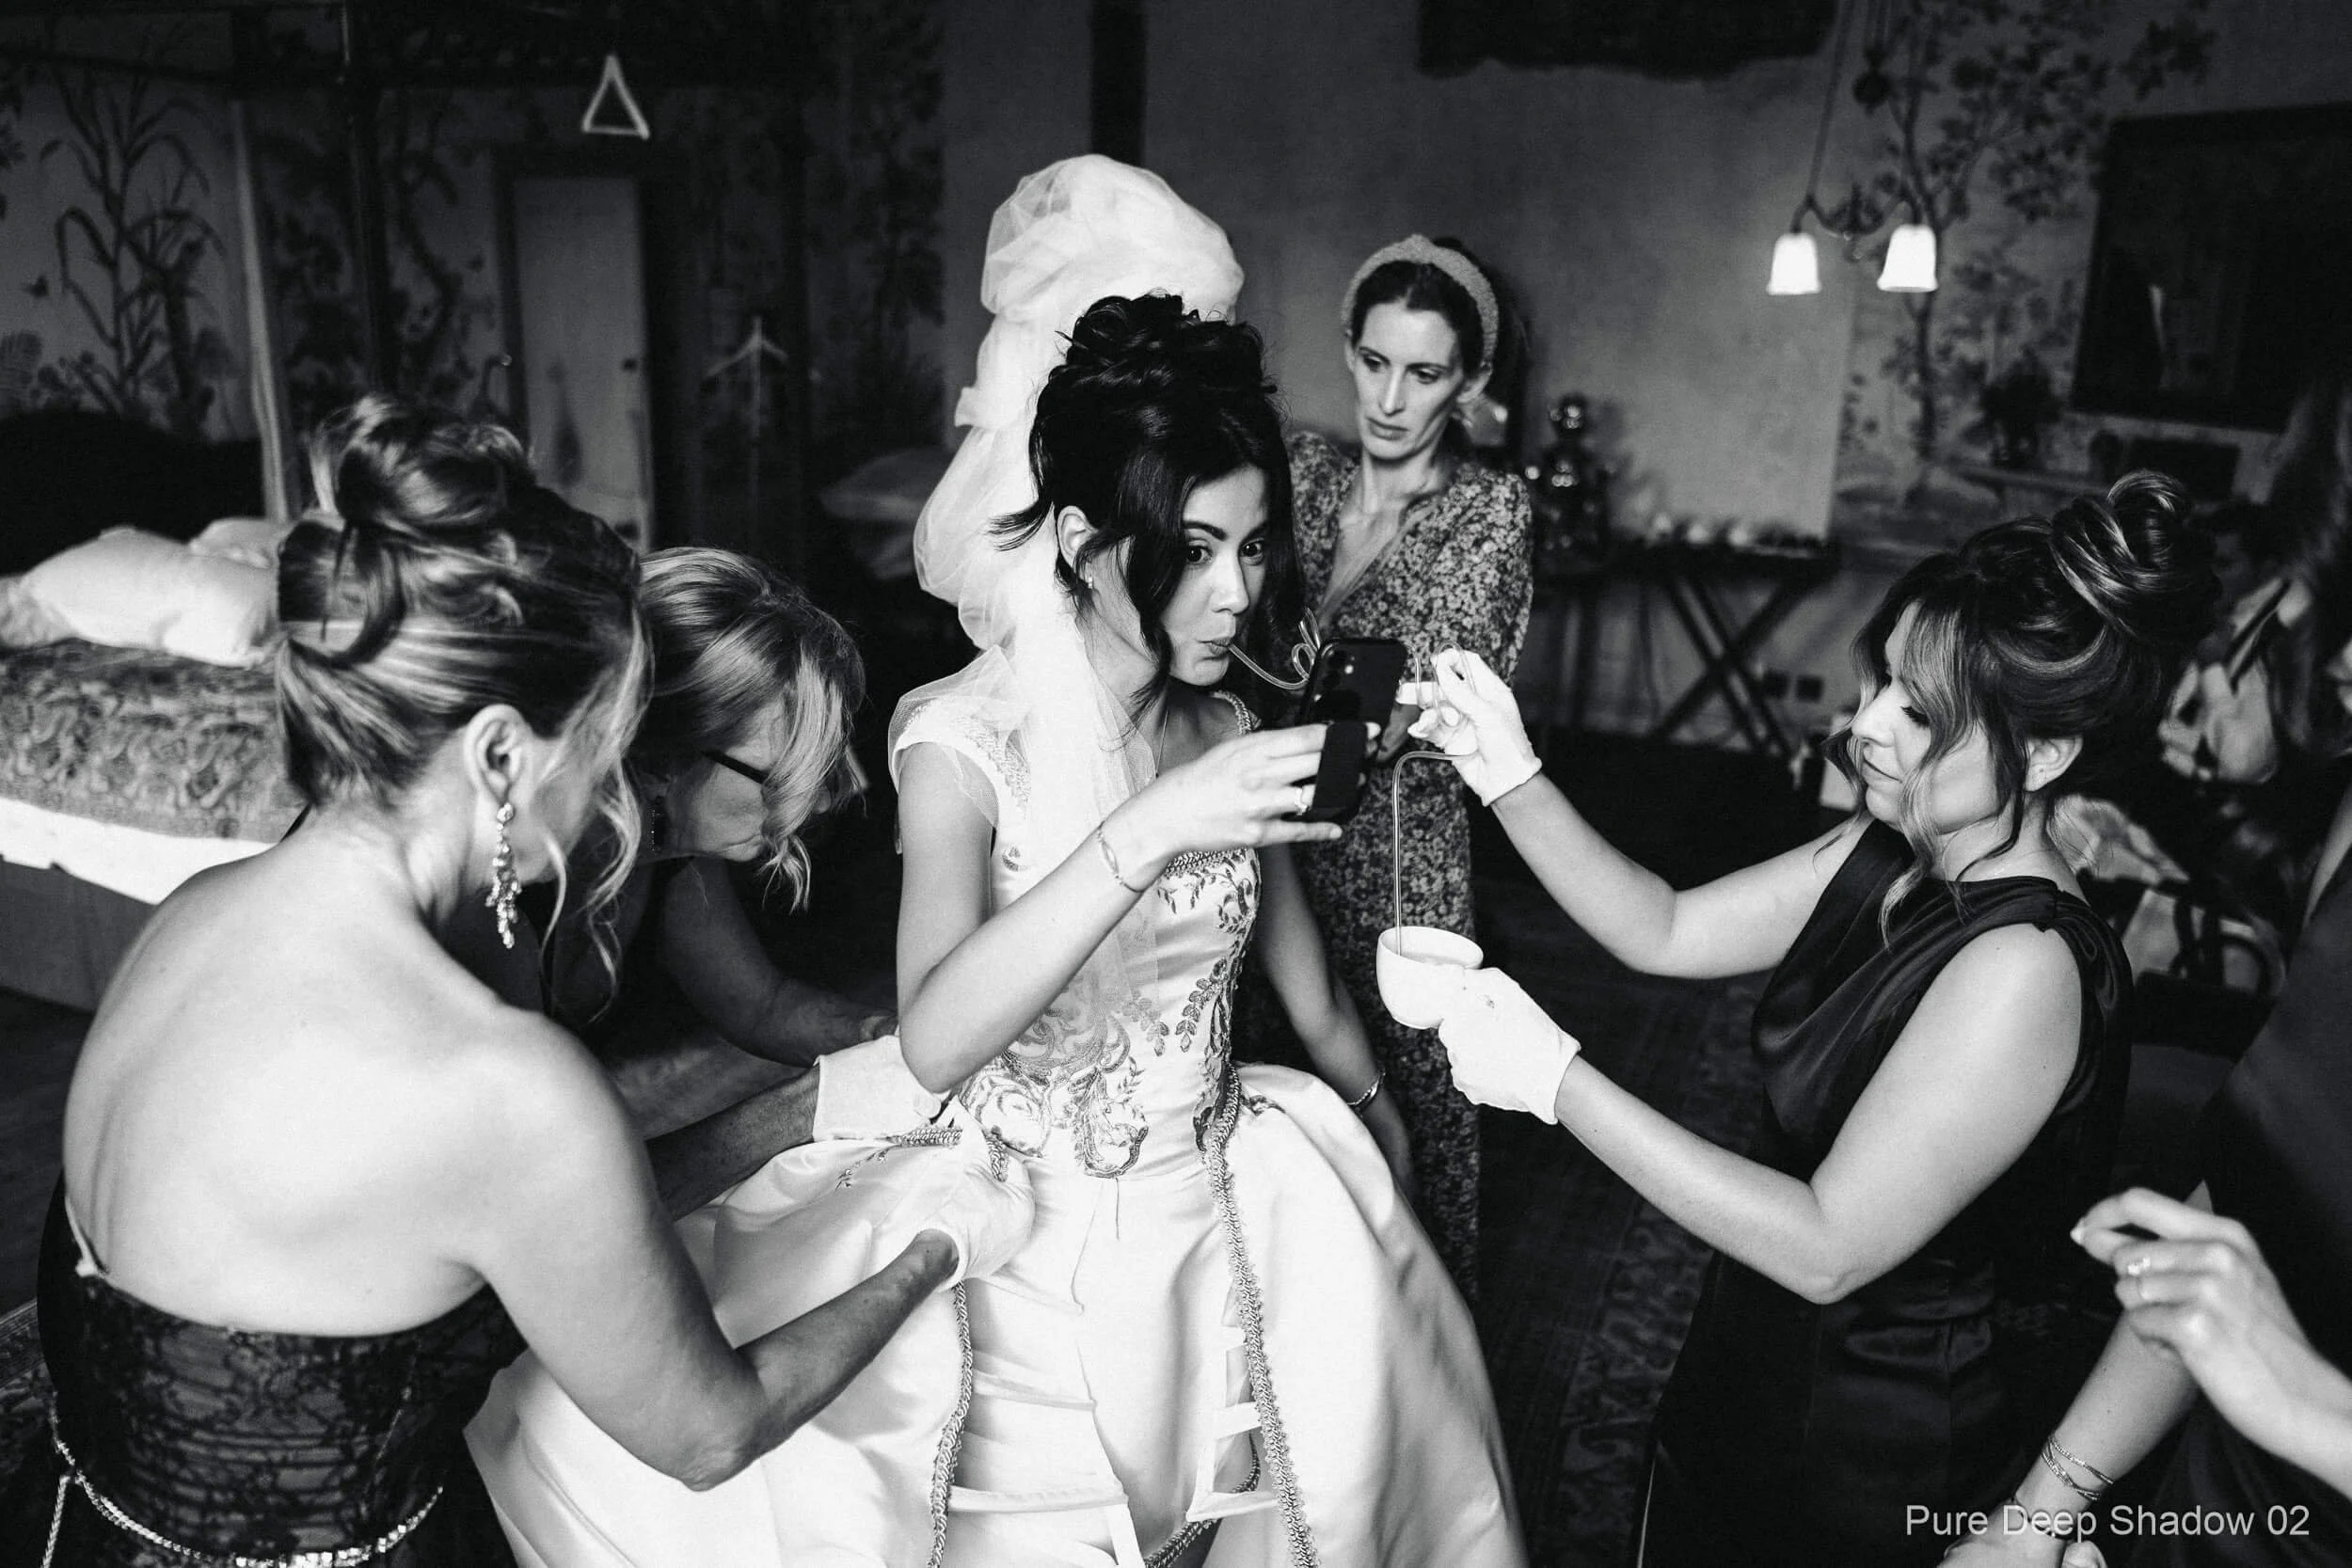
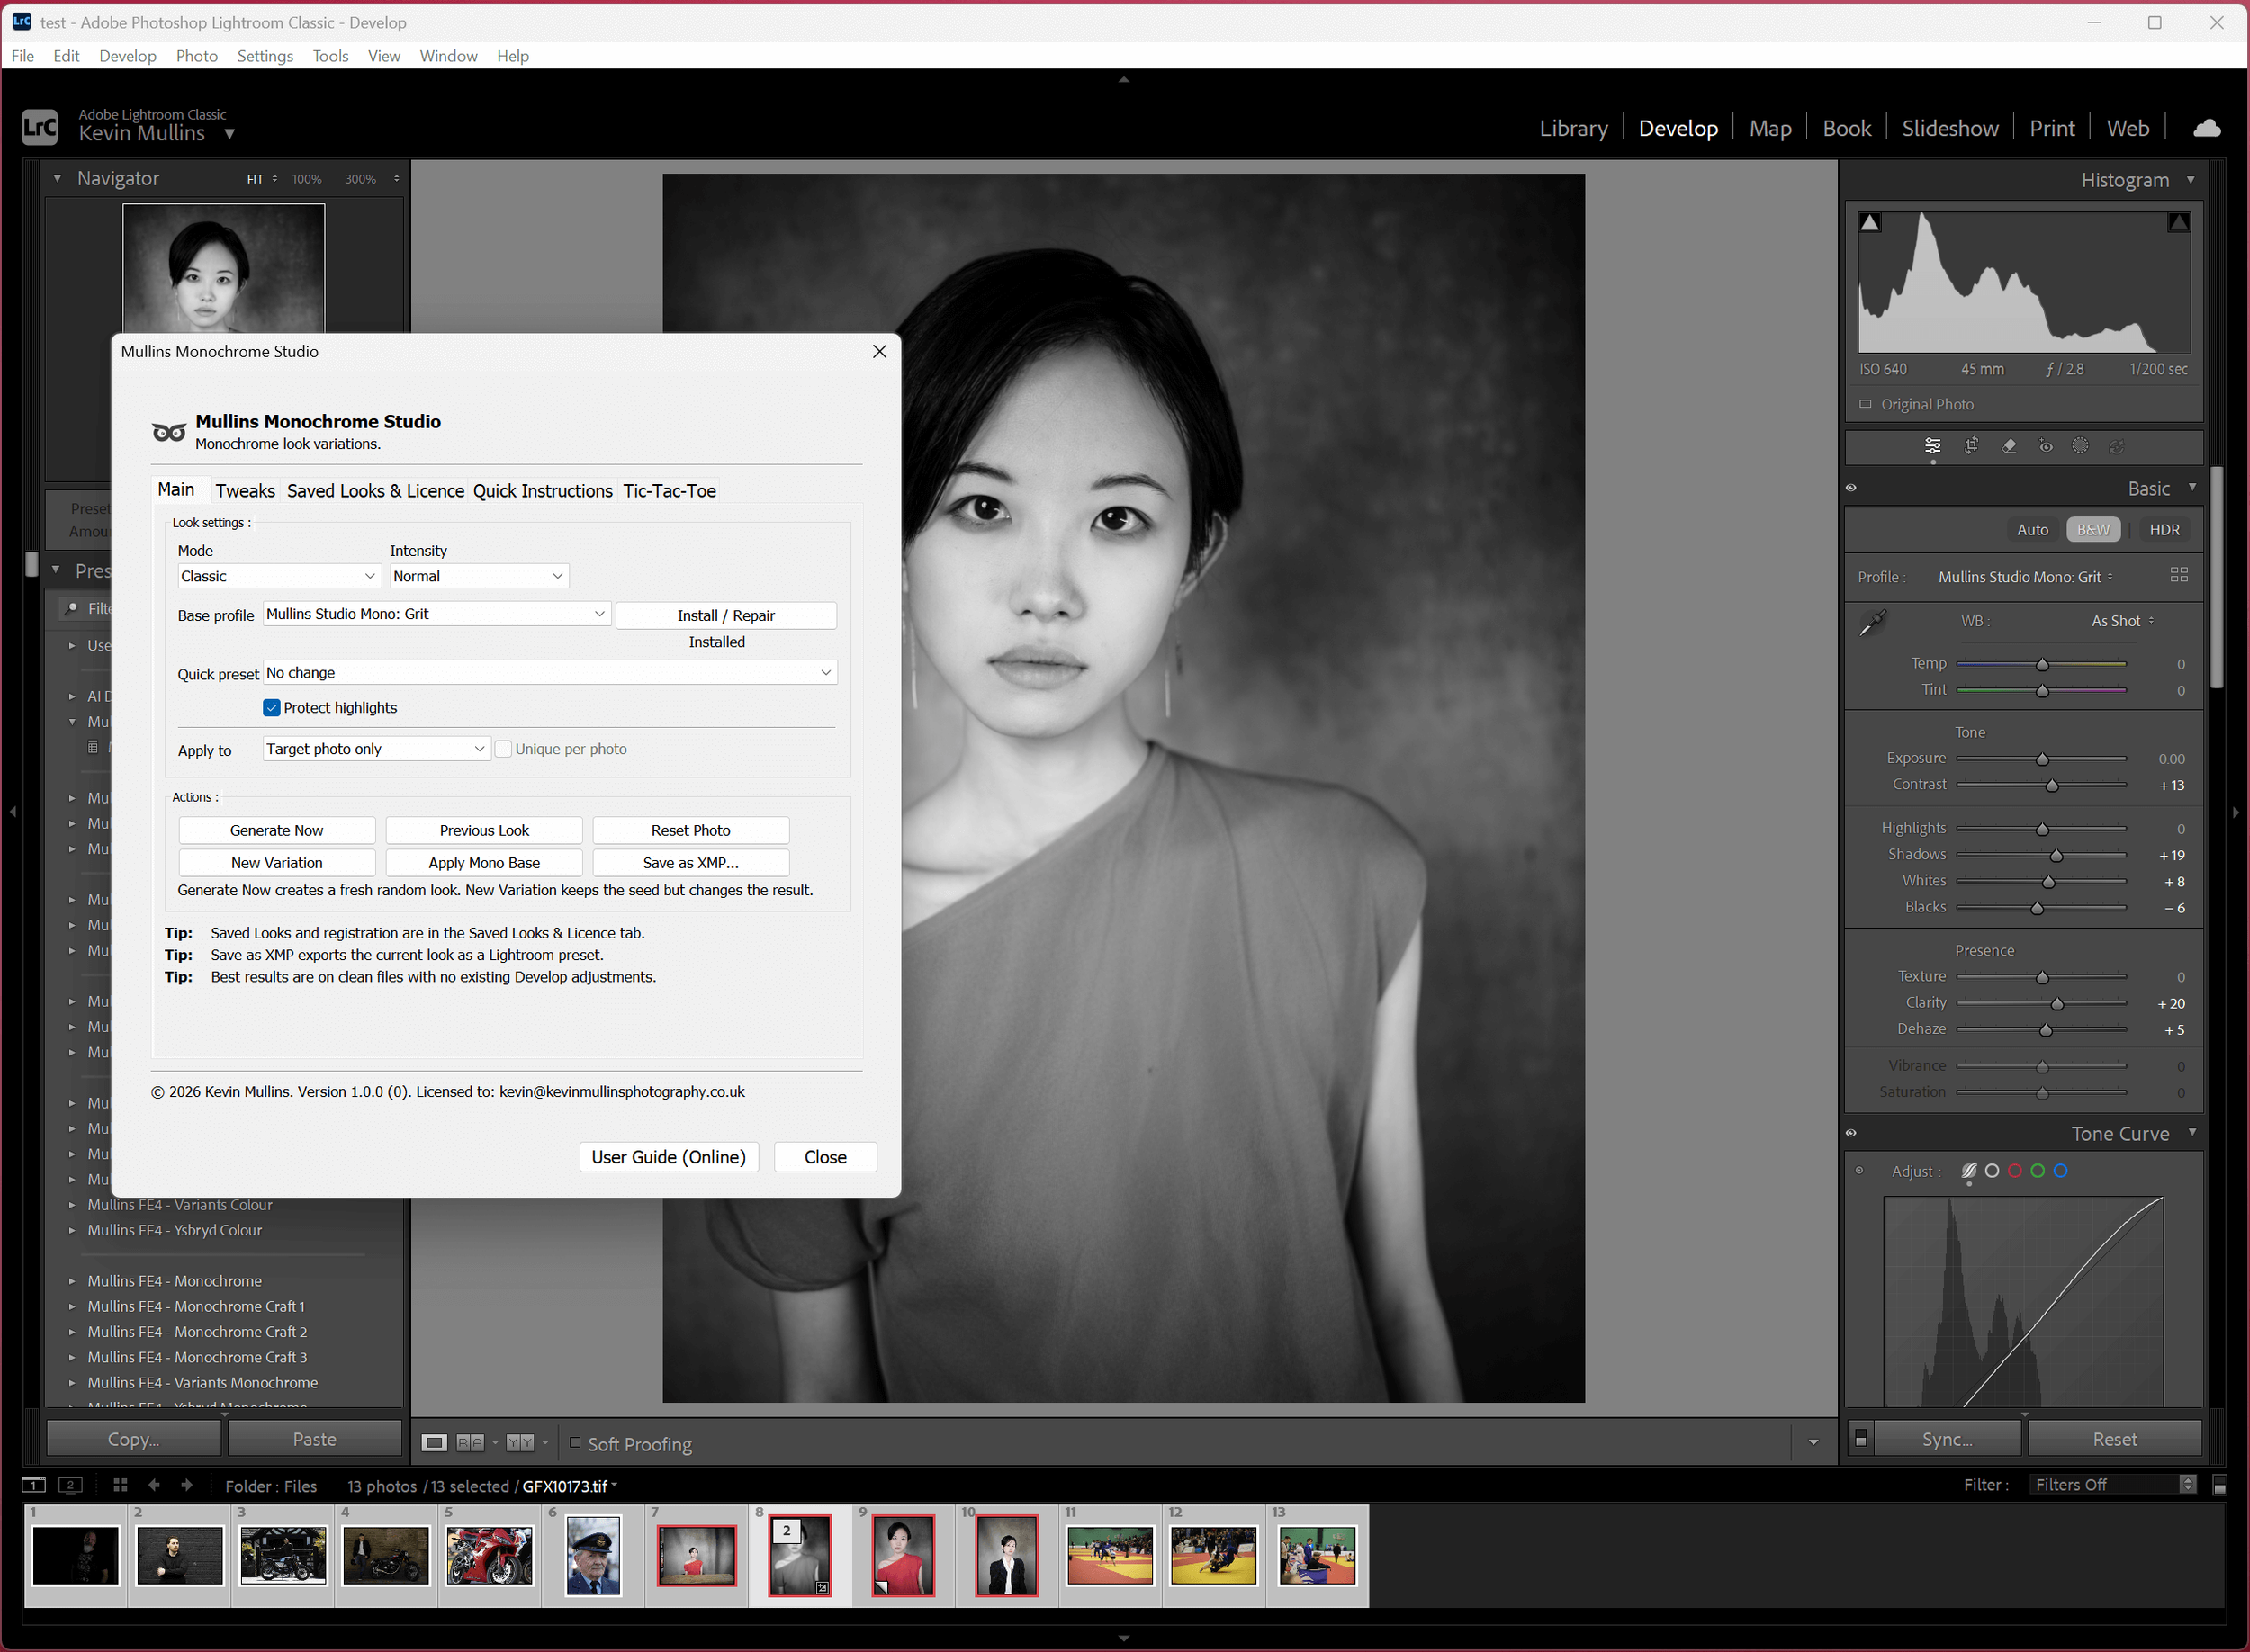
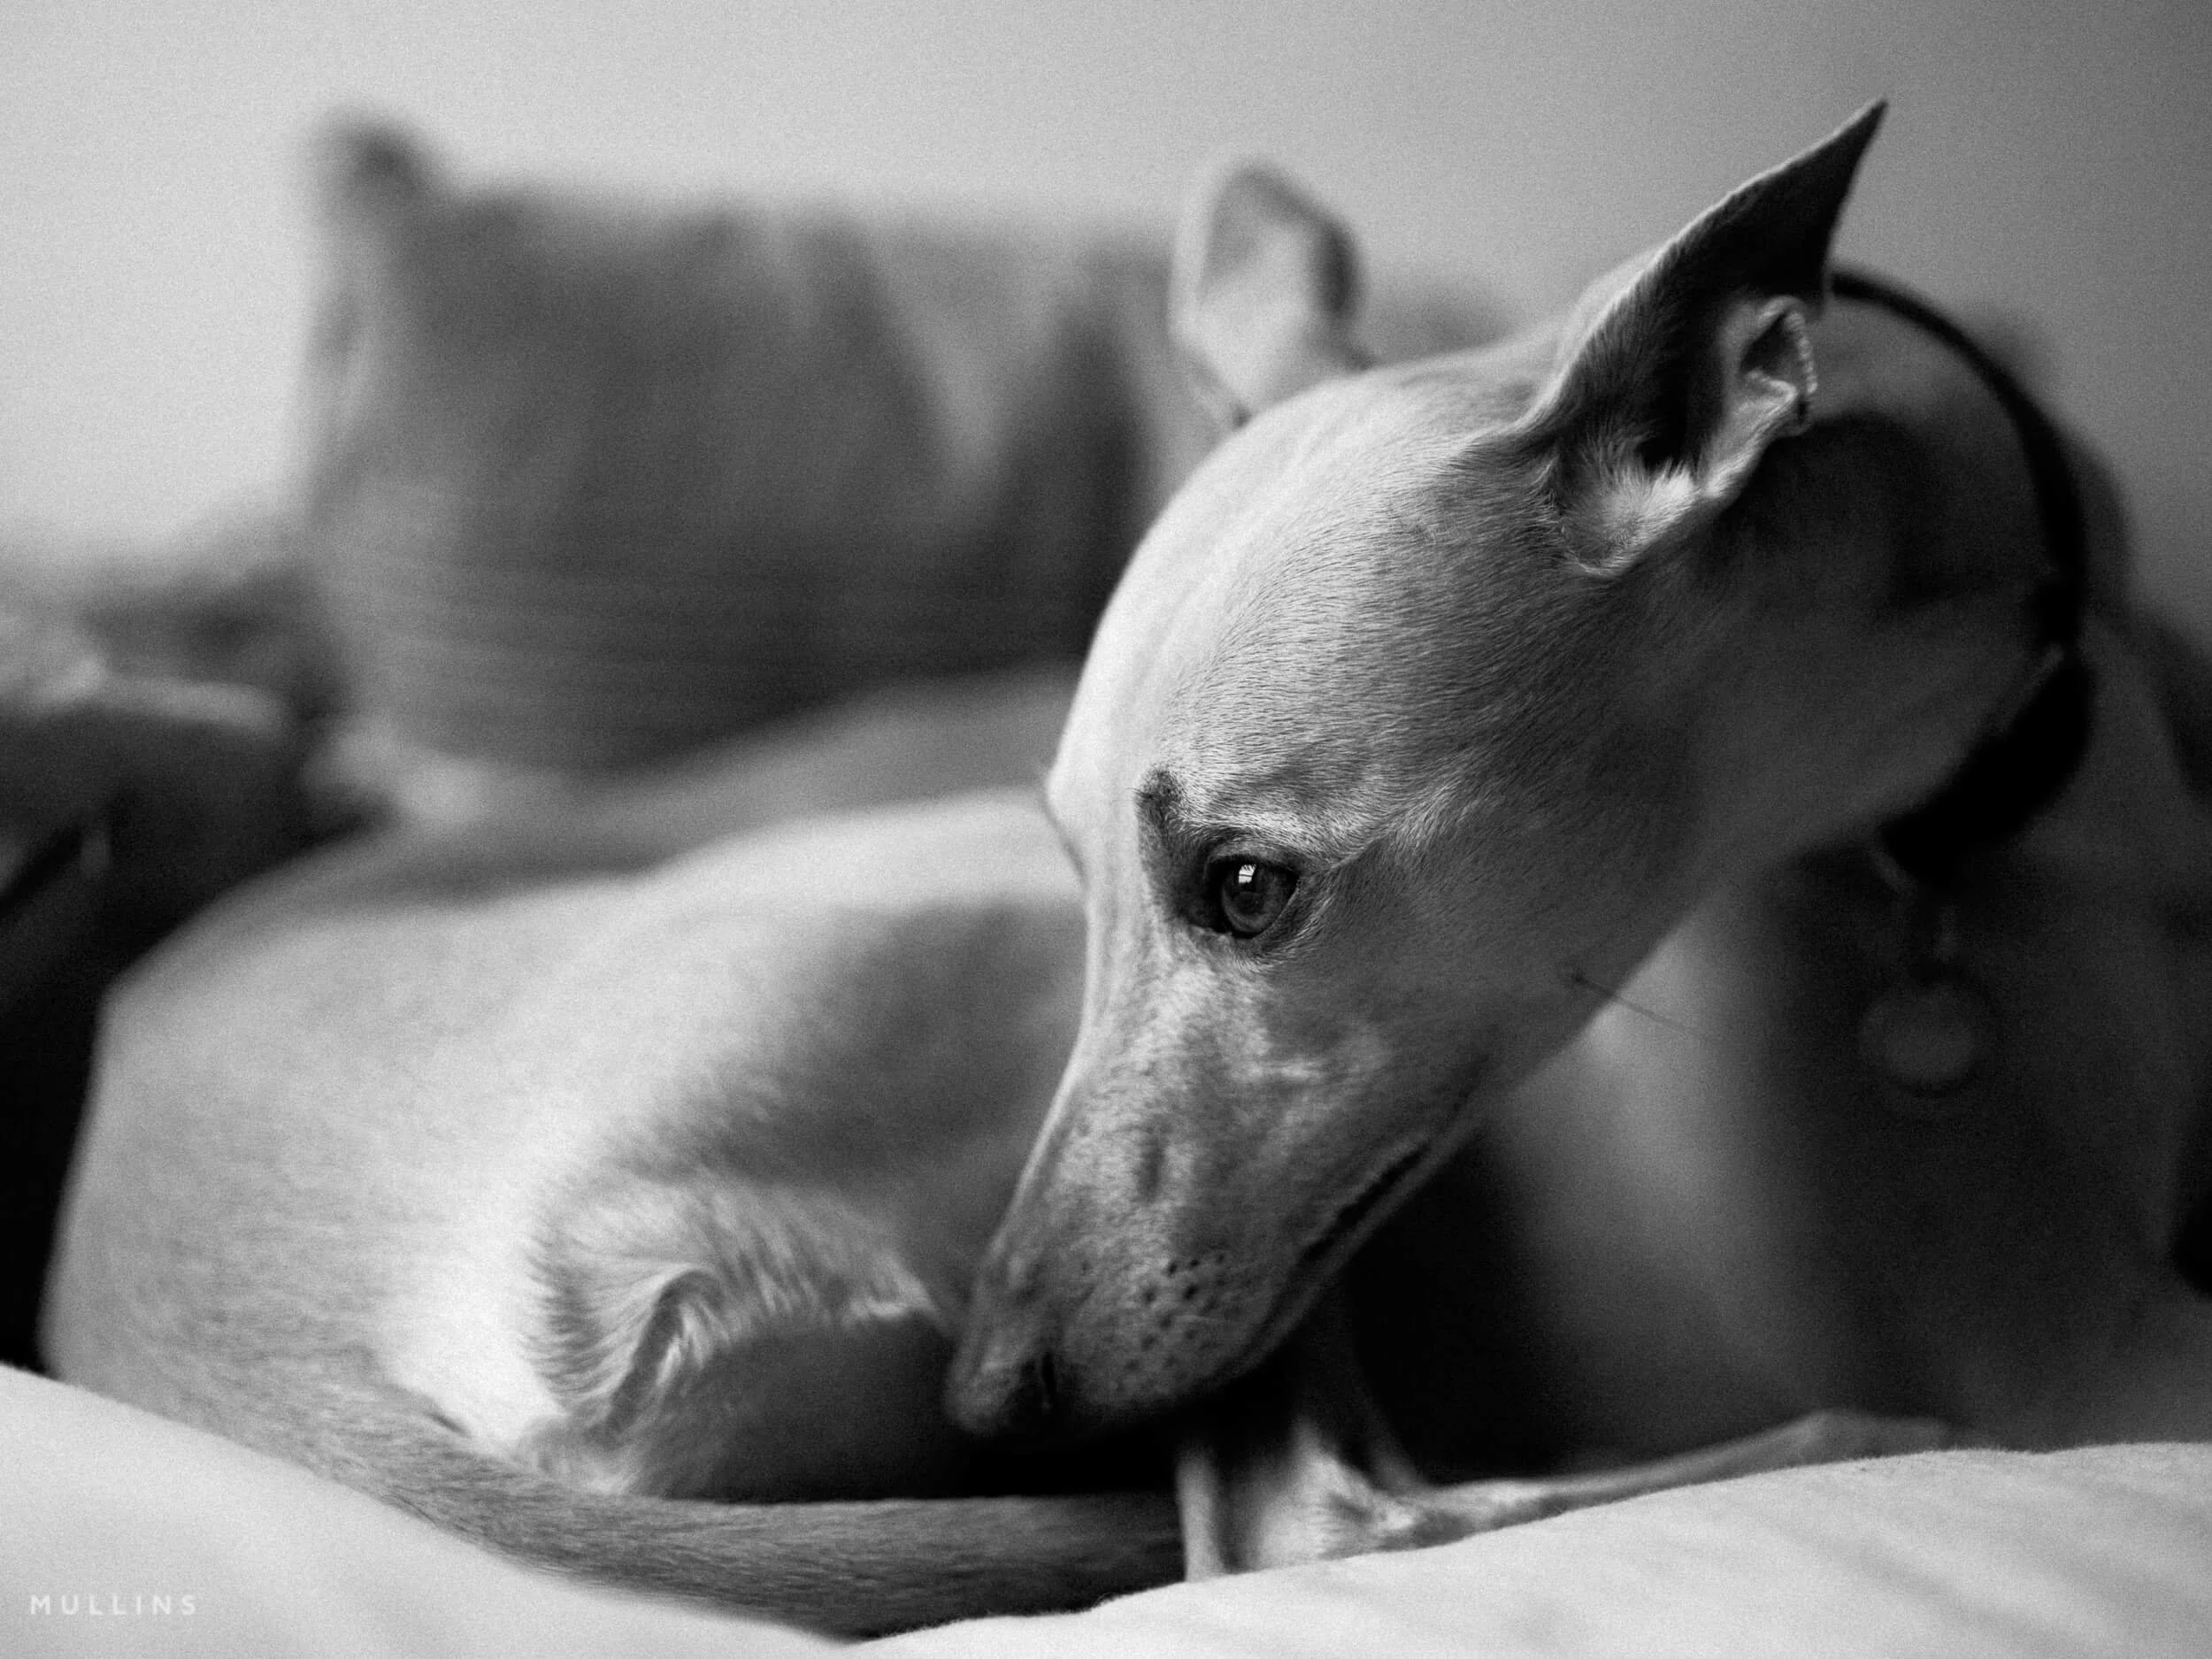
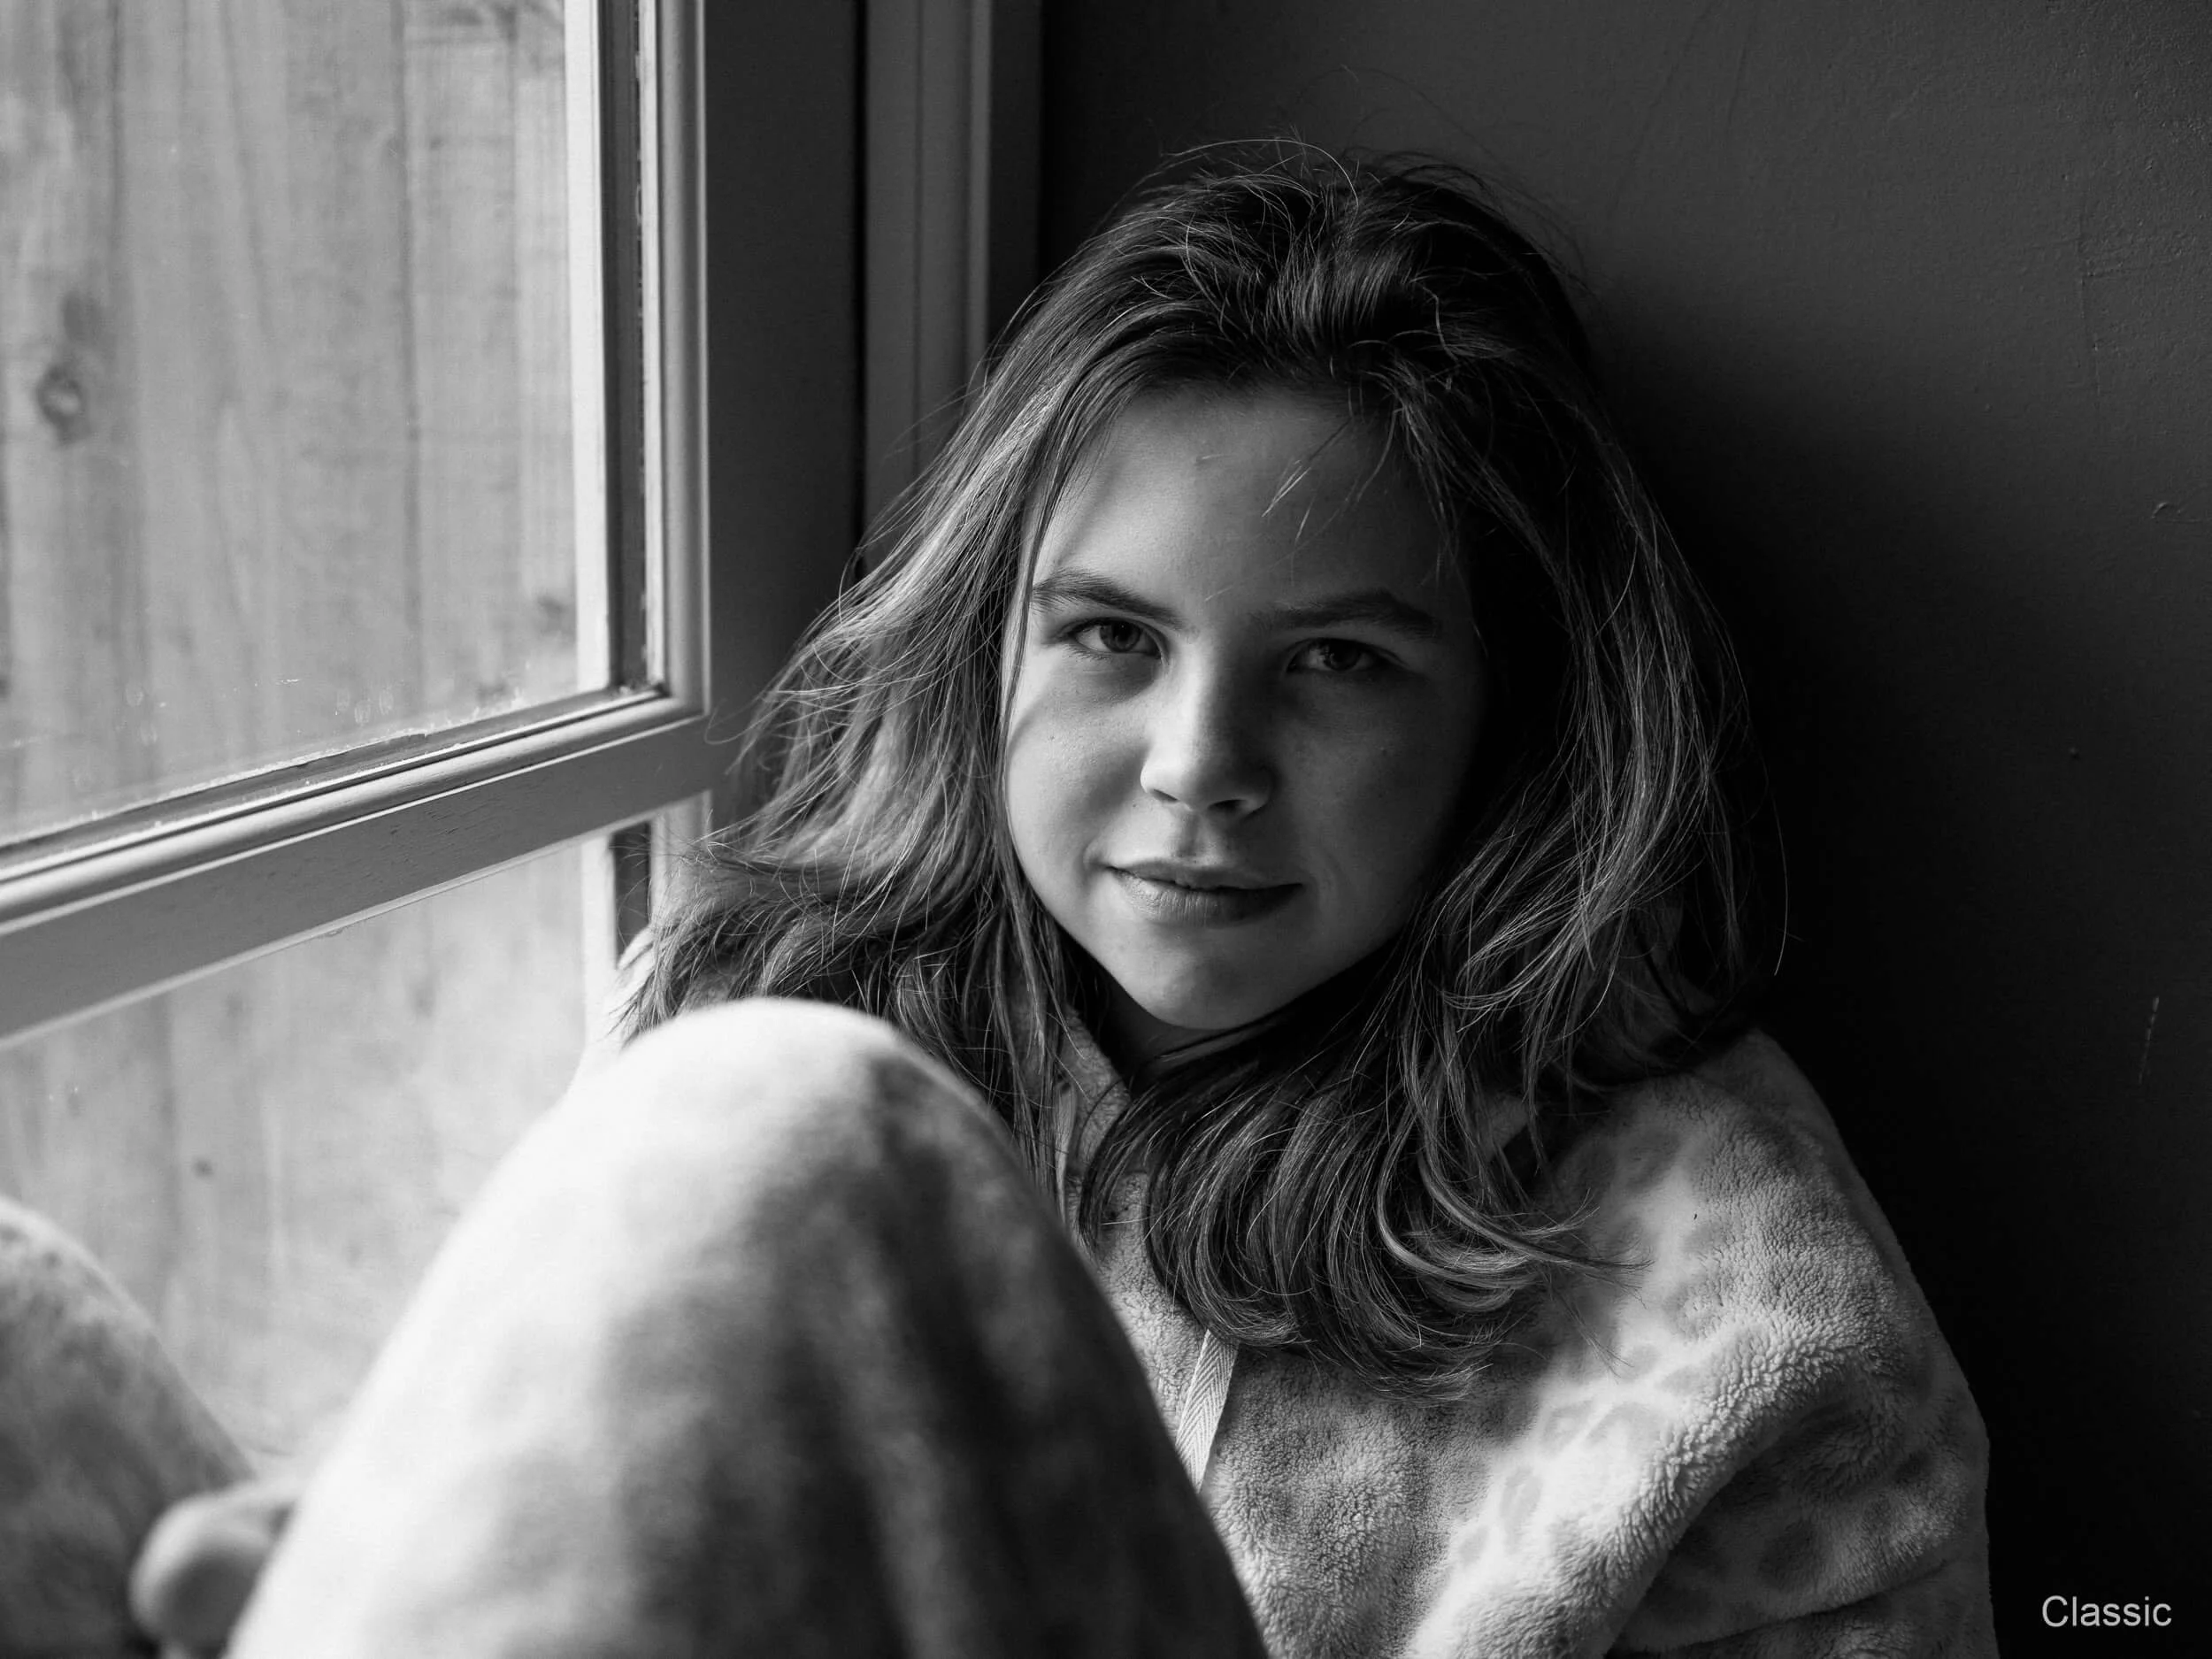 Image 3 of 5
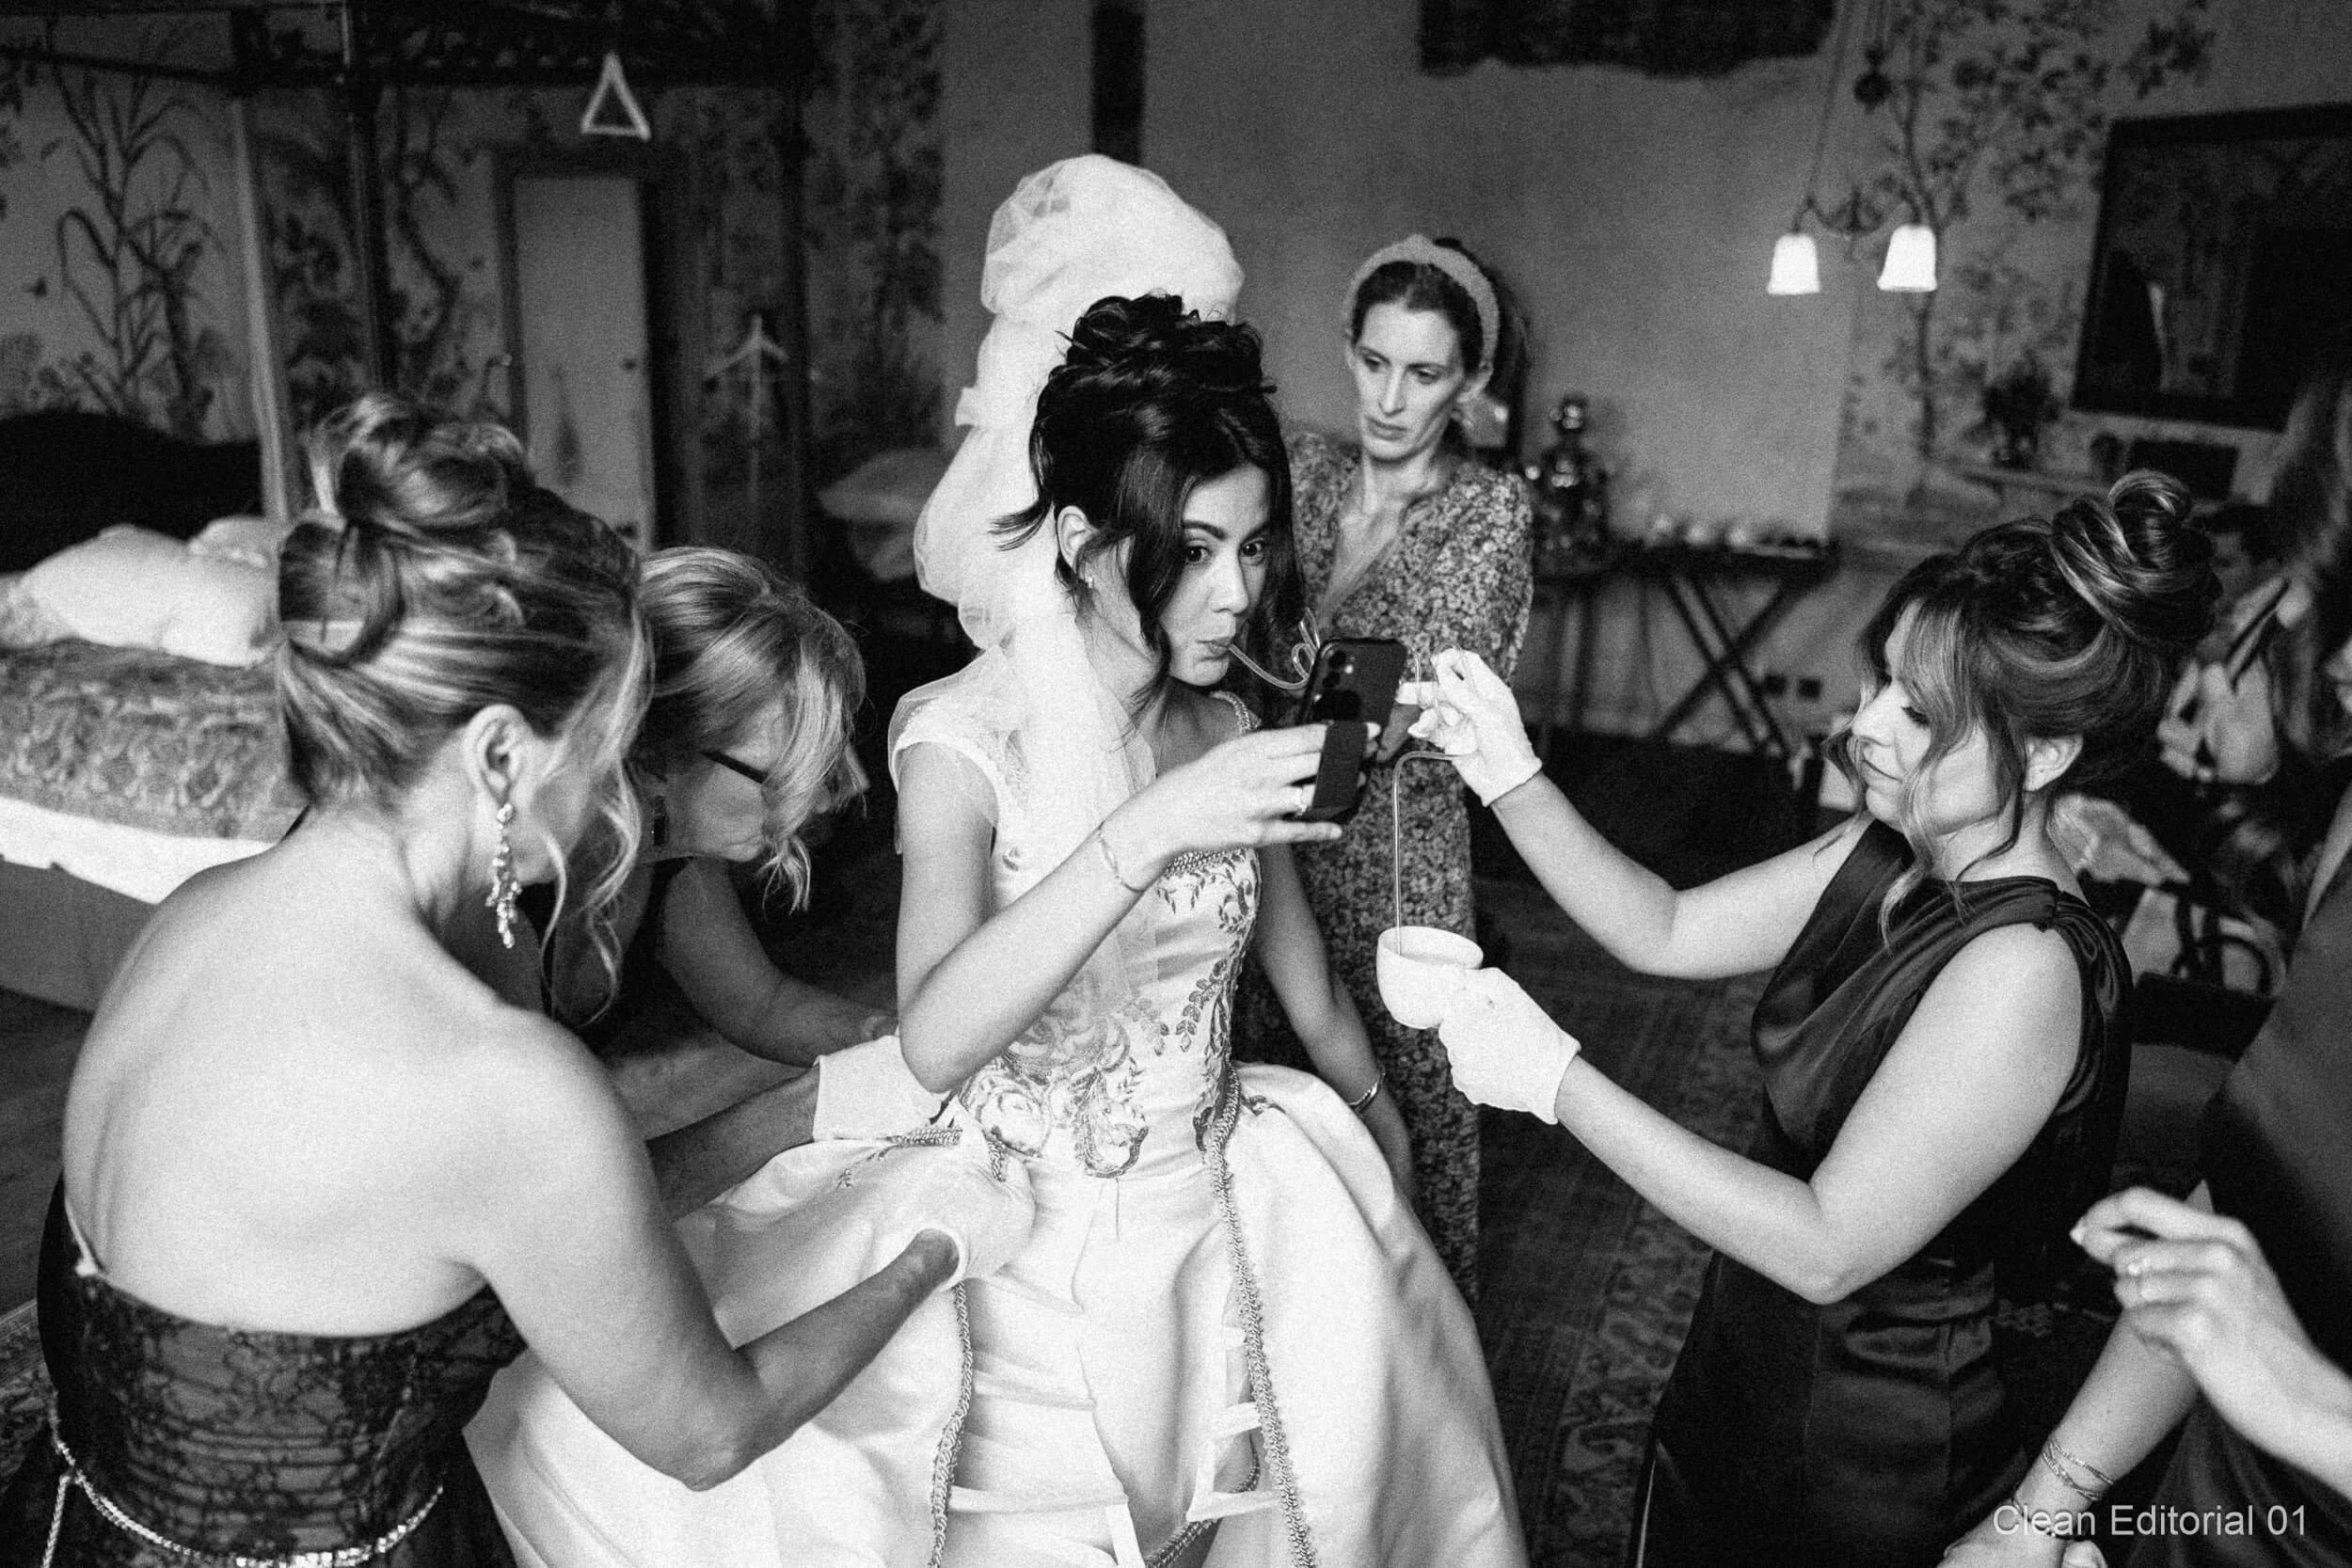
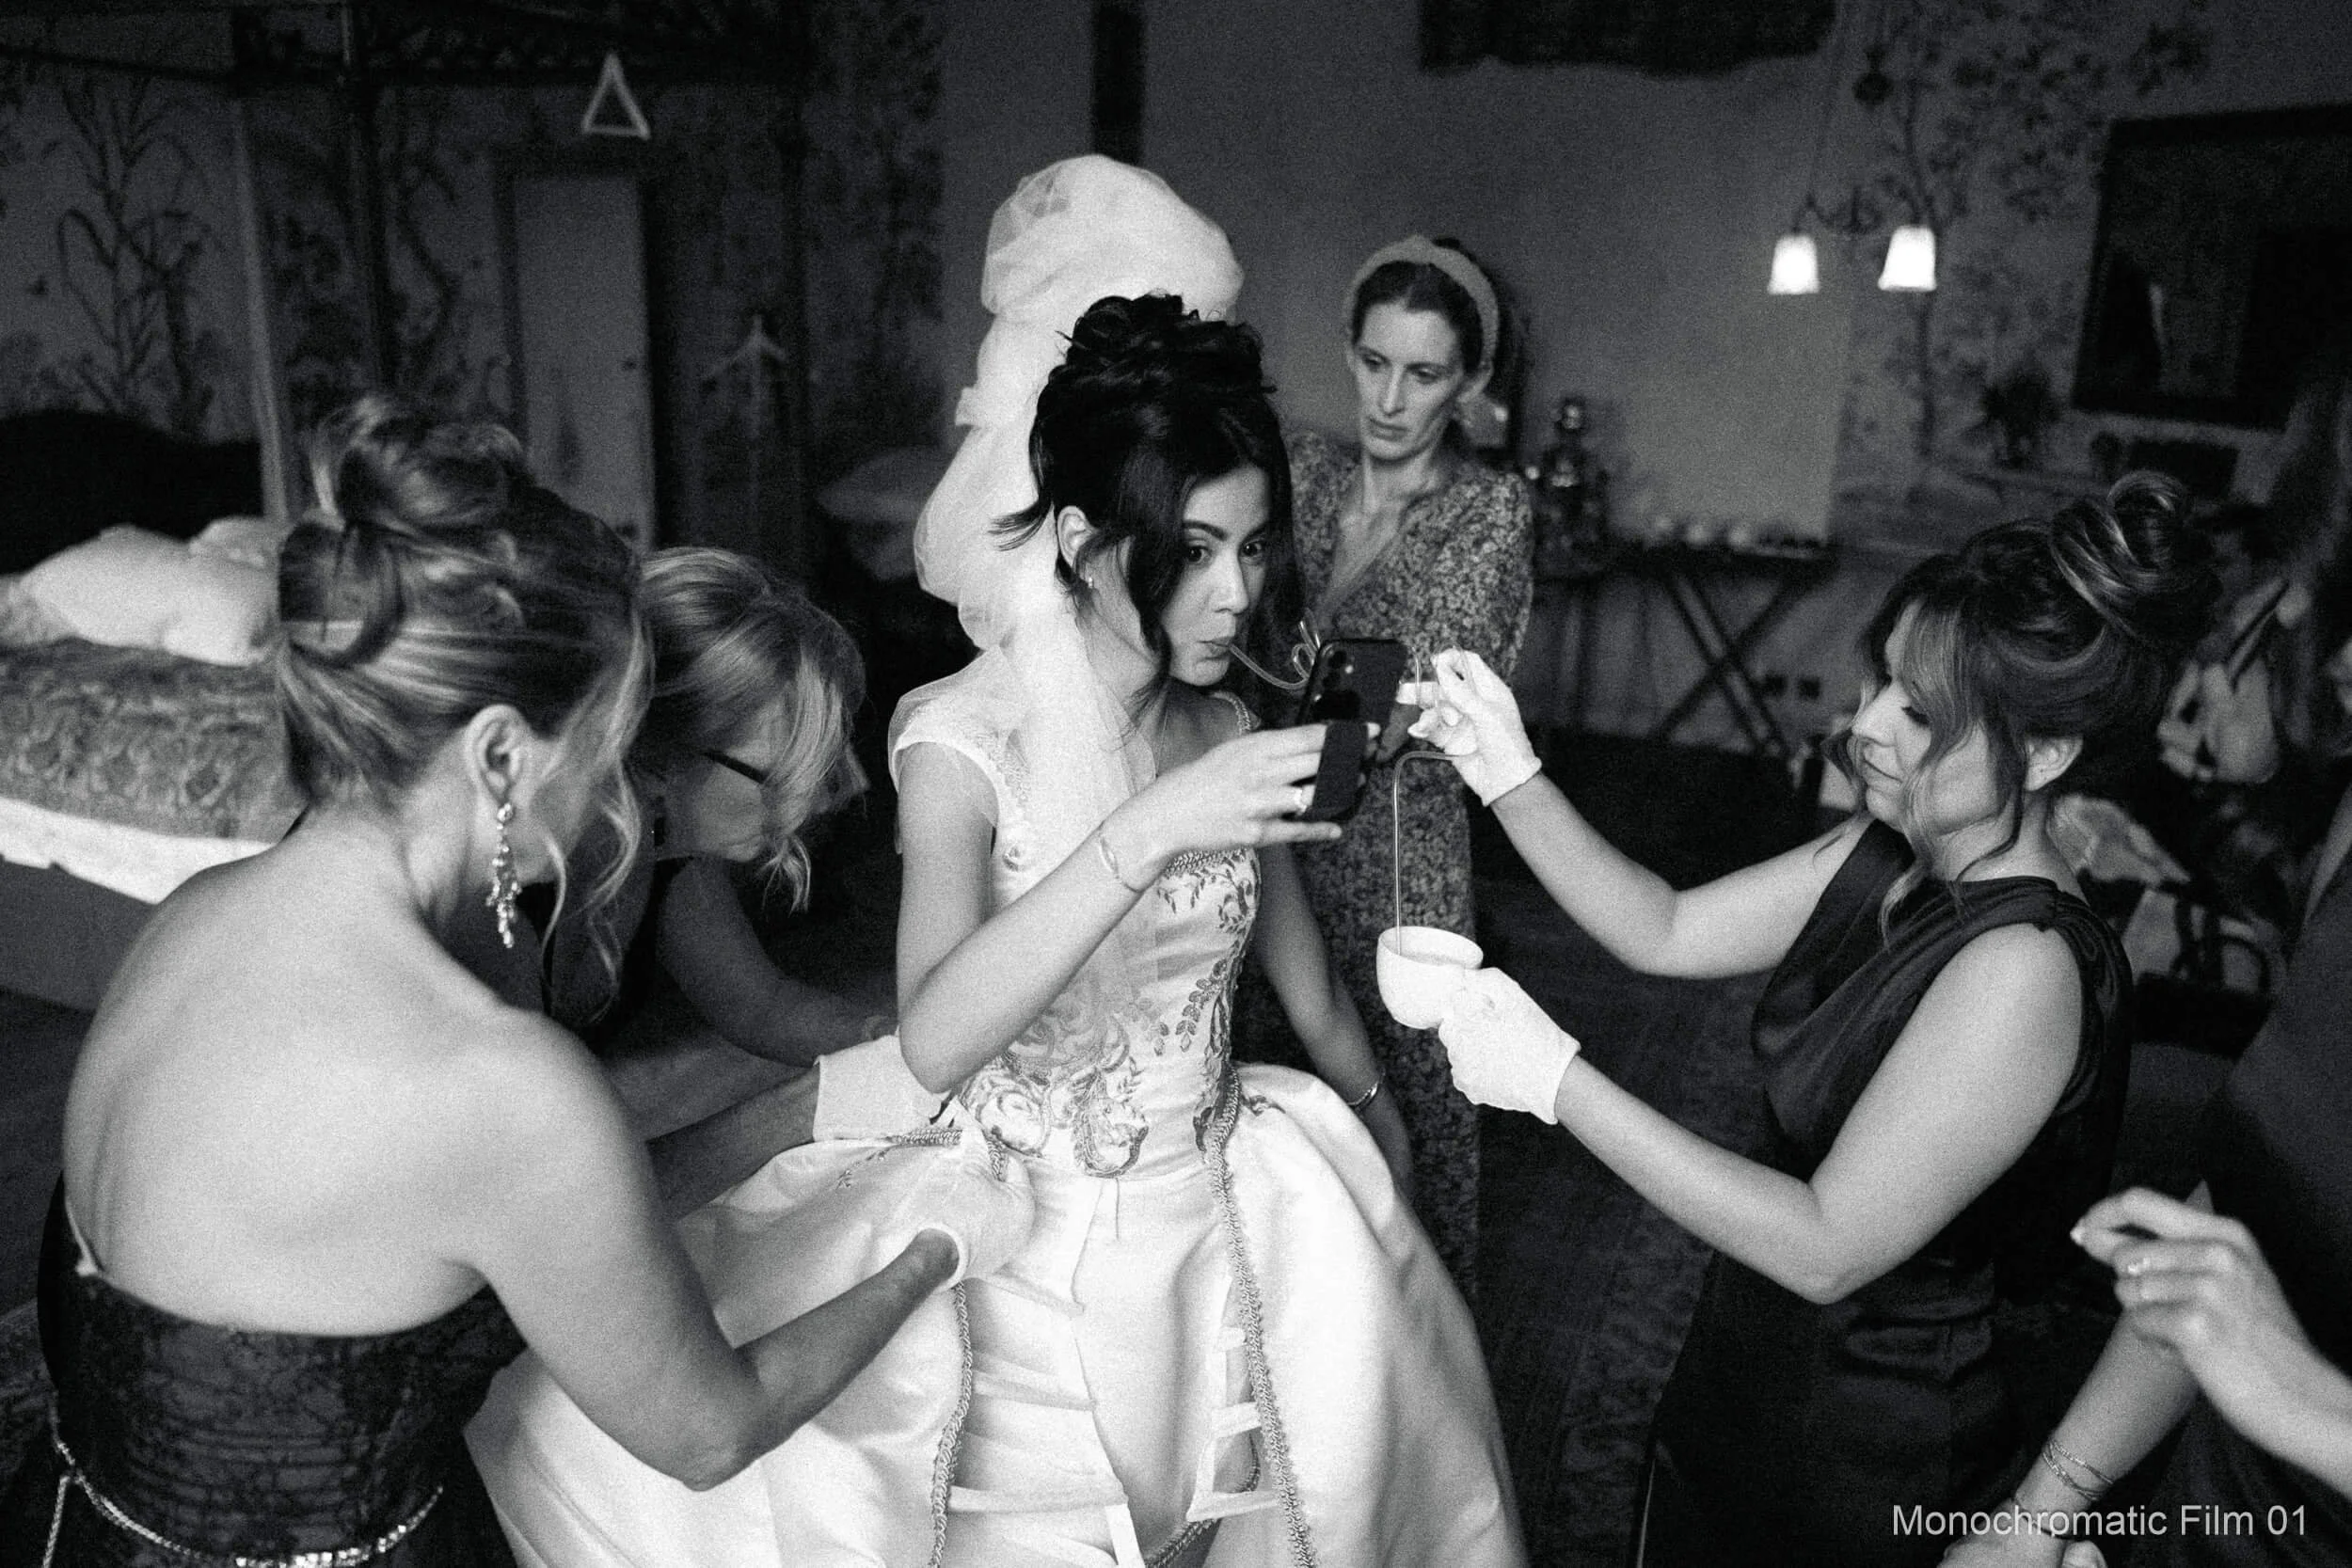
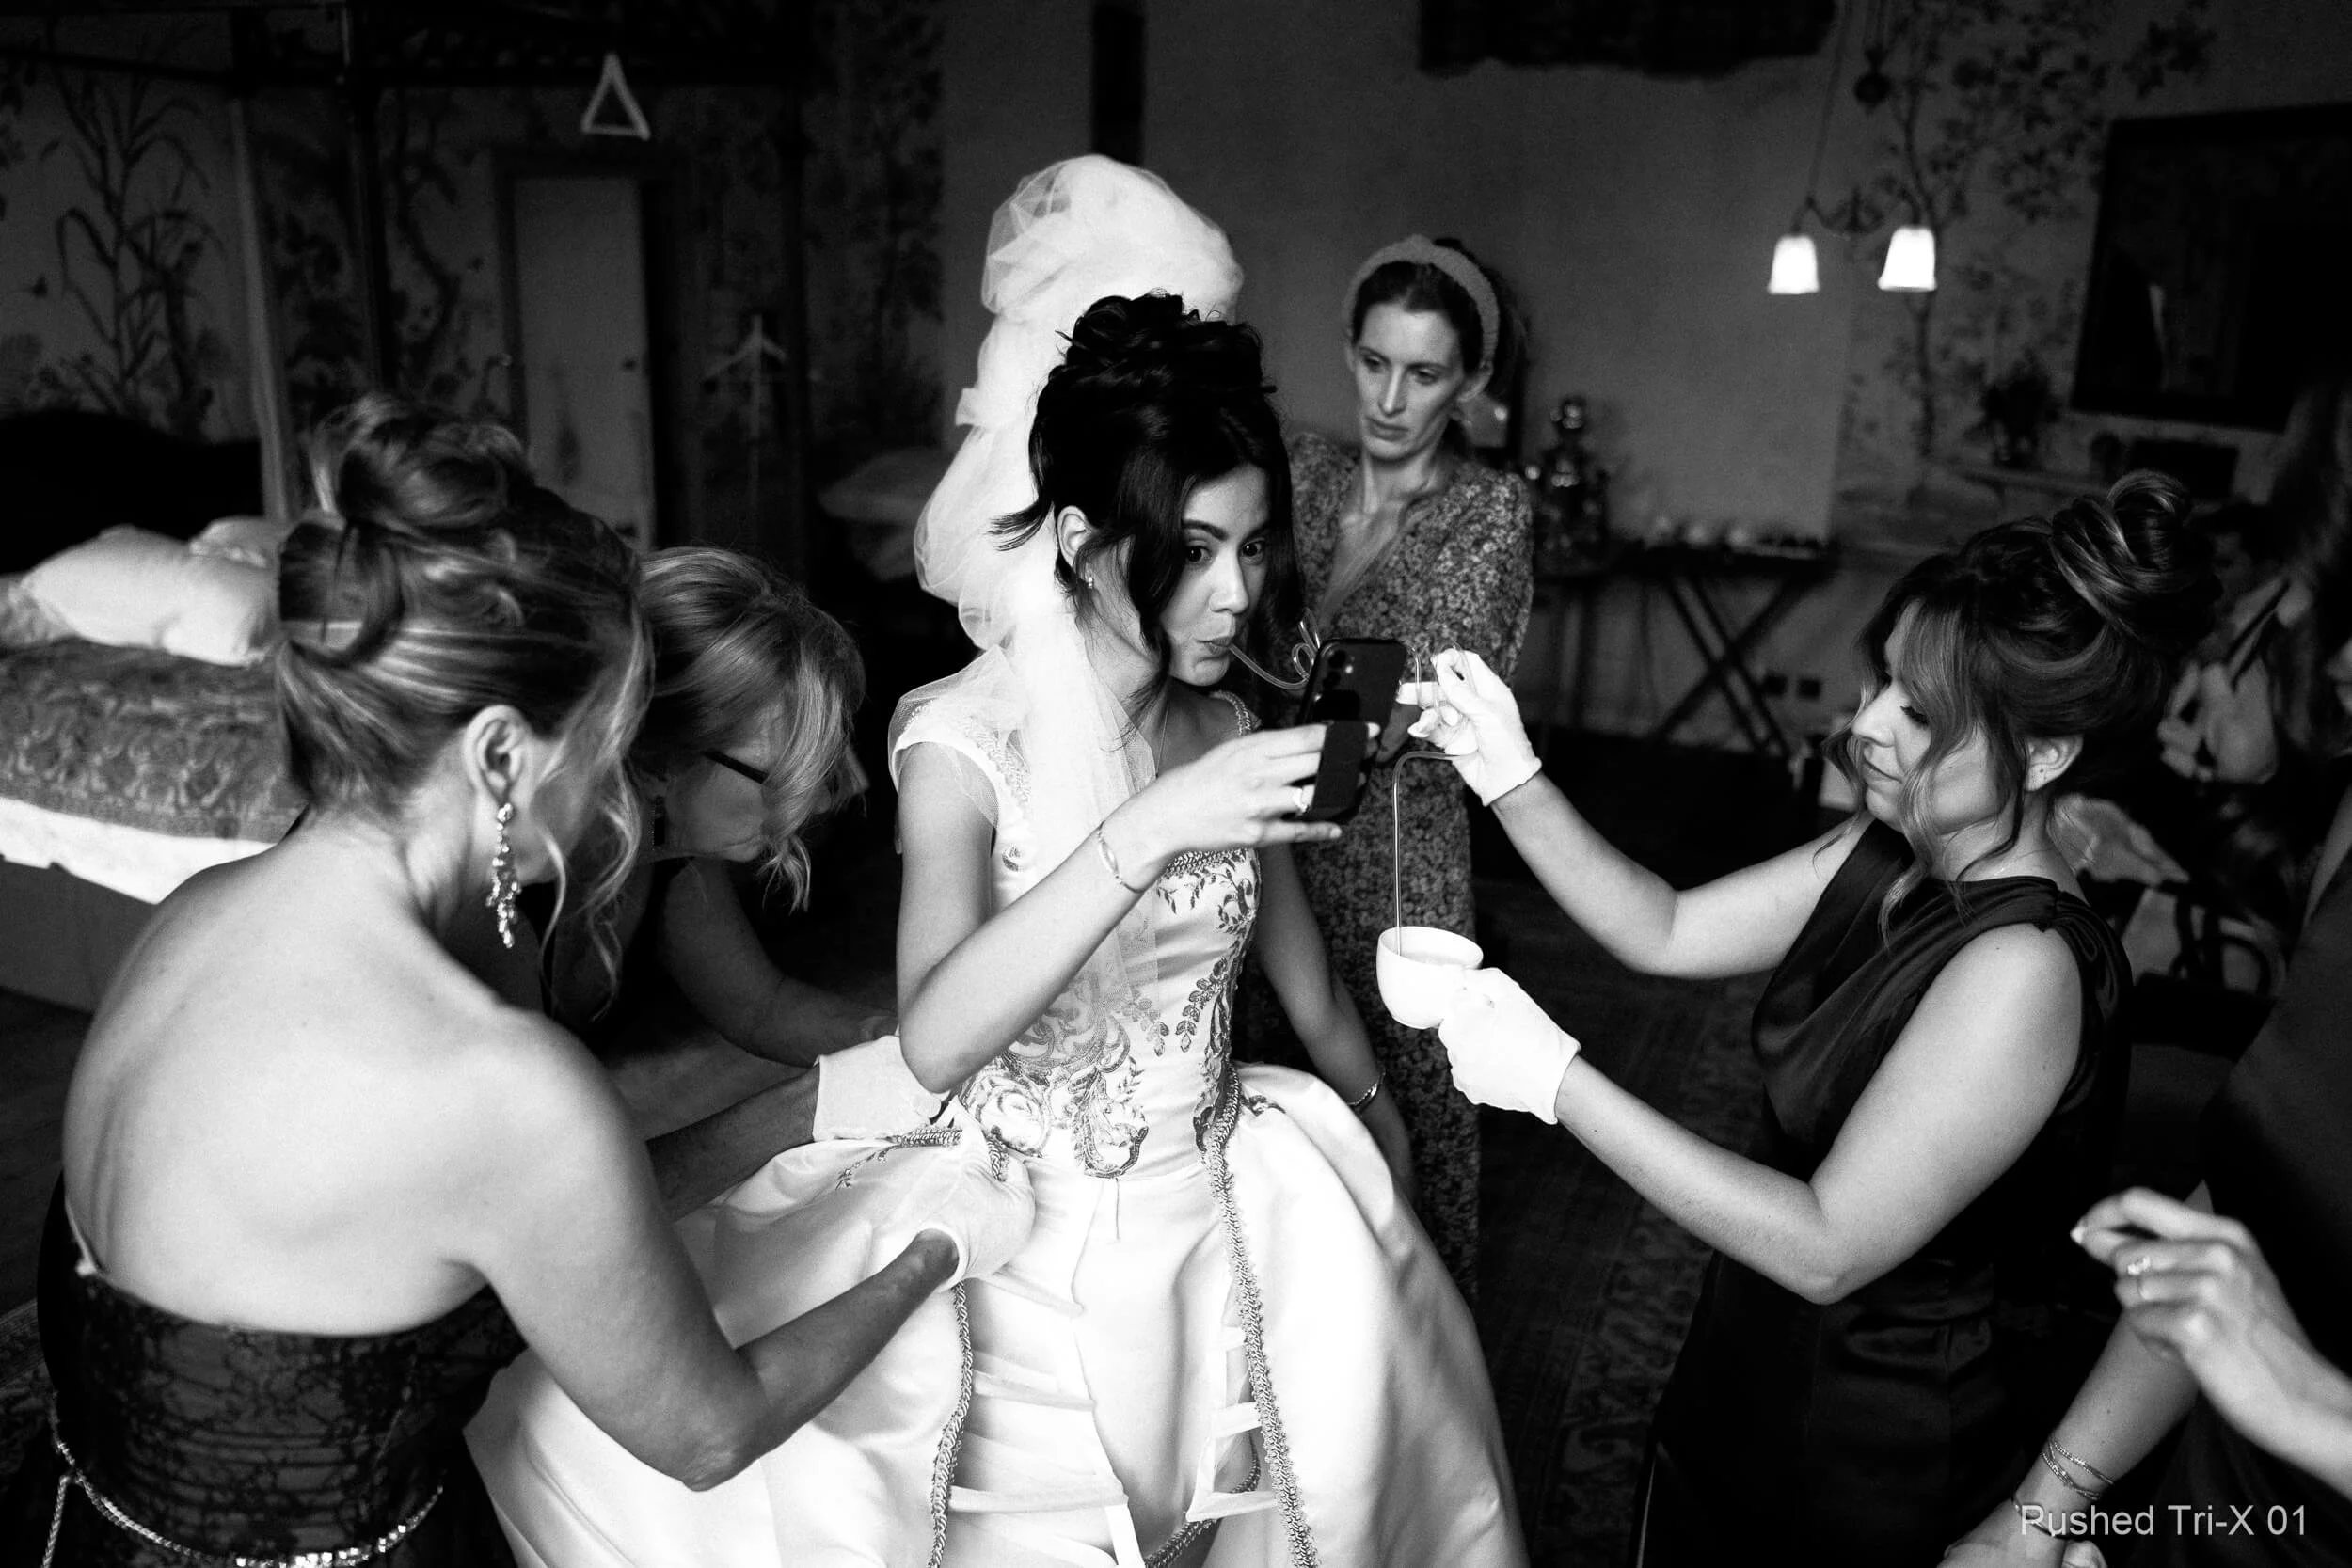
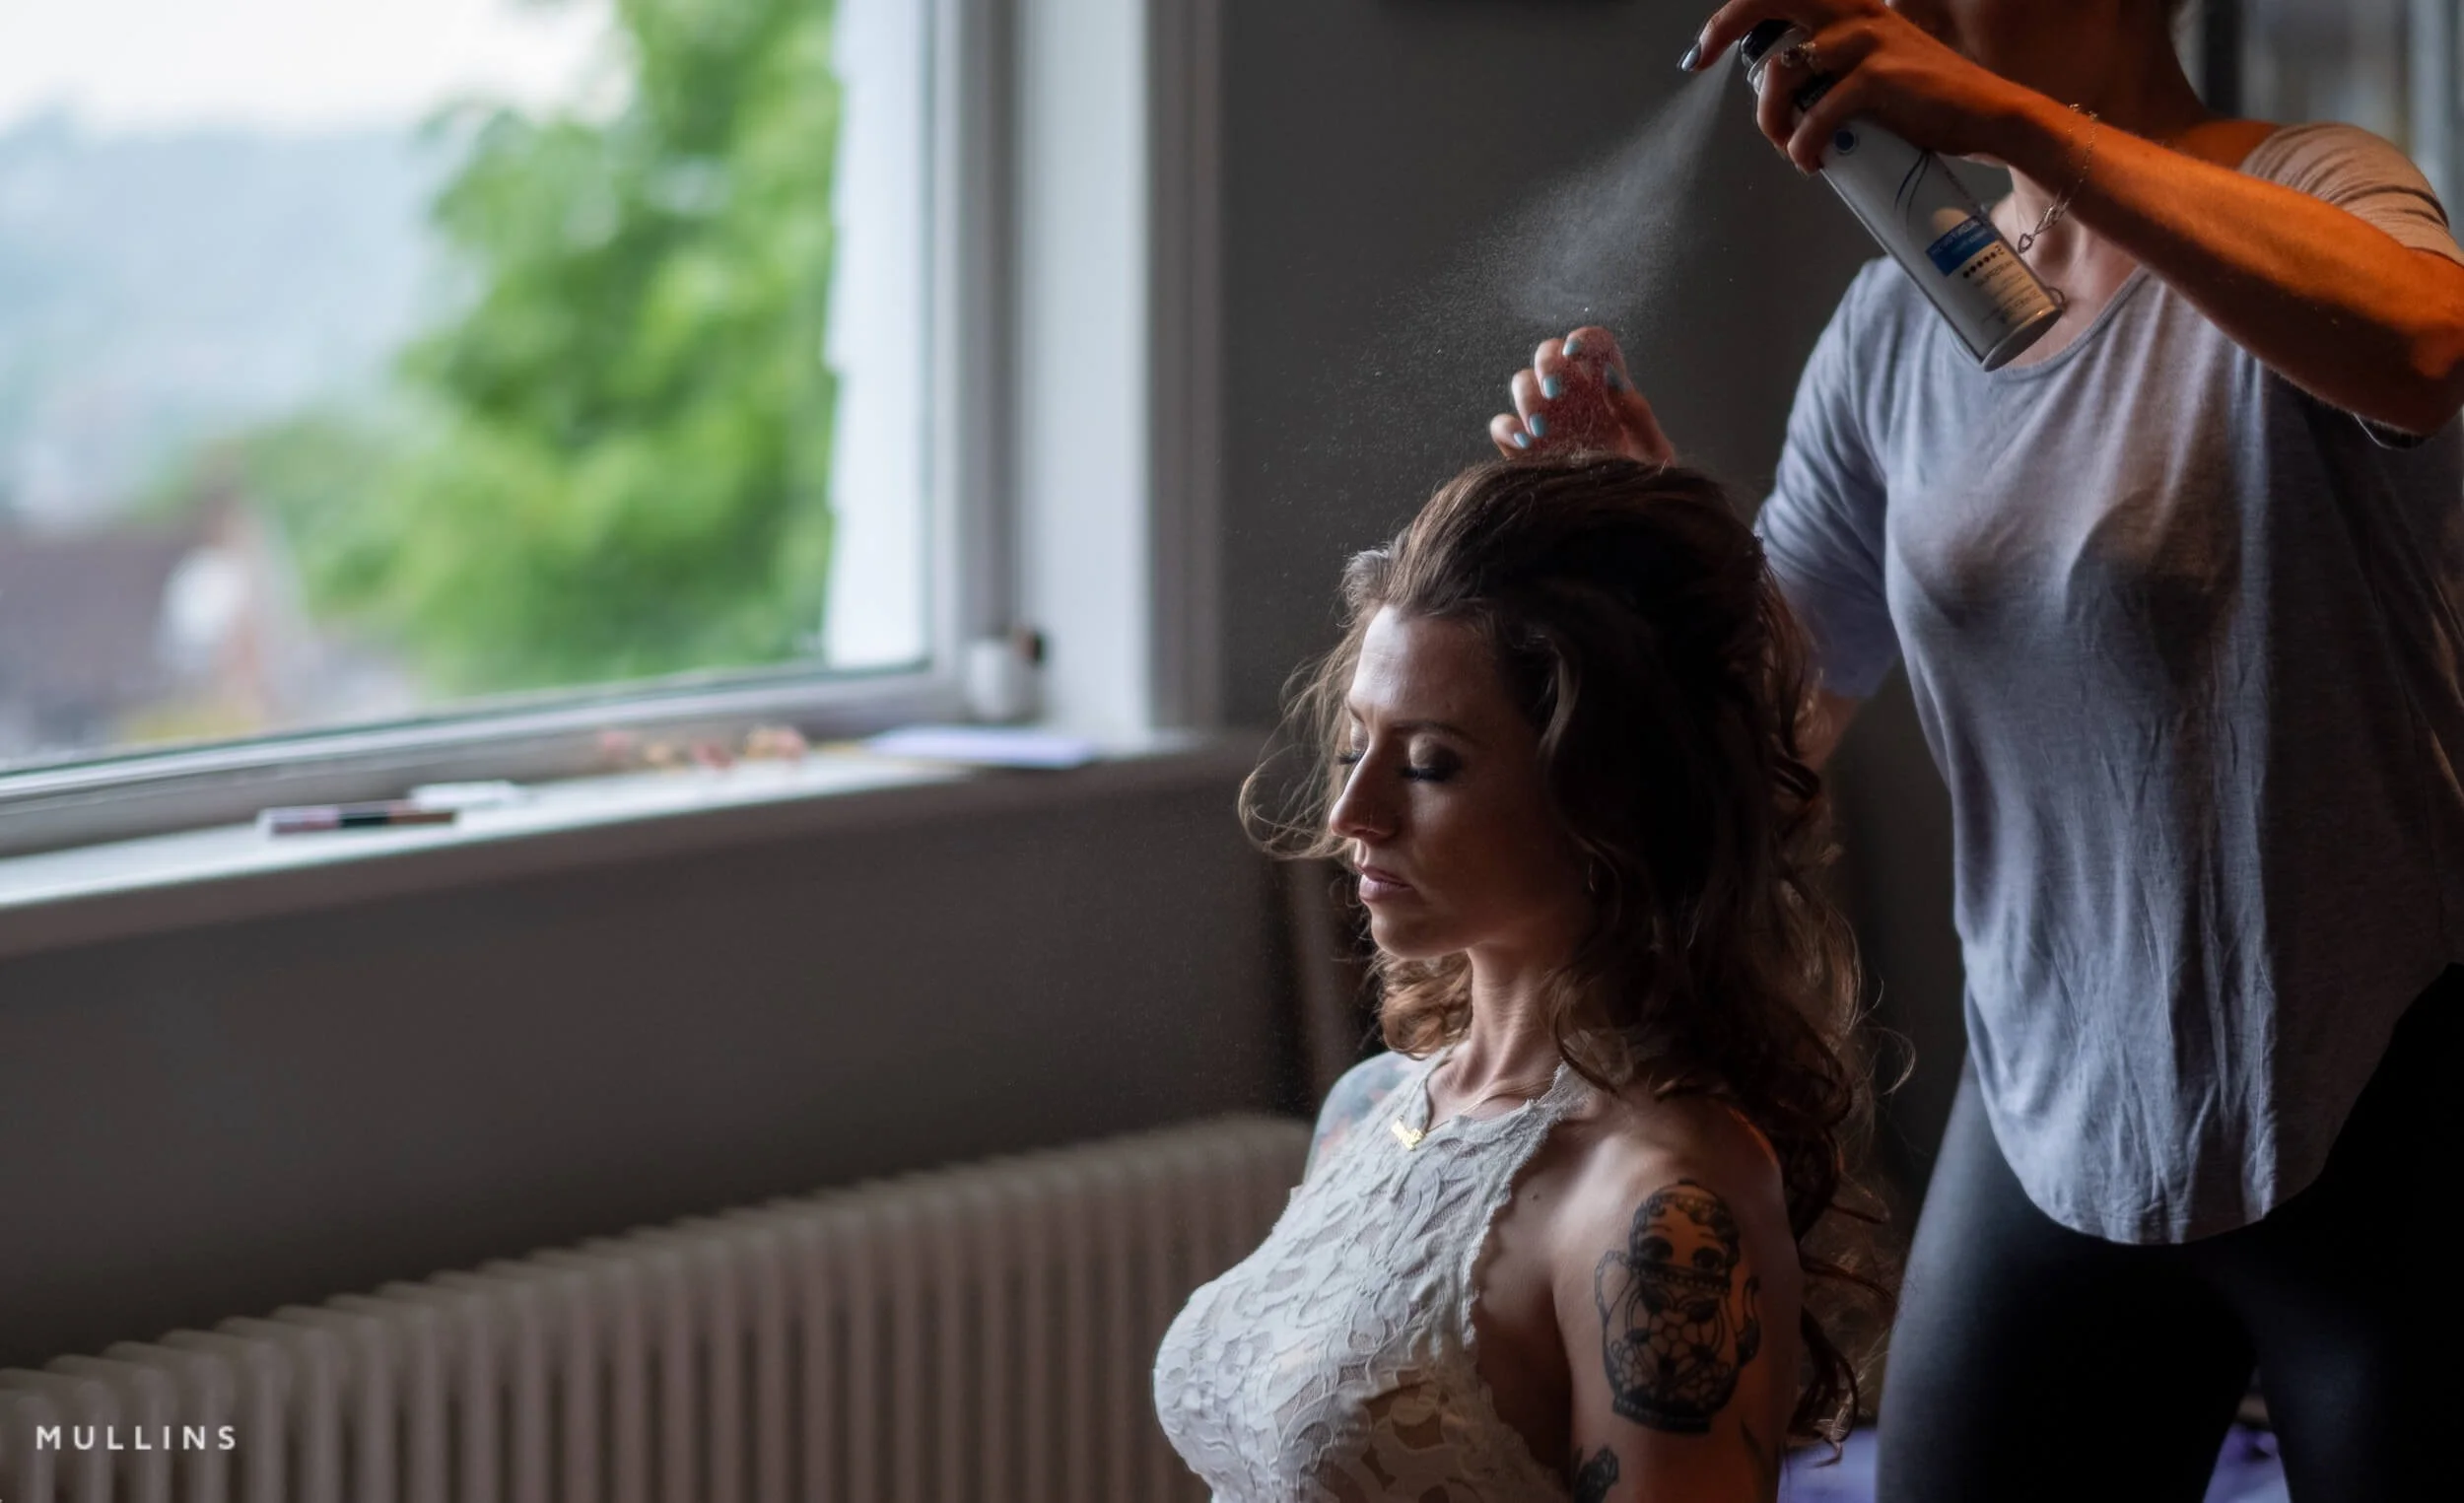
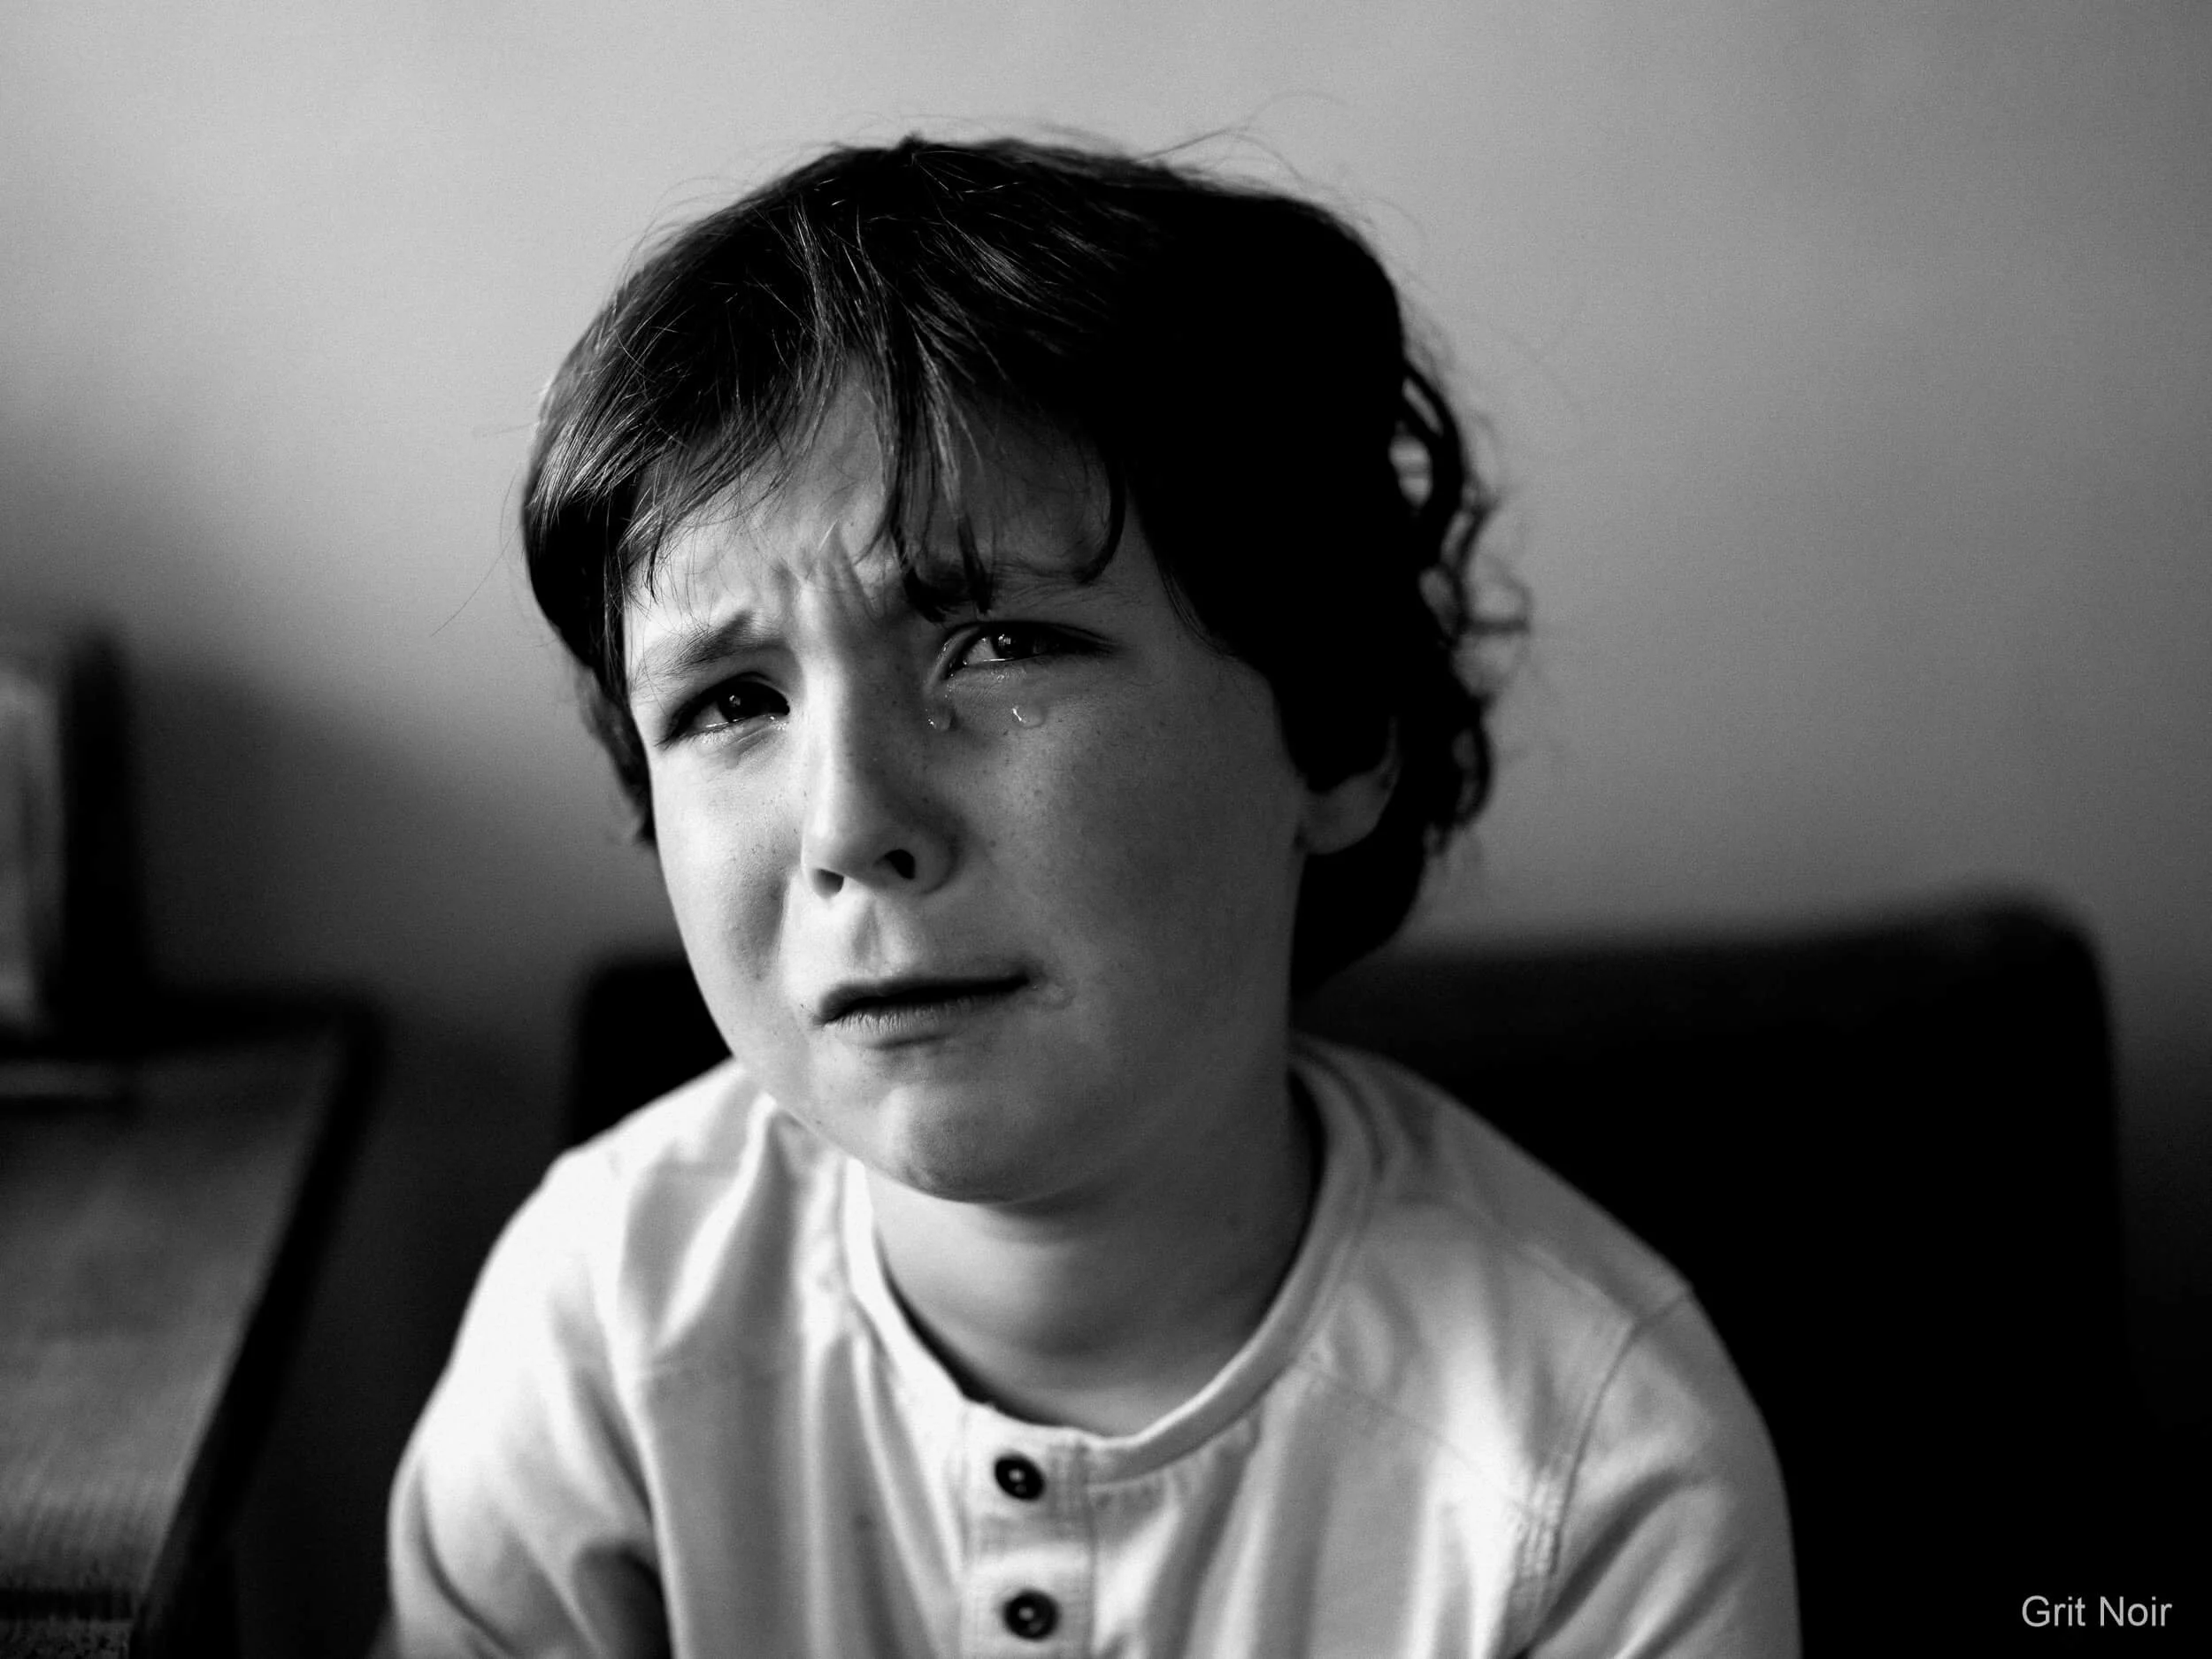 Image 4 of 5
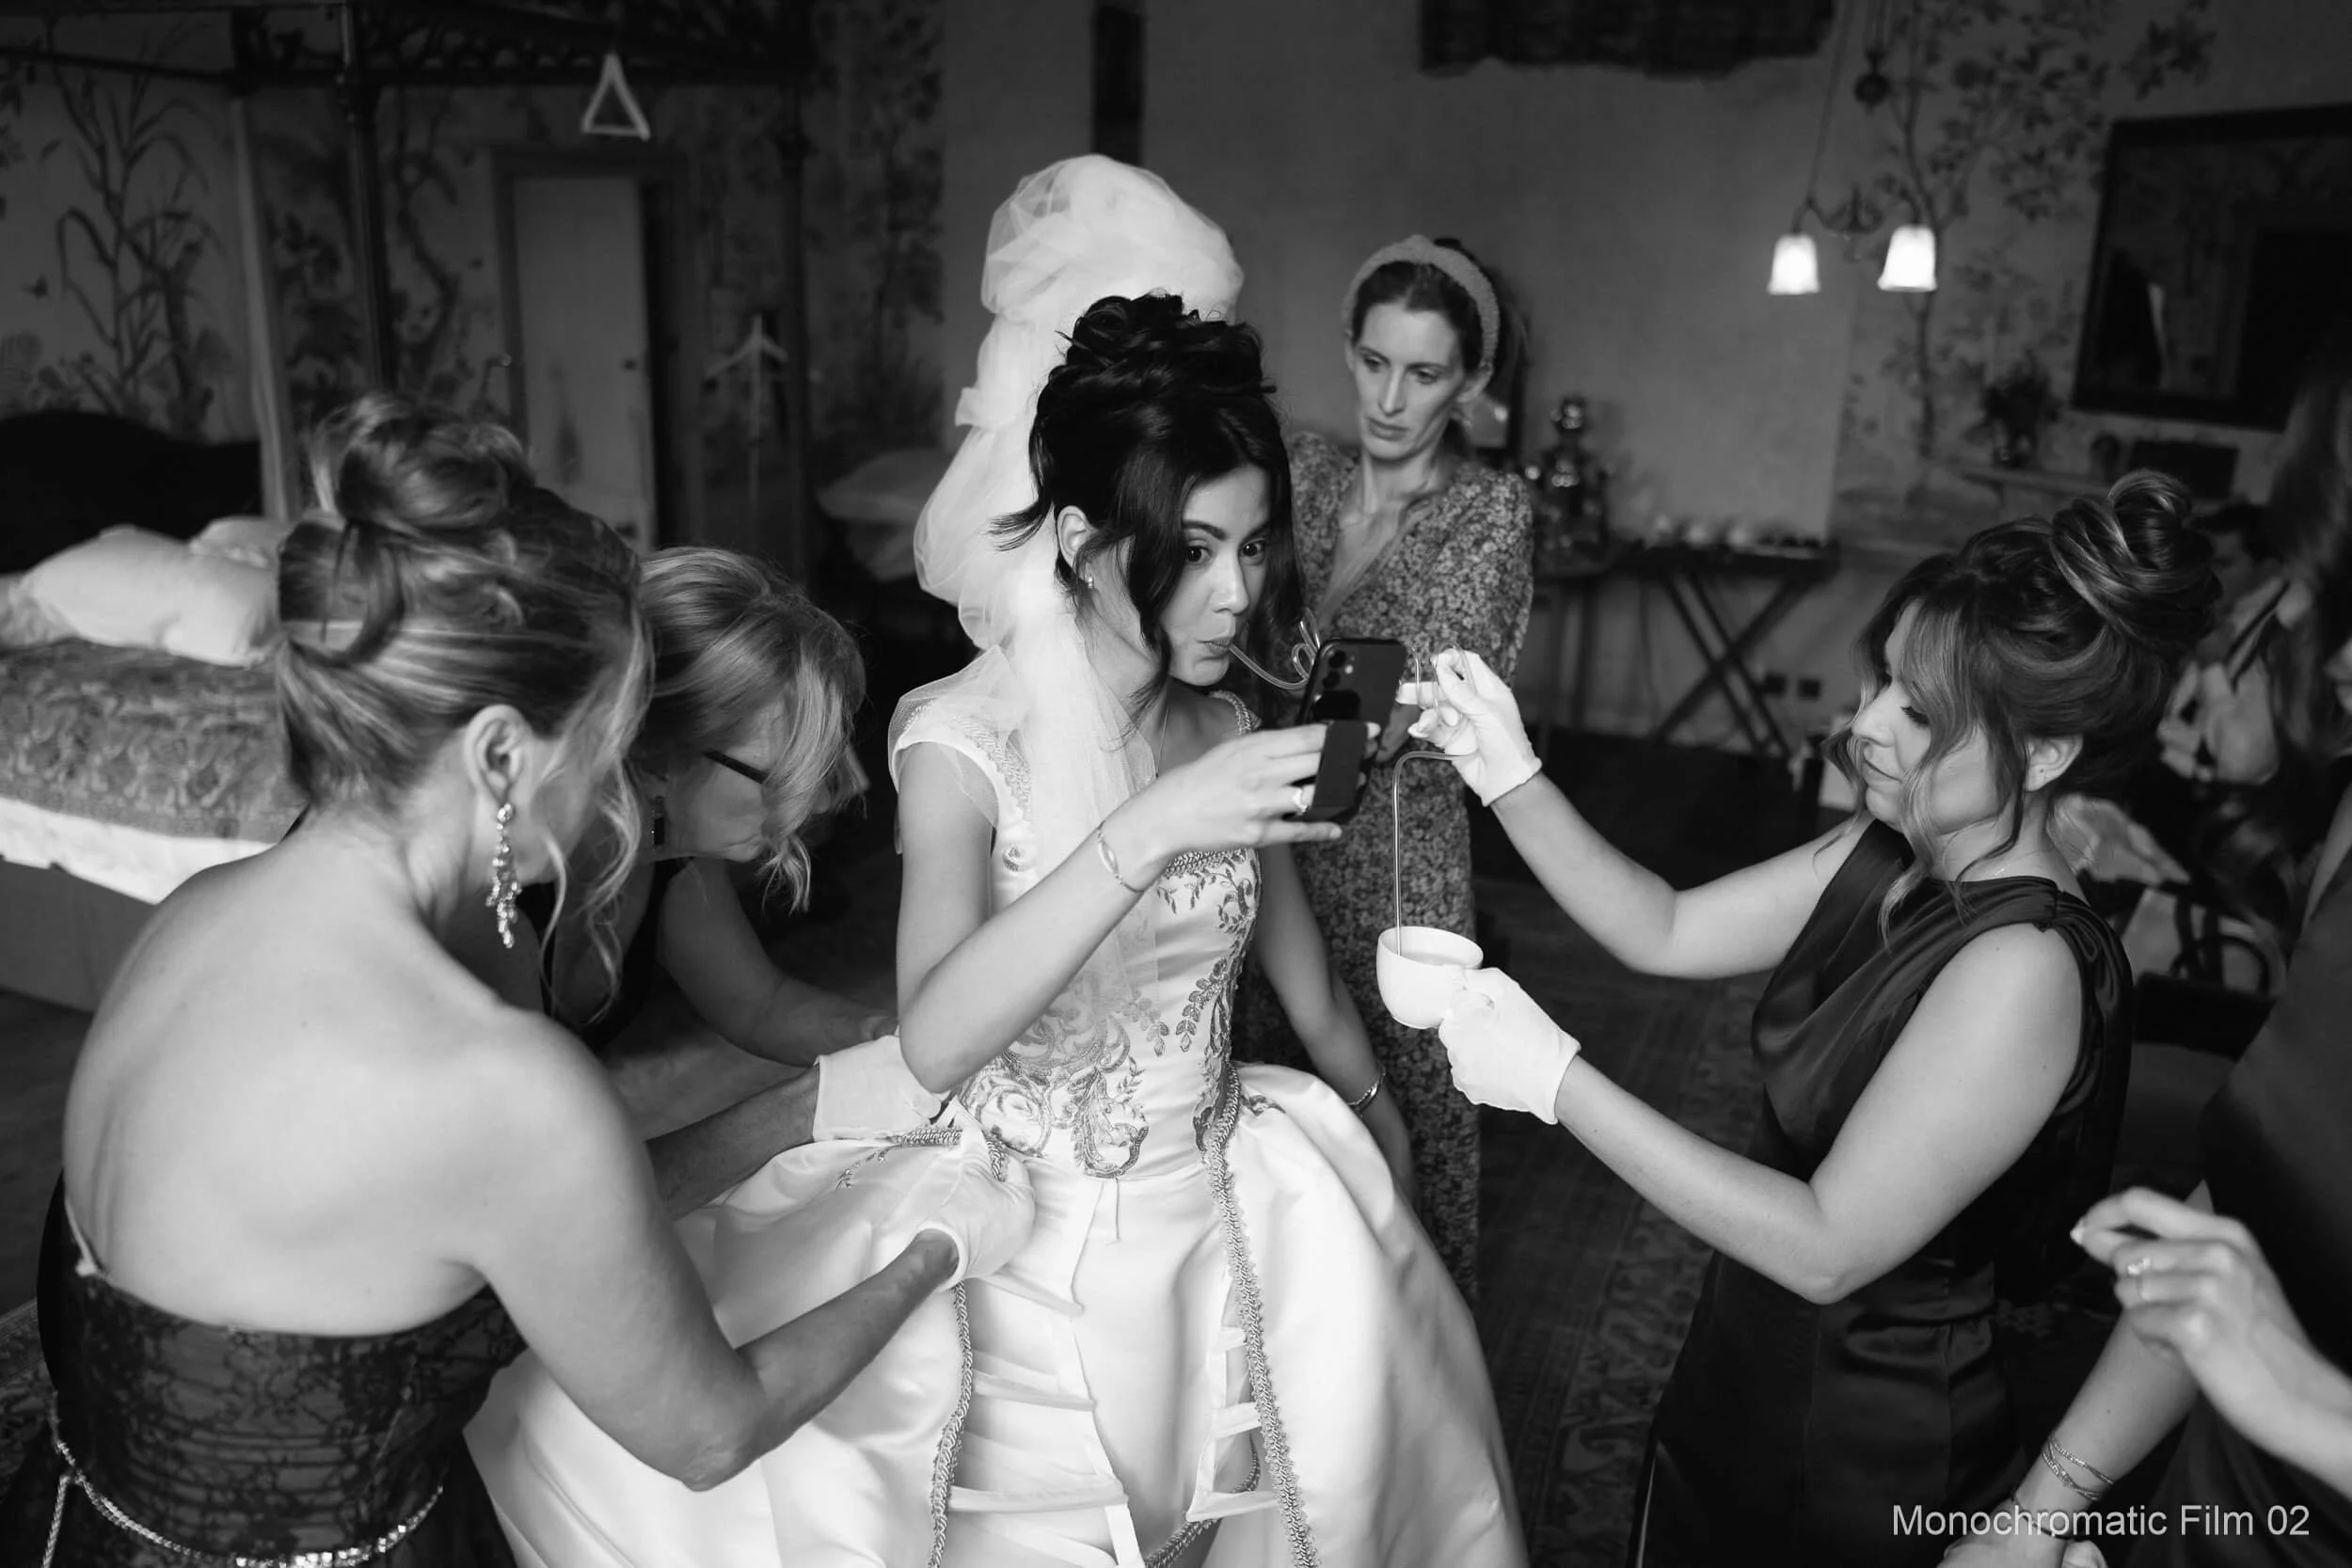
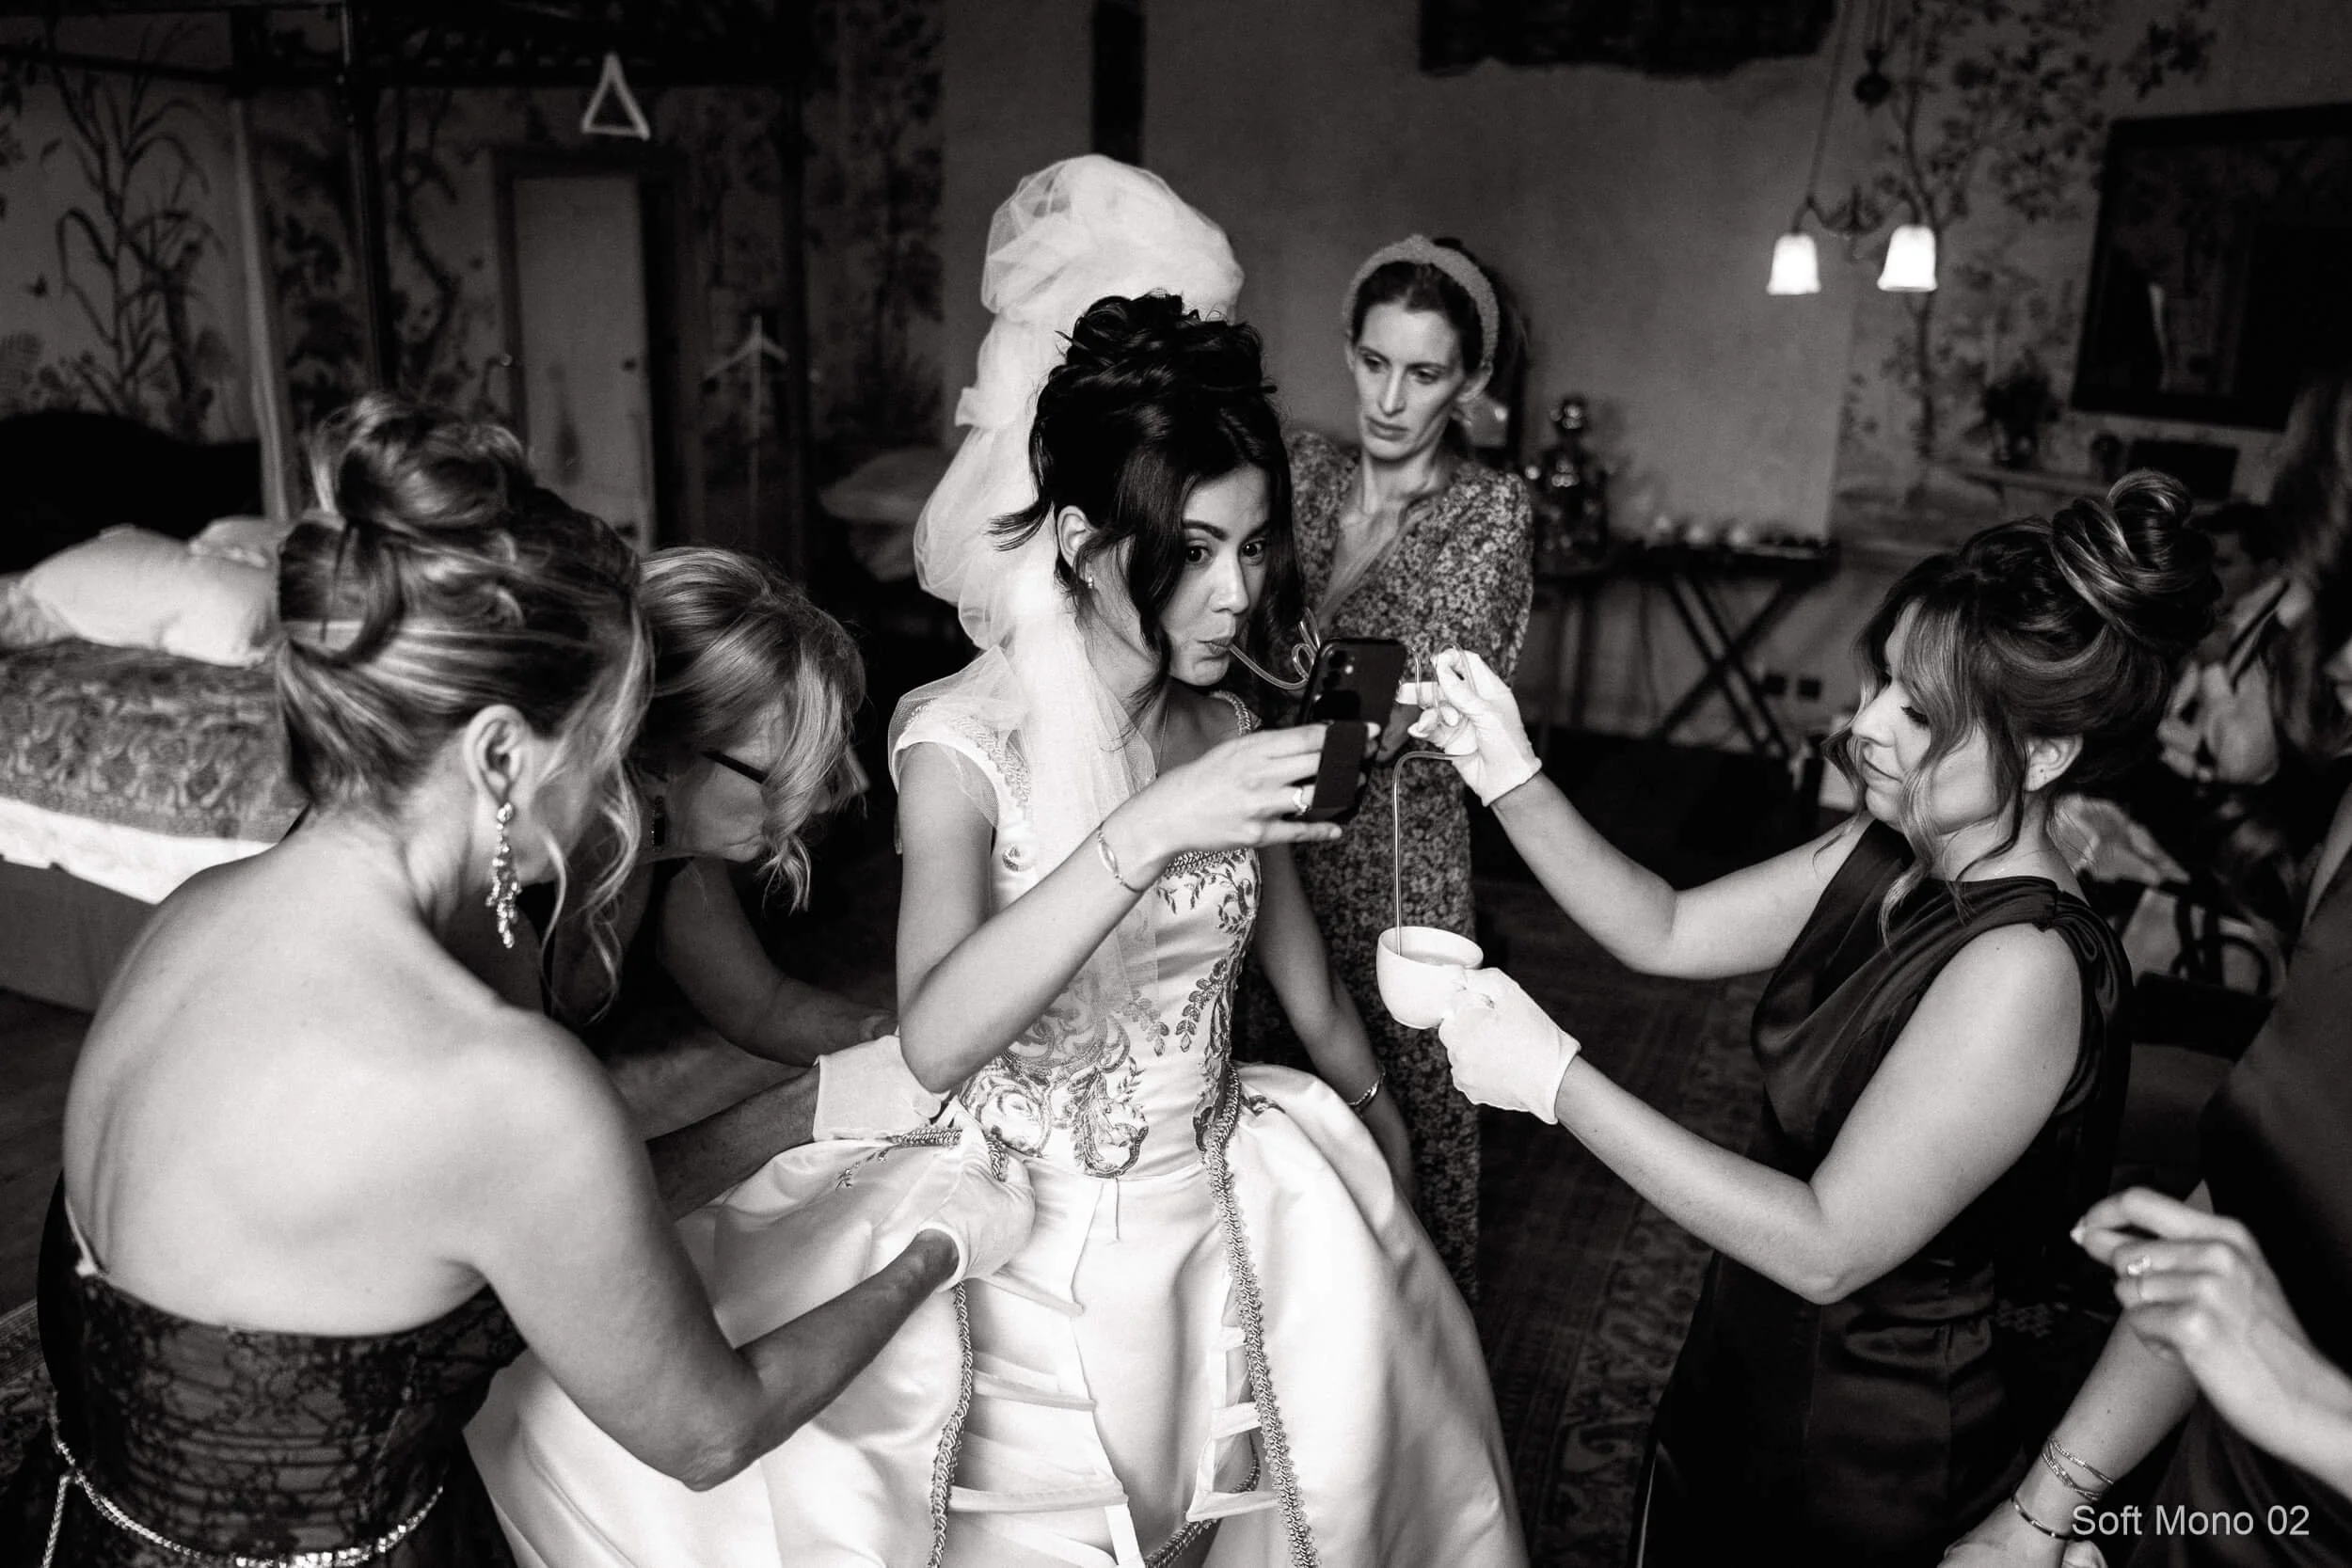
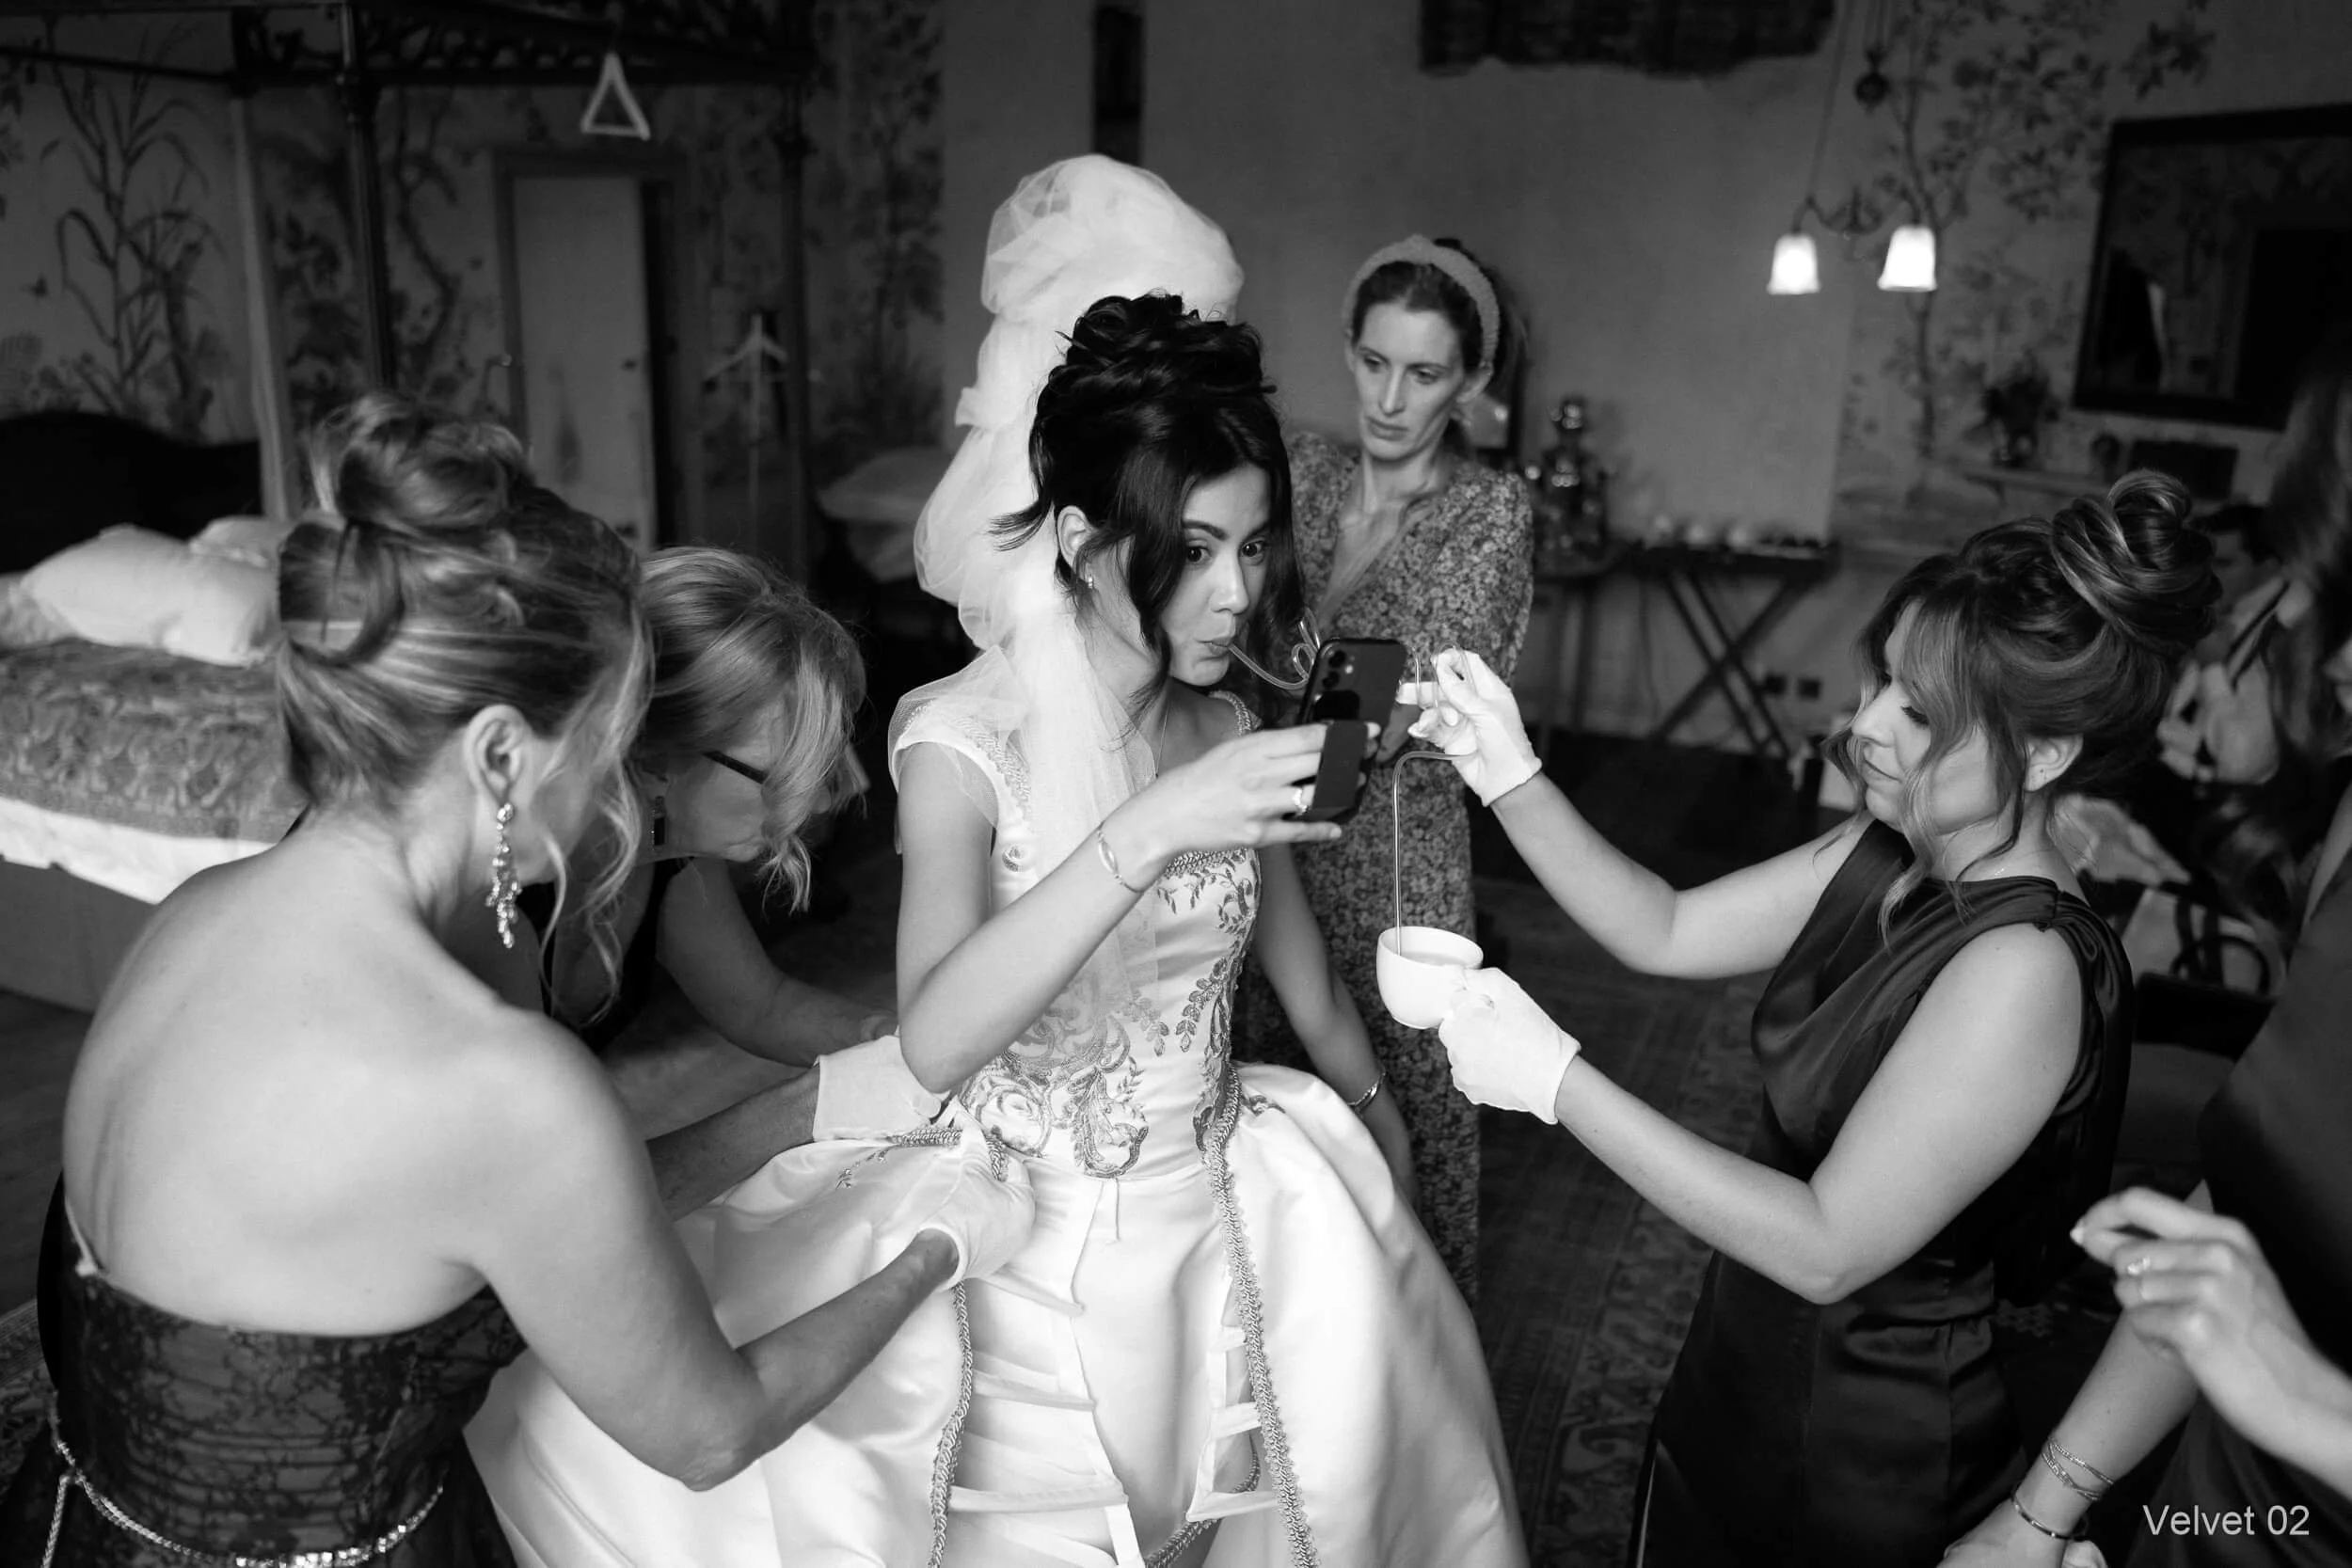
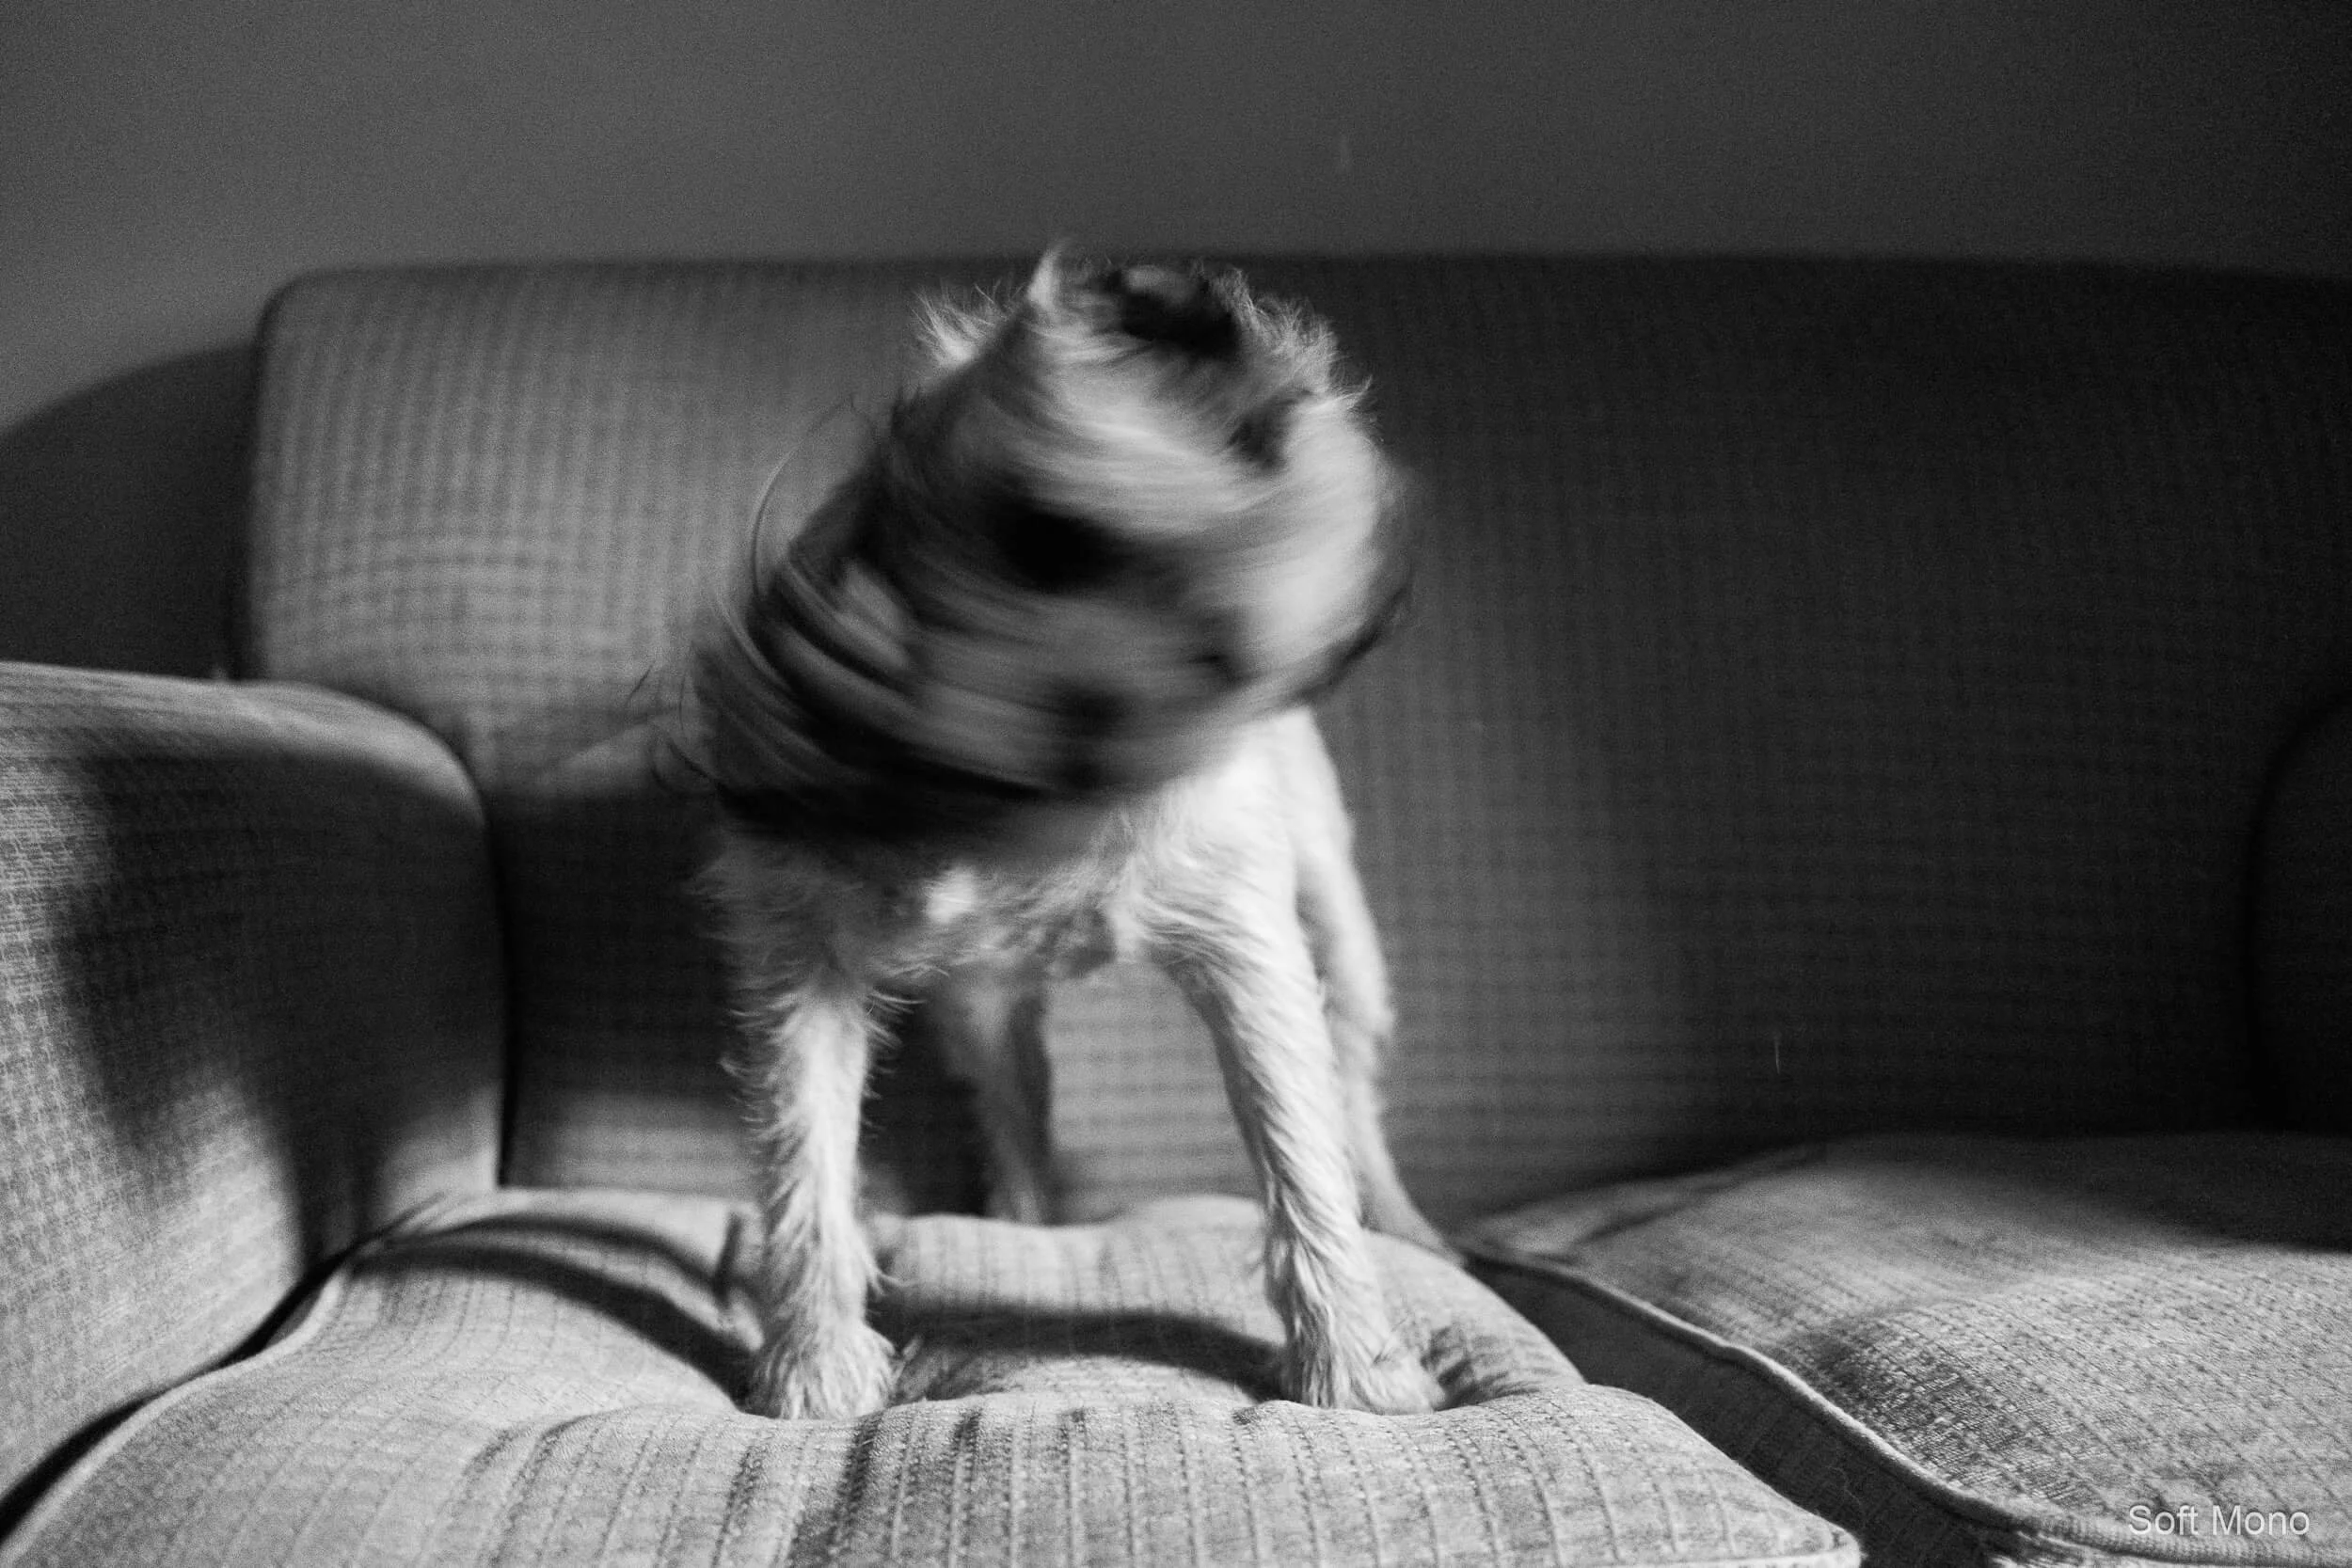 Image 5 of 5
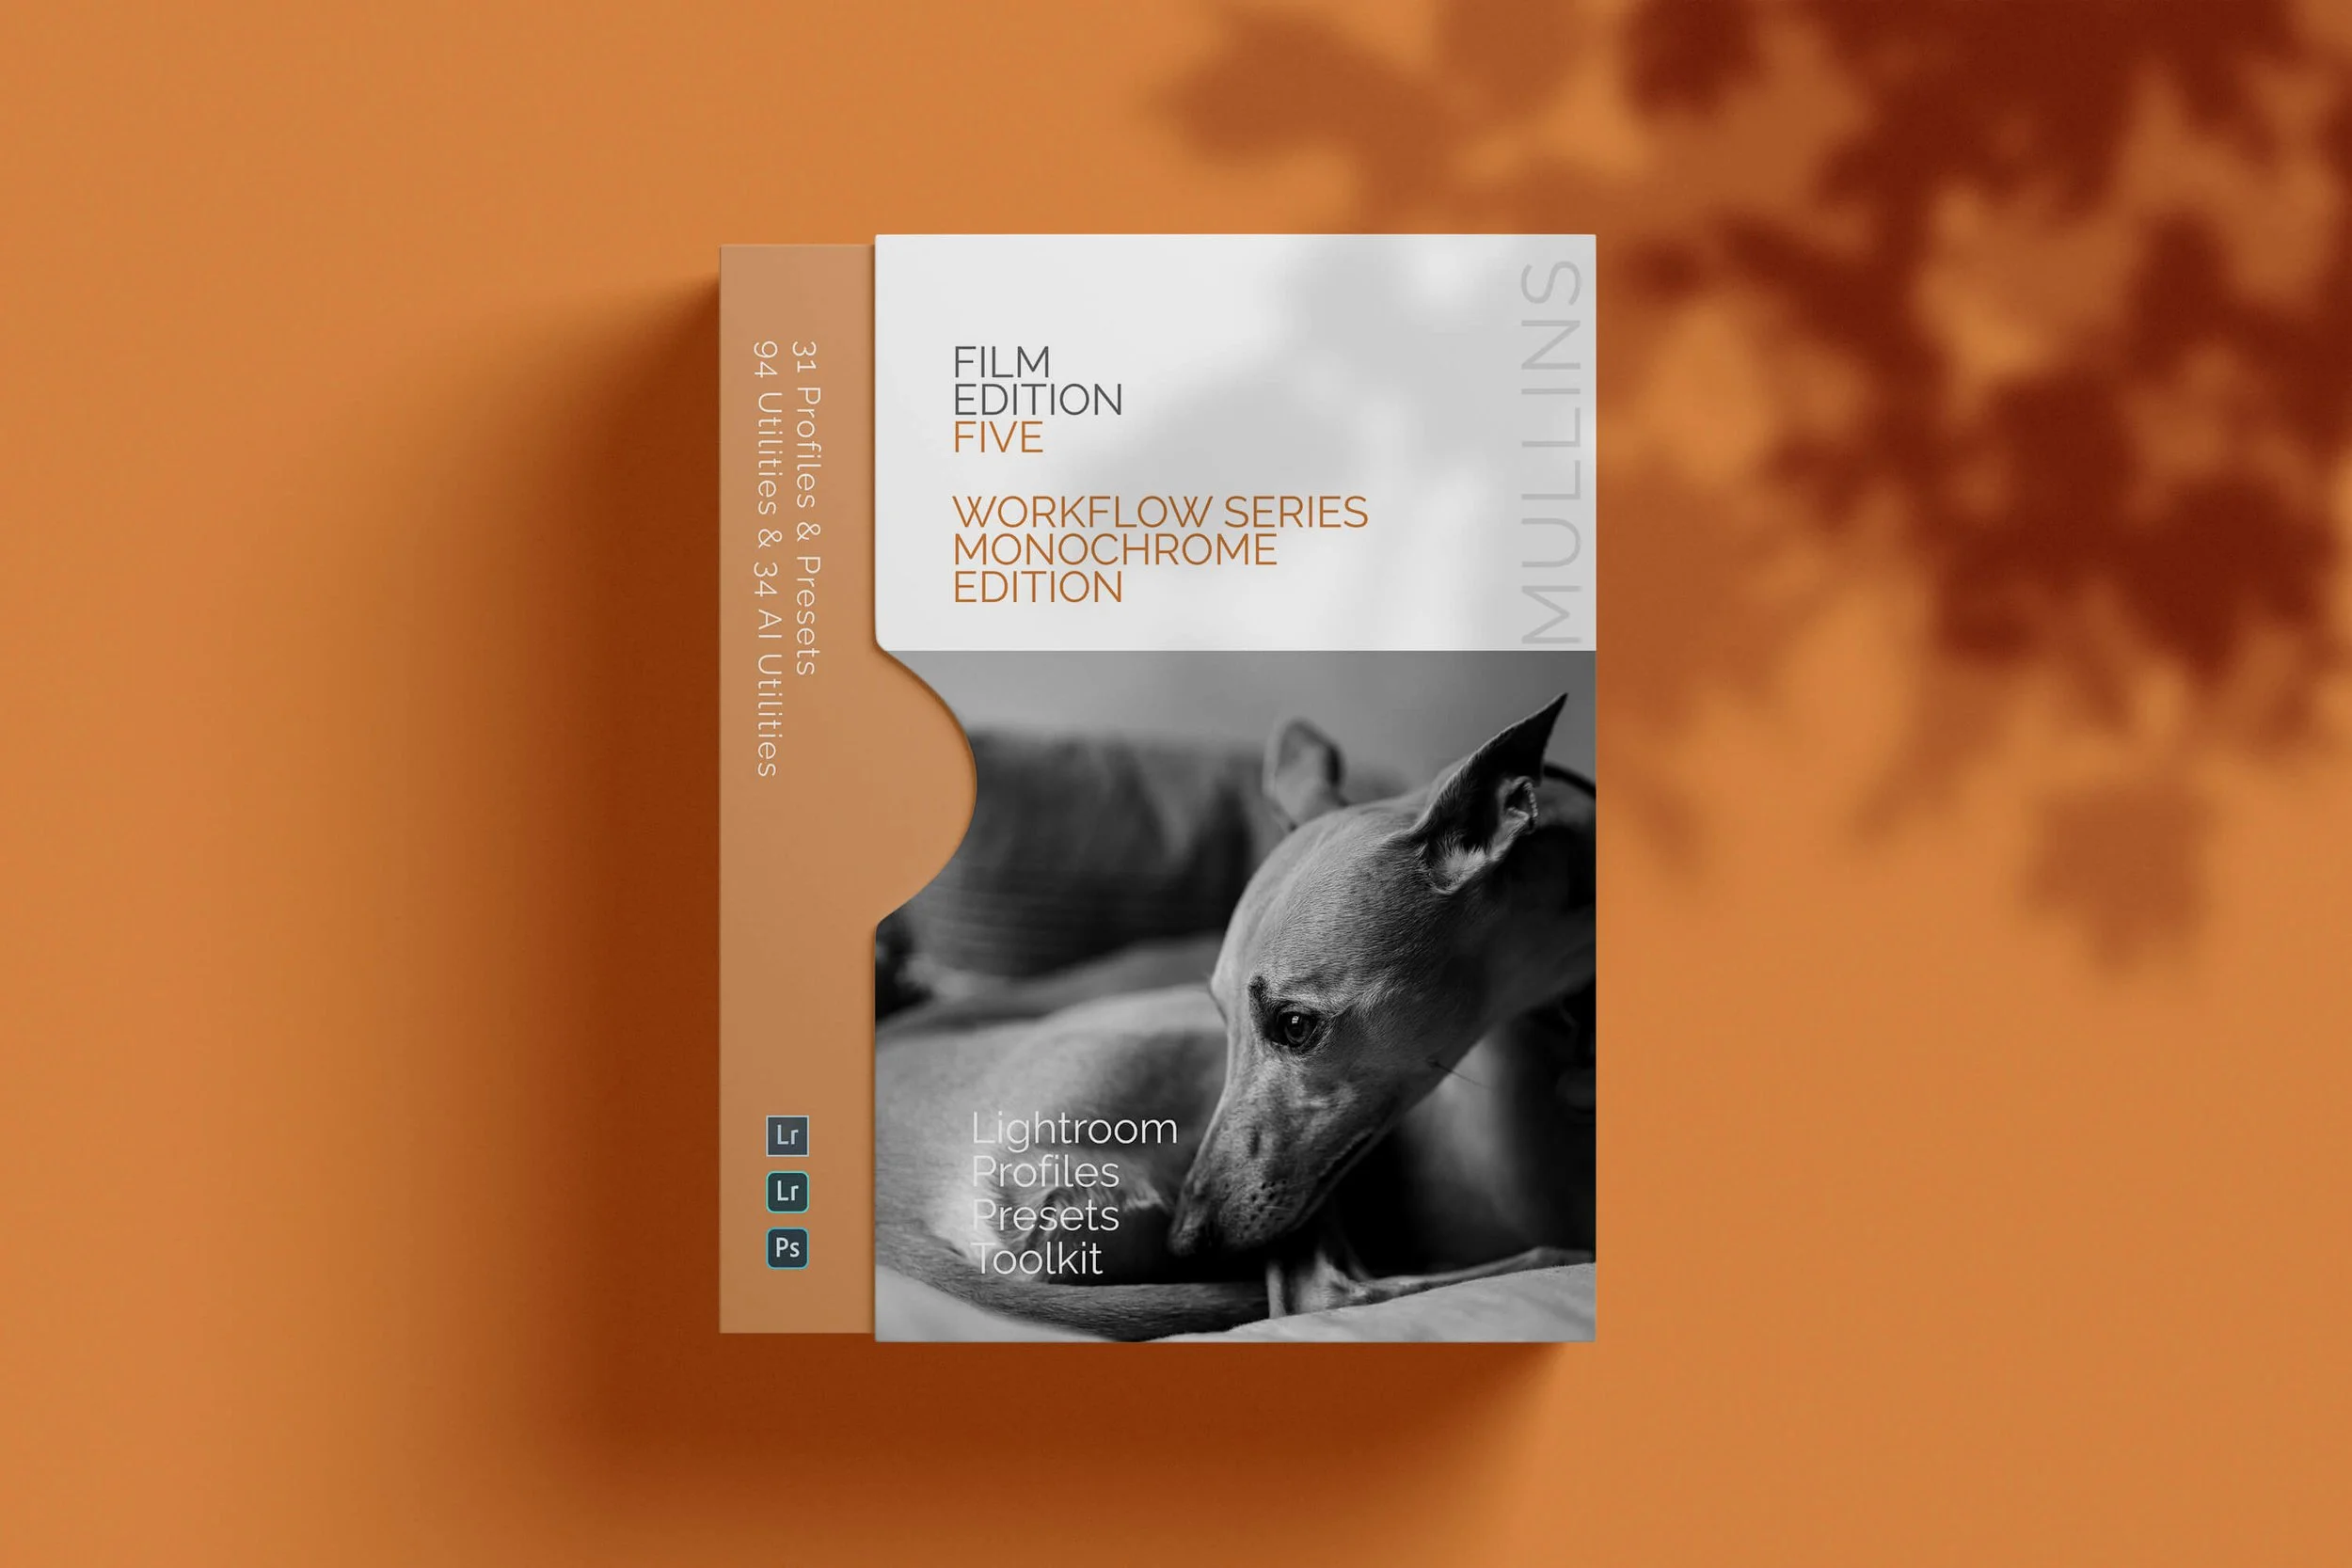
Film Edition 5 - Workflow Series (Monochrome) + AI Utilities
See Film Edition 5 Monochrome in Action
This video gives a quick tour of Film Edition 5 Workflow Series Monochrome, showing a spread of looks, a couple of real before and after edits, and a glance at the built-in toolkit and AI utilities.
The workflow is designed to feel simple and repeatable: start with a monochrome profile to set the tonality, apply a workflow preset if the image needs more shape or bite, then use the utilities and AI tools to fine-tune specific areas without getting bogged down in sliders.
Everything is kept tidy in Lightroom, so the pack stays easy to navigate, and it’s perfectly normal to stop after one click if the photo already feels right.
What’s included in the download
Total items: 170 (presets + profiles)
Click any heading to expand the list.
Film Edition 5 - Workflow Series (Monochrome) 31 items
Profiles 11
- Andalusian High Key (Warm Paper)
- Classic (Push)
- Clean Editorial (Soft Matte)
- Flash Bar Noir (Hot Whites)
- Grit Noir (Pushed Grain)
- Monochromatic Film (Natural)
- Pure (Deep Shadow)
- Pushed Tri-X (Hard Contrast)
- Soft Mono (Open Whites)
- Soft Mono Fade (Open Whites)
- Velvet (Deep Blacks)
Film Presets 20
- Andalusian 01
- Andalusian 02
- Classic 01
- Classic 02
- Clean Editorial 01
- Clean Editorial 02
- Flash Bar Noir 01
- Flash Bar Noir 02
- Grit Noir 01
- Grit Noir 02
- Monochromatic Film 01
- Monochromatic Film 02
- Pure Deep Shadow 01
- Pure Deep Shadow 02
- Pushed Tri-X 01
- Pushed Tri-X 02
- Soft Mono 01
- Soft Mono 02
- Velvet 01
- Velvet 02
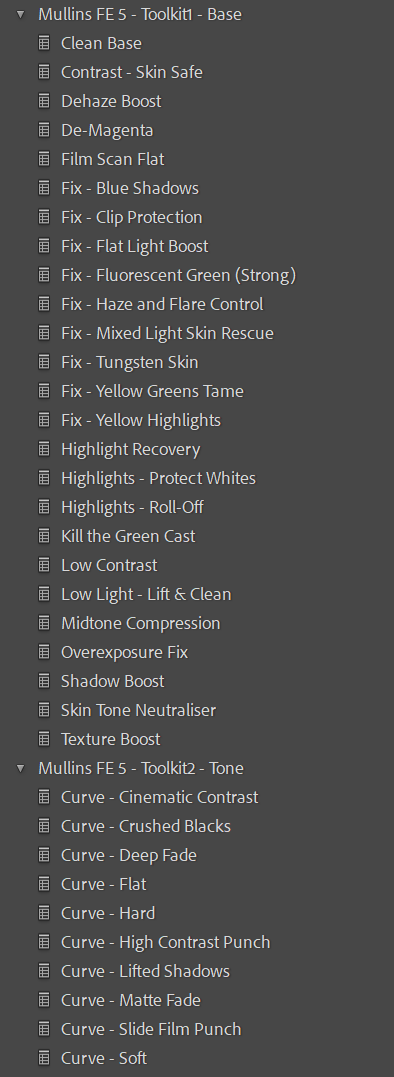
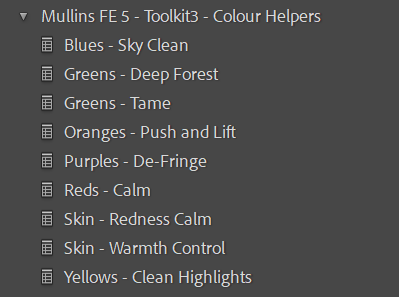
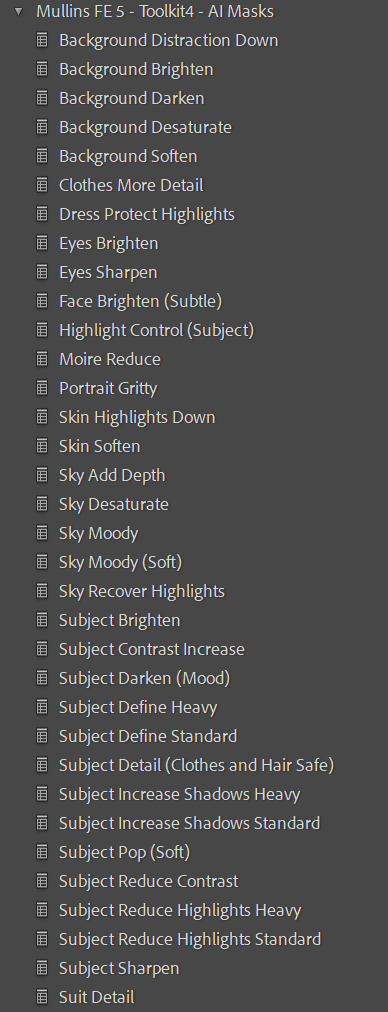
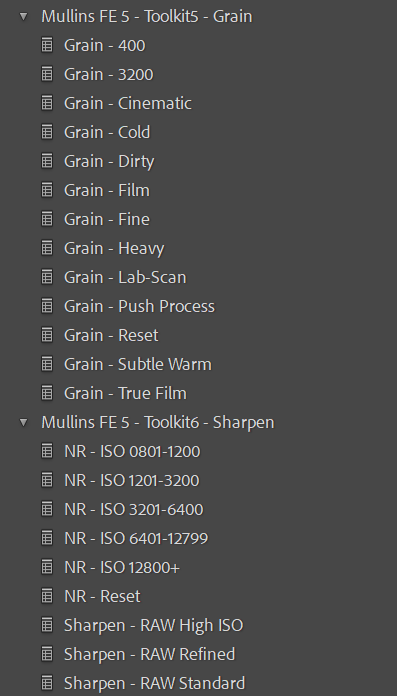
Mullins Lightroom Toolkit (included) 128 presets
AI Masks 34
- Background Brighten
- Background Darken
- Background Desaturate
- Background Distraction Down
- Background Soften
- Clothes More Detail
- Dress Protect Highlights
- Eyes Brighten
- Eyes Sharpen
- Face Brighten (Subtle)
- Highlight Control (Subject)
- Moire Reduce
- Portrait Gritty
- Skin Highlights Decrease
- Skin Soften
- Sky Add Depth
- Sky Desaturate
- Sky Moody
- Sky Moody (Soft)
- Sky Recover Highlights
- Subject Brighten
- Subject Contrast Increase
- Subject Darken (Mood)
- Subject Define Heavy
- Subject Define Standard
- Subject Detail (Clothes and Hair Safe)
- Subject Increase Shadows Heavy
- Subject Increase Shadows Standard
- Subject Pop (Soft)
- Subject Reduce Contrast
- Subject Reduce Highlights Heavy
- Subject Reduce Highlights Standard
- Subject Sharpen
- Suit Detail
Base & Fixes 25
- Clean Base
- Contrast - Skin Safe
- De-Magenta
- Dehaze Boost
- Film Scan Flat
- Fix - Blue Shadows
- Fix - Clip Protection
- Fix - Flat Light Boost
- Fix - Fluorescent Green (Strong)
- Fix - Haze and Flare Control
- Fix - Mixed Light Skin Rescue
- Fix - Tungsten Skin
- Fix - Yellow Greens Tame
- Fix - Yellow Highlights
- Highlight Recovery
- Highlights - Protect Whites
- Highlights - Roll-Off
- Kill the Green Cast
- Low Contrast
- Low Light - Lift & Clean
- Midtone Compression
- Overexposure Fix
- Shadow Boost
- Skin Tone Neutraliser
- Texture Boost
Utilities 21
- Density Medium
- Density Reset
- Density Standard
- Density Strong
- Edge Burn
- Highlights - Warm
- JPEG Reduce Contrast
- Look - Faded Film
- Look - Film
- Look - Polaroid Warm
- Tone Blue
- Tone Gold
- Tone Red
- Utility - As Shot WB Reset
- Utility - Colour Reset
- Utility - Lens Corrections On
- Utility - Presence Reset
- Vignette Reset
- Vignette Subtle
- Warm Standard
- Warm Subtle
Grain 13
- Grain - 3200
- Grain - 400
- Grain - Cinematic
- Grain - Cold
- Grain - Dirty
- Grain - Film
- Grain - Fine
- Grain - Heavy
- Grain - Lab-Scan
- Grain - Push Process
- Grain - Reset
- Grain - Subtle Warm
- Grain - True Film
Tone & Curves 10
- Curve - Cinematic Contrast
- Curve - Crushed Blacks
- Curve - Deep Fade
- Curve - Flat
- Curve - Hard
- Curve - High Contrast Punch
- Curve - Lifted Shadows
- Curve - Matte Fade
- Curve - Slide Film Punch
- Curve - Soft
Colour Helpers 9
- Blues - Sky Clean
- Greens - Deep Forest
- Greens - Tame
- Oranges - Push and Lift
- Purples - De-Fringe
- Reds - Calm
- Skin - Redness Calm
- Skin - Warmth Control
- Yellows - Clean Highlights
Sharpen & NR 9
- NR - ISO 0801-1200
- NR - ISO 1201-3200
- NR - ISO 12800+
- NR - ISO 3201-6400
- NR - ISO 6401-12799
- NR - Reset
- Sharpen - RAW High ISO
- Sharpen - RAW Refined
- Sharpen - RAW Standard
Finishers 7
- Finish - Calm Colours
- Finish - Crisp (No Harshness)
- Finish - Halation Glow (Subtle)
- Finish - Print Ready (Matte)
- Finish - Soft Contrast and Bite
- Finish - Soft Glow
- Finish - Subtle Colour Pop
11 All New Monochrome Profiles (the foundation)
These are not “a preset that moves a few sliders”. The profiles in all my Preset Packs, including Film Edition 5 - Workflow Series, are built externally, then brought into Lightroom as proper profiles, so the look is created through a controlled colour and tonal transform rather than a handful of Lightroom adjustments.
In practical terms, a profile sits right at the start of Lightroom’s processing pipeline. It defines the file's underlying response before you even touch exposure, contrast, curves, HSL, or any of the usual sliders. That’s why profiles feel different. They change how the image behaves, not just how it looks afterwards.
What that means for you:
Designed for believable monochrome tonality, with a film-inspired curve and separation through the midtones
Cleaner highlight roll-off, so bright areas don’t snap into harsh white or get that brittle, crunchy feel
Stronger shadow structure, holding detail and shape even when you add contrast or push the image harder than normal
You’re still in full control of the final look. The profile gives you the foundation, then the presets, and your own tweaks take it wherever you want.

What People Are Saying
-
"You've done it again, Kevin. Incredible set of tools for a working photographer like me."
S.B
-
"I have all your previous Lightroom Presets but I love how you keep creating new looks for us to try."
J.L
-
"I'm just getting started with Lightroom but absolutely love the Pure Deep Shadow Preset in Film Edition 5"
R.J
Workflow Presets (the system)
Once the profile has given you the base tonality, the workflow presets take over. These are the practical, repeatable steps that get you from “good starting point” to “finished monochrome” without you having to rebuild the same edits over and over.
They’re designed to be used in a simple order, but they’re not fragile. You can stop early if the image is already there, or you can push further when a frame needs more shape, more depth, or a bit more bite.
The important bit is this: the workflow presets are built to work with the profile, not fight it. So you’re shaping contrast and midtones on top of a deliberate tonal response, rather than trying to force a look using global Contrast and a heavy-handed curve.
Typical use:
Step 1: Choose your base profile
This gives you the core look. It’s the “what kind of monochrome is this?” decision. Clean, classic, punchier, moodier - whatever direction you’re going in starts here.
Step 2: Apply a workflow preset to shape tone and presence
This is where you control the feel of the image without wrecking it. The workflow presets are focused on things like:
midtone presence (so the image doesn’t feel flat, especially in soft light)
contrast behaviour (more shape, but with controlled highlights and usable shadows)
micro-contrast and clarity-style structure applied carefully, so skin and backgrounds don’t go crunchy
The aim is to add definition and depth while keeping the photo believable.
Step 3: Finish only if the photo needs it
Not every image needs grain. Not every image needs extra punch. The finishing tools are there for when they genuinely improve the photo: texture, subtle toning, highlight protection, haze control, and so on.
So the workflow stays consistent, but the final result still feels tailored to the frame.
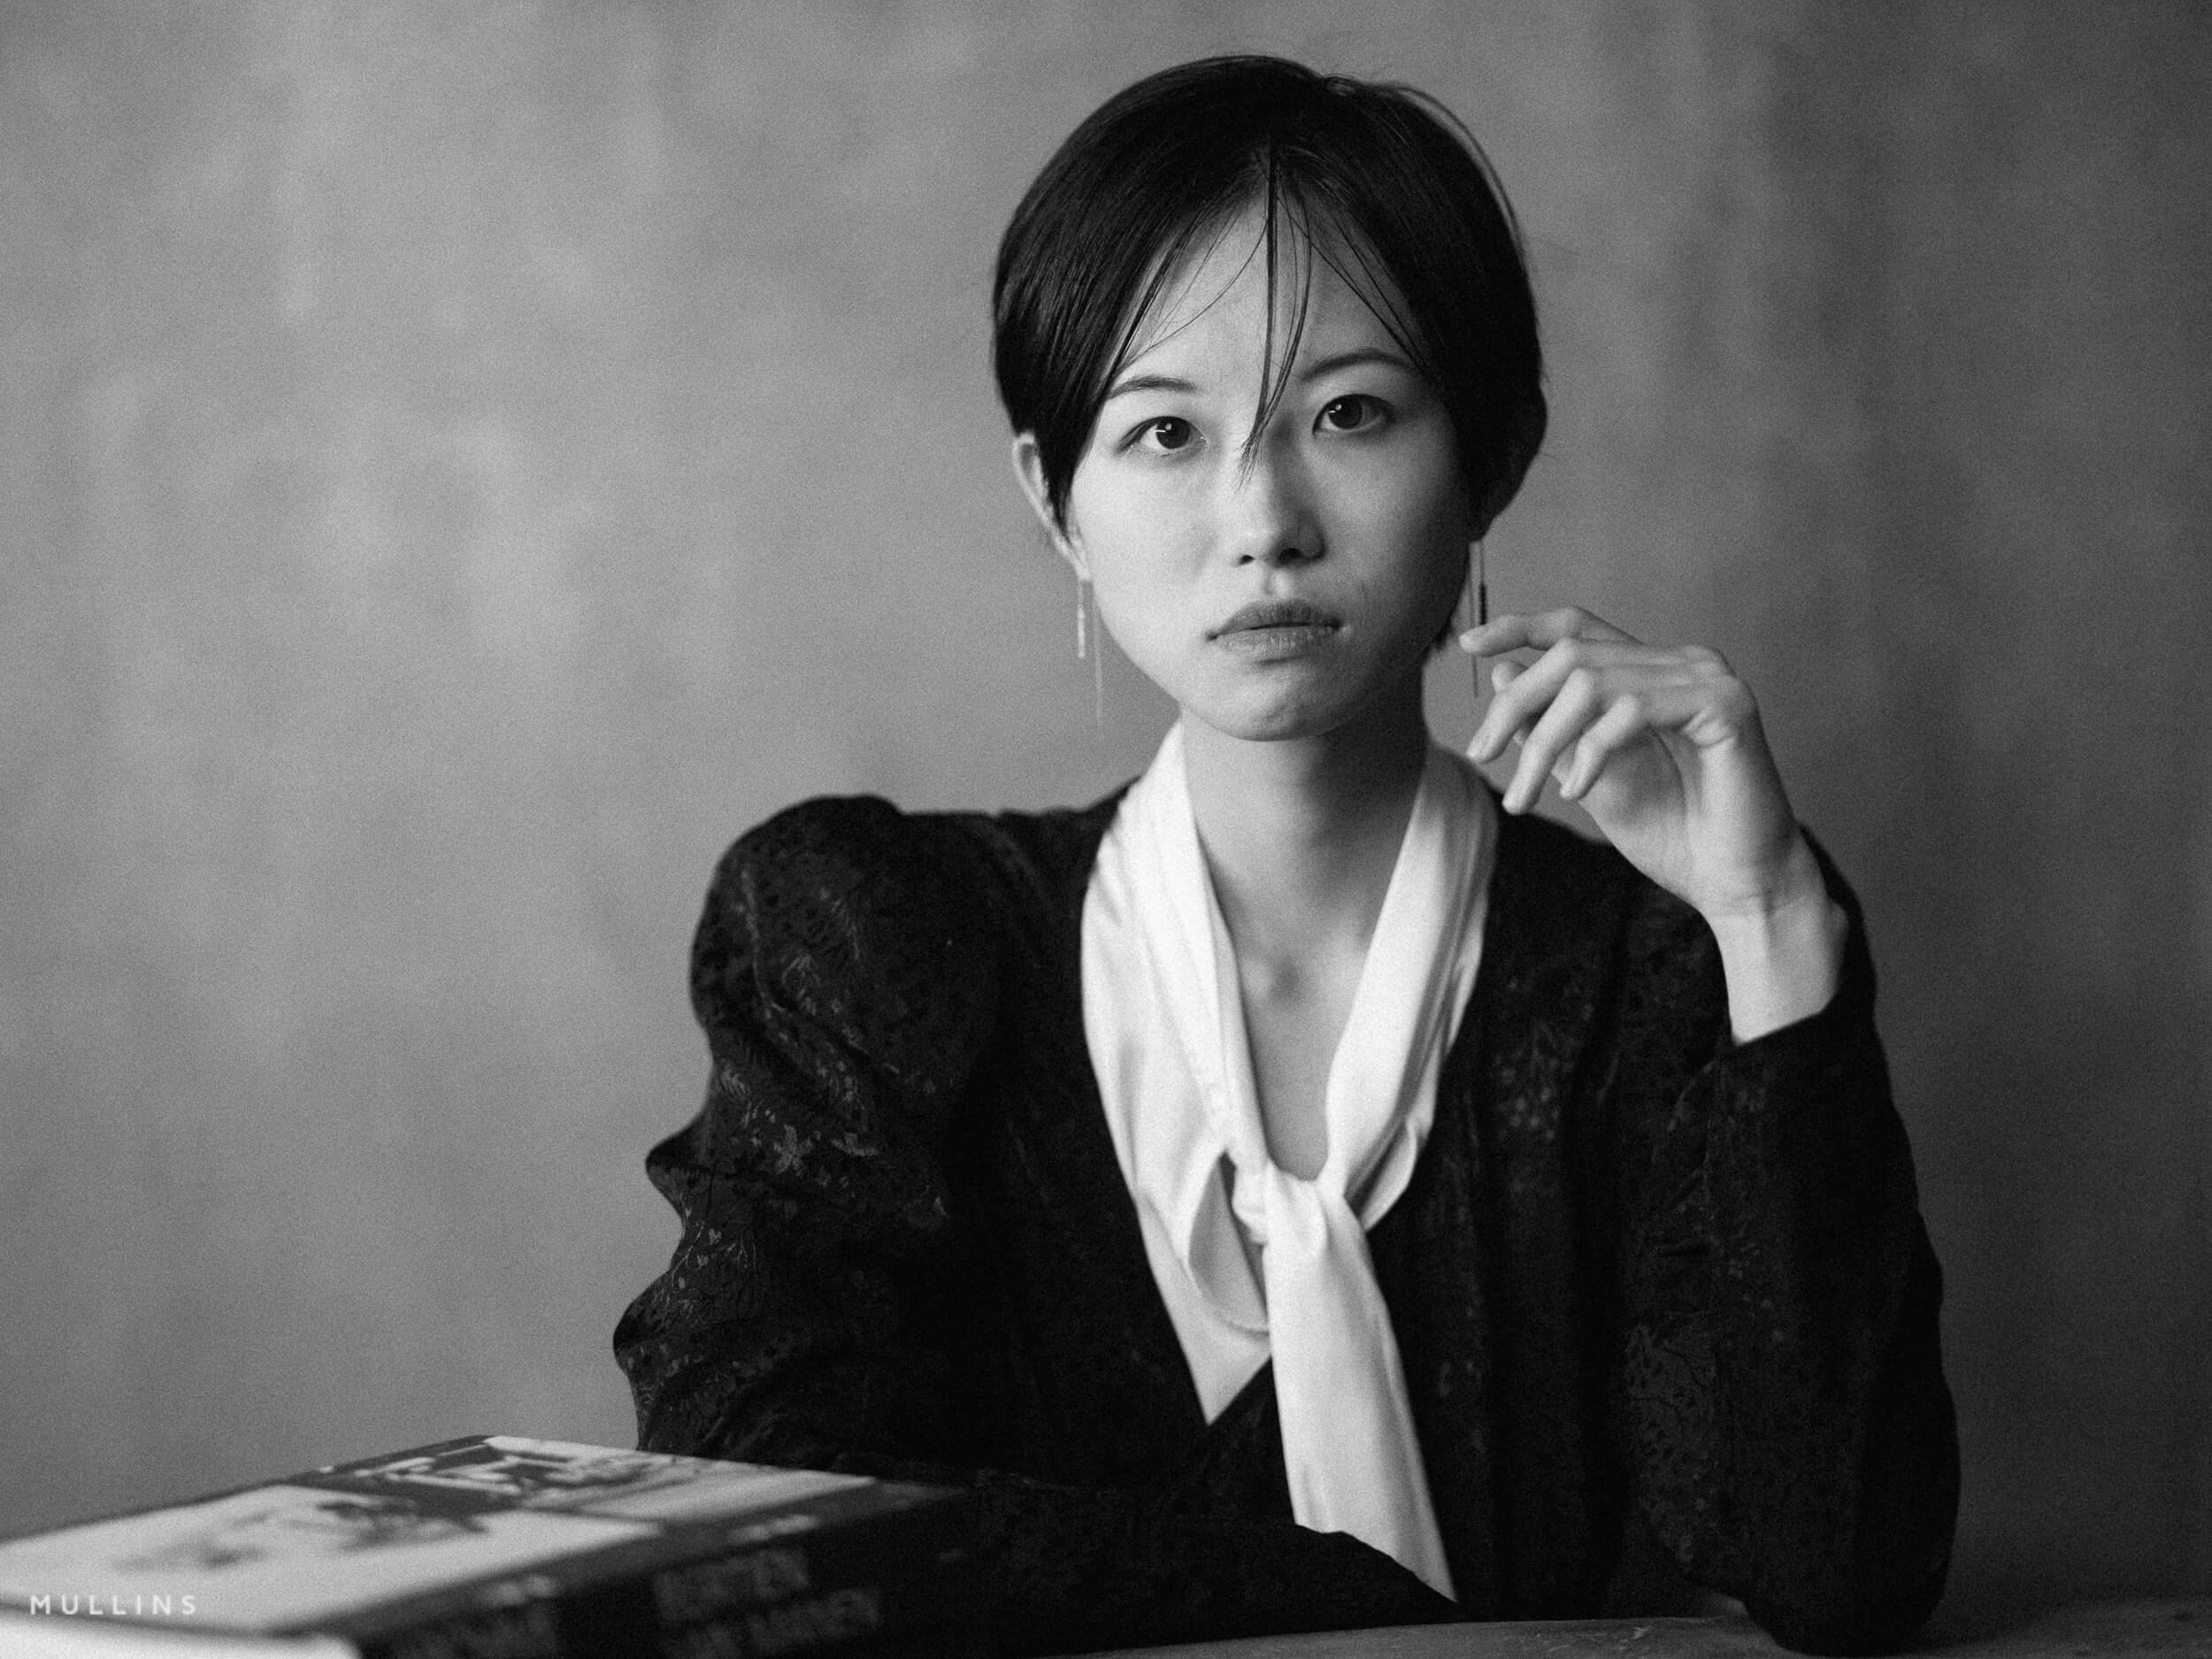
The sample below shows the original RAW (1), the Pushed-Tri-X Profile applied (2) and finally, Grain Heavy + Halation Glow (3)
Clean folder structure in Lightroom (so you’re not hunting around)
One of the most common complaints I hear about preset packs is that they turn Lightroom into a mess. Dozens of random names. No order. No logic. You spend more time scrolling than editing.
Film Edition 5 - Workflow Series is the opposite of that (as are all my Preset packs)
Everything is organised into a clear folder structure inside the Presets panel, with consistent naming and a simple flow. Profiles sit where you’d expect, film presets are grouped together, and the Toolkit is separated into sensible categories (AI Masks, Fixes, Grain, Curves, and so on). It means you can find what you need in seconds, apply it, and keep moving.
Compatibility
Lightroom Classic (Mac and Windows)
Lightroom Desktop (cloud-based)
AI Mask presets need Lightroom Classic 11.0+ or Lightroom Desktop 5.0+
FAQ
Is this the same as Film Edition 4 Monochrome?
Different idea. Film Edition 4 is more “set of looks”. Film Edition 5 Workflow System is more “system and workflow”, with fixes and tools designed to keep you moving.
Do I need to use the presets in order?
You don’t have to, but it’s built that way for a reason. If you follow the workflow, it’s faster and more consistent across a set.
Are these one-click?
Sometimes, yes. But proper editing still needs basic exposure and white balance to be right. The pack is designed to make the creative part quick and reliable.
Will it work on all cameras?
Yes. Profiles and presets are designed to be camera-agnostic, but RAW quality and lighting still matter.
Can I use this alongside your other Film Editions?
Yes. You can mix systems if you want. Just avoid stacking heavy contrast and heavy texture from multiple packs at the same time unless you’re deliberately going for that.
If you want a monochrome look that’s consistent, film-inspired, and built for real-world editing speed, Film Edition 5 - Workflow Series (Monochrome) is designed for exactly that.