
Fujifilm Dynamic Range: 5 Mistakes and Fixes

What this article covers
An explanation of Fujifilm Dynamic Range, plus the five most common mistakes I see people make with DR settings and the fixes that should get you back to clean highlights and usable shadows.
Dynamic Range on Fujifilm cameras is one of those menu items that sounds simple, but it can send you down a rabbit hole fast. Especially when you are shooting real life. People in white shirts. Faces in mixed light. A bright window behind someone’s head. All that kind of stuff.
The main thing to know is this: Fujifilm DR settings are mostly about protecting highlights in your JPEG (and the preview you see), by effectively holding exposure back and then lifting the darker tones back up. It's not particularly magical, but it is pretty clever technology.
Used well, DR is brilliant. Used badly, it can make images look flat, noisy, or weirdly “thin”, especially if you are a JPEG-only photographer.
So, here are the five mistakes I see most often that crop up in my street photography workshops, plus the fixes that should work.
Quick note on camera differences
Fujifilm Dynamic Range behaves broadly the same across X-Series cameras, but the exact rules can vary slightly by model and generation. In particular, the ISO requirements for DR200 and DR400, how DR Auto behaves, and how D Range Priority interacts with DR can differ.
So if your friend’s X100VI seems to behave differently to your X-T5 (or your older body), you’re probably not imagining it. Treat the guidance below as the principle, then check your specific model’s manual if something looks inconsistent.
Fujifilm Dynamic Range quick reference (DR100 vs DR200 vs DR400)
| DR setting | Best used when | What it does (in plain English) | Common downside | Quick fix if it looks wrong |
|---|---|---|---|---|
| DR100 | Soft light, low contrast scenes, indoor ambient light where highlights are not under threat | The clean, “normal” rendering. No extra highlight protection, no extra shadow lifting | Highlights can clip sooner in harsh light (bright sky, backlight, white shirts) | If highlights are clipping, try DR200 (or a touch of negative exposure compensation) |
| DR200 | Mixed light, backlit faces, bright clothing, sunny days where you still want a natural look | Adds moderate highlight protection while keeping the midtones fairly lively | Shadows can look a bit lifted, and noise can show more in very dark areas | If it looks flat or noisy, go back to DR100 for softer scenes, or raise exposure slightly |
| DR400 | Very contrasty scenes: harsh sun, bright windows, strong backlight, shiny highlights | Maximum highlight protection. The camera holds exposure back more, then lifts shadows more | Can look flat or “thin” in low contrast scenes, and can emphasise noise in shadows | If it looks grim, use DR200 (or DR100) unless highlights are genuinely in danger |
| DR Auto | Fast shooting in changing light when you do not want to think about it | The camera chooses DR100/200/400 depending on what it thinks the highlights are doing | Can change the look from shot to shot, and may lift shadows more than you would choose | If consistency matters, pick DR100 or DR200 and leave it there |
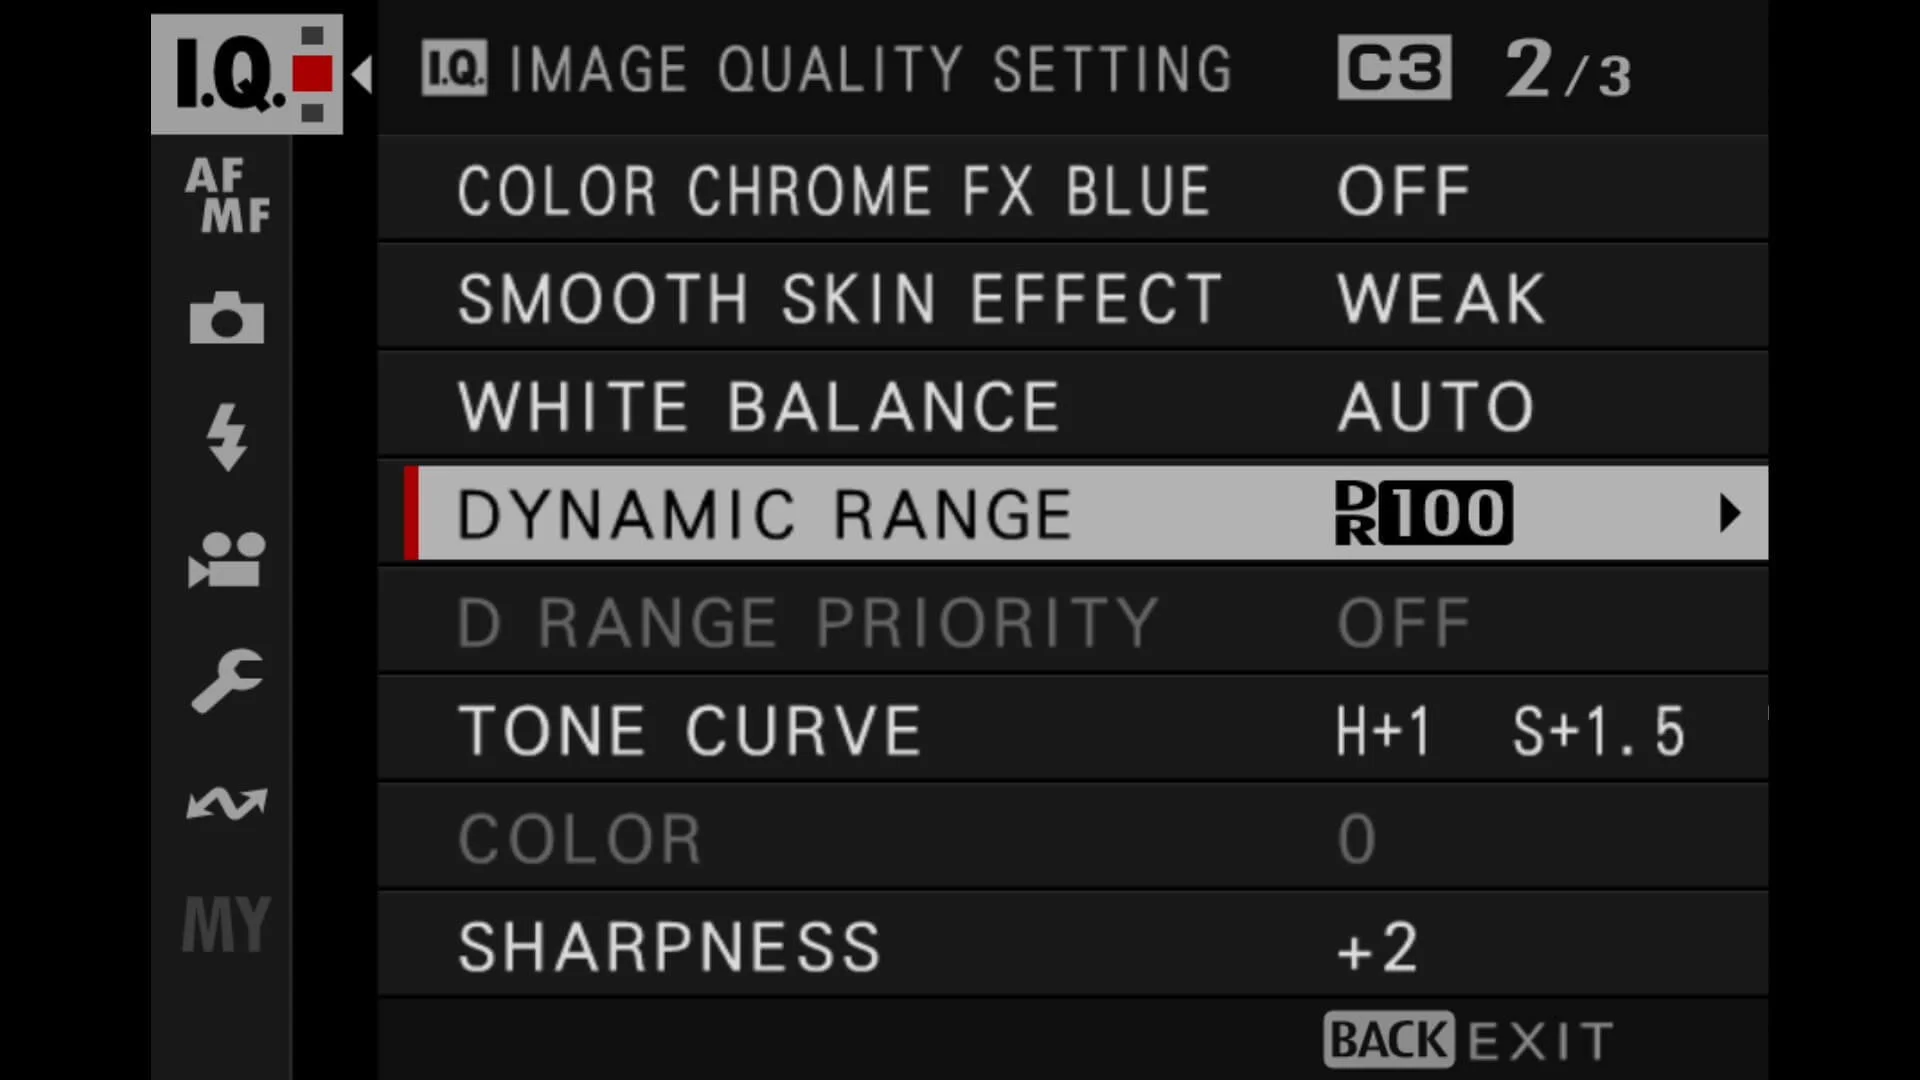
Mistake 1: Thinking DR200/DR400 is “broken” because it’s greyed out
This is the main one I see. You go into the menu, try to select DR200 or DR400, and the camera says “nope”.
Why it happens
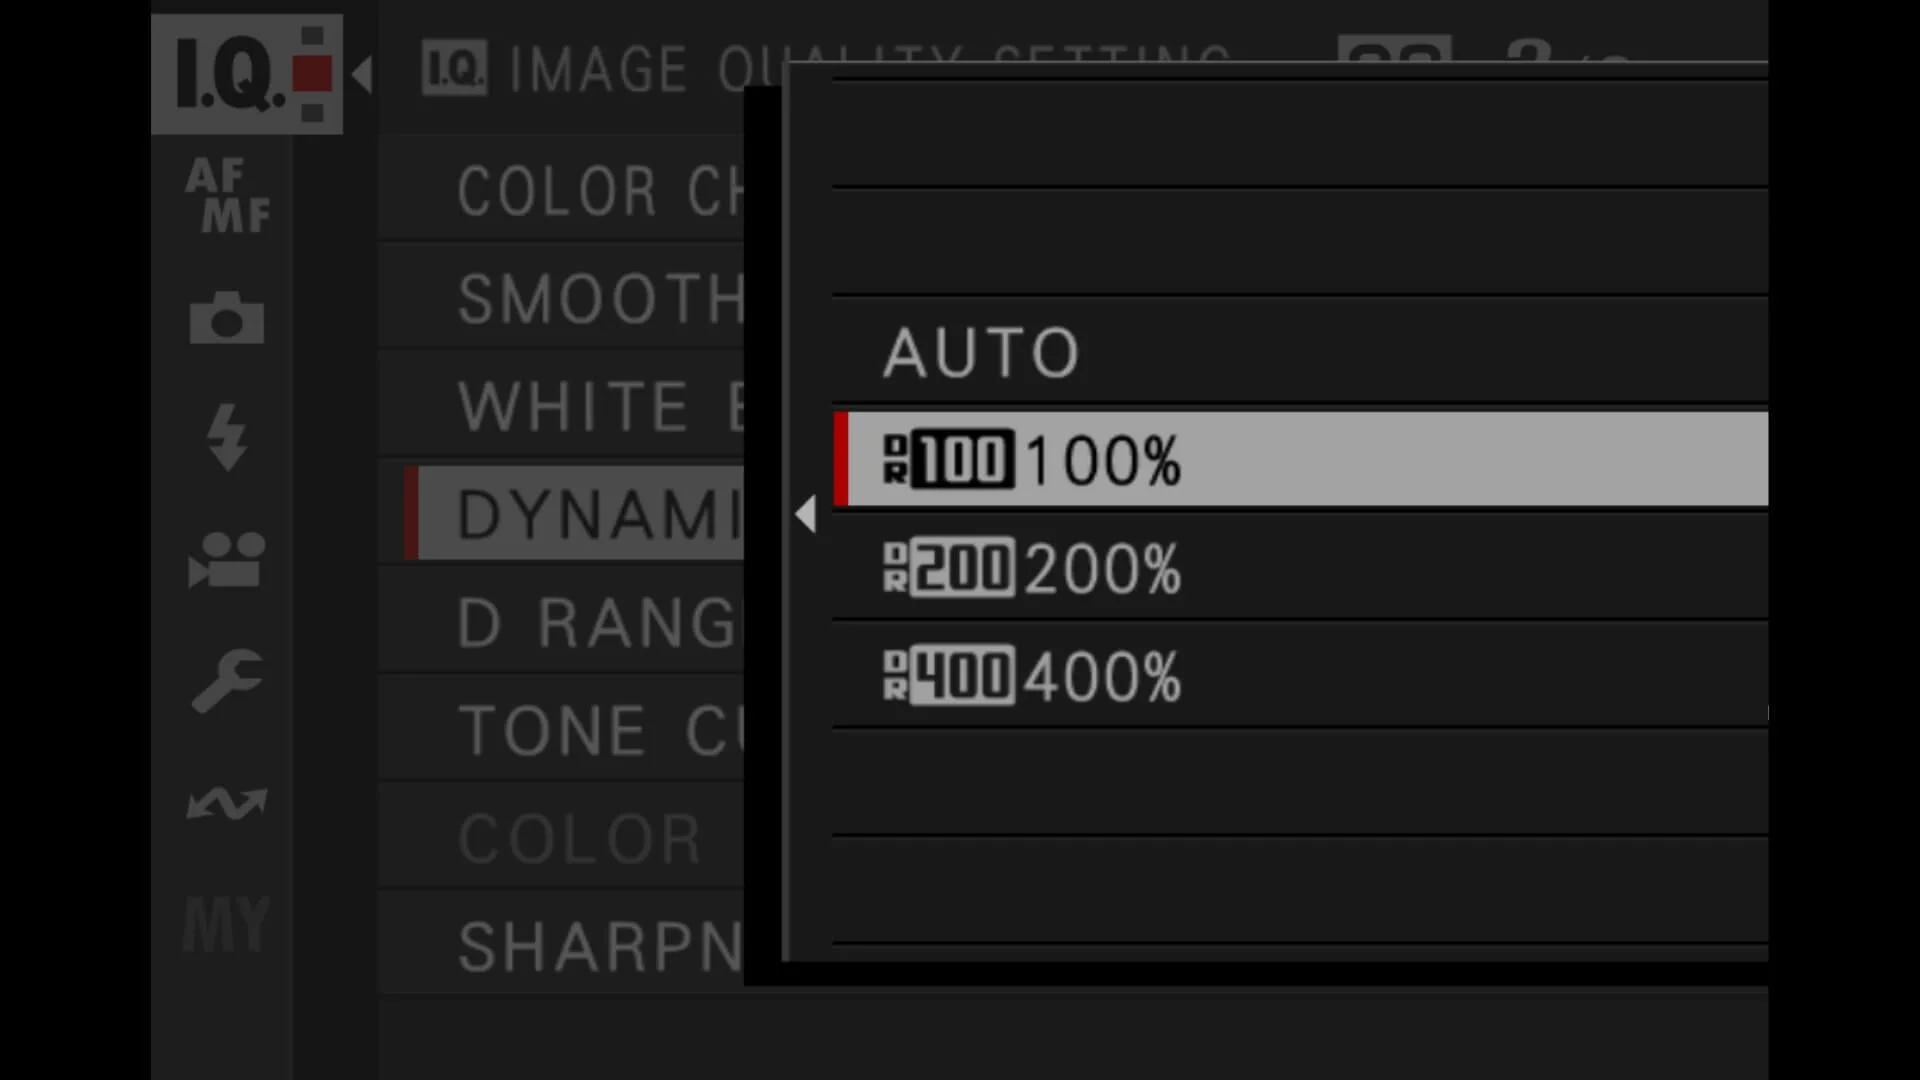
Fujifilm only allows DR200 and DR400 above certain ISO thresholds, and those thresholds vary by camera generation. If your ISO is too low (or you are locked to a low ISO), those options will be unavailable.
Fix
Make sure you are not forcing the ISO too low.
If you use Auto ISO, check the minimum ISO in that Auto ISO preset. If you are in manual ISO, bump the ISO up and check the DR menu again. If you want the camera to manage it, DR Auto can also be a sensible default for general shooting.
A small extra thing, because it catches people out: if you are using flash (I don’t), DR options can behave differently depending on camera and mode.
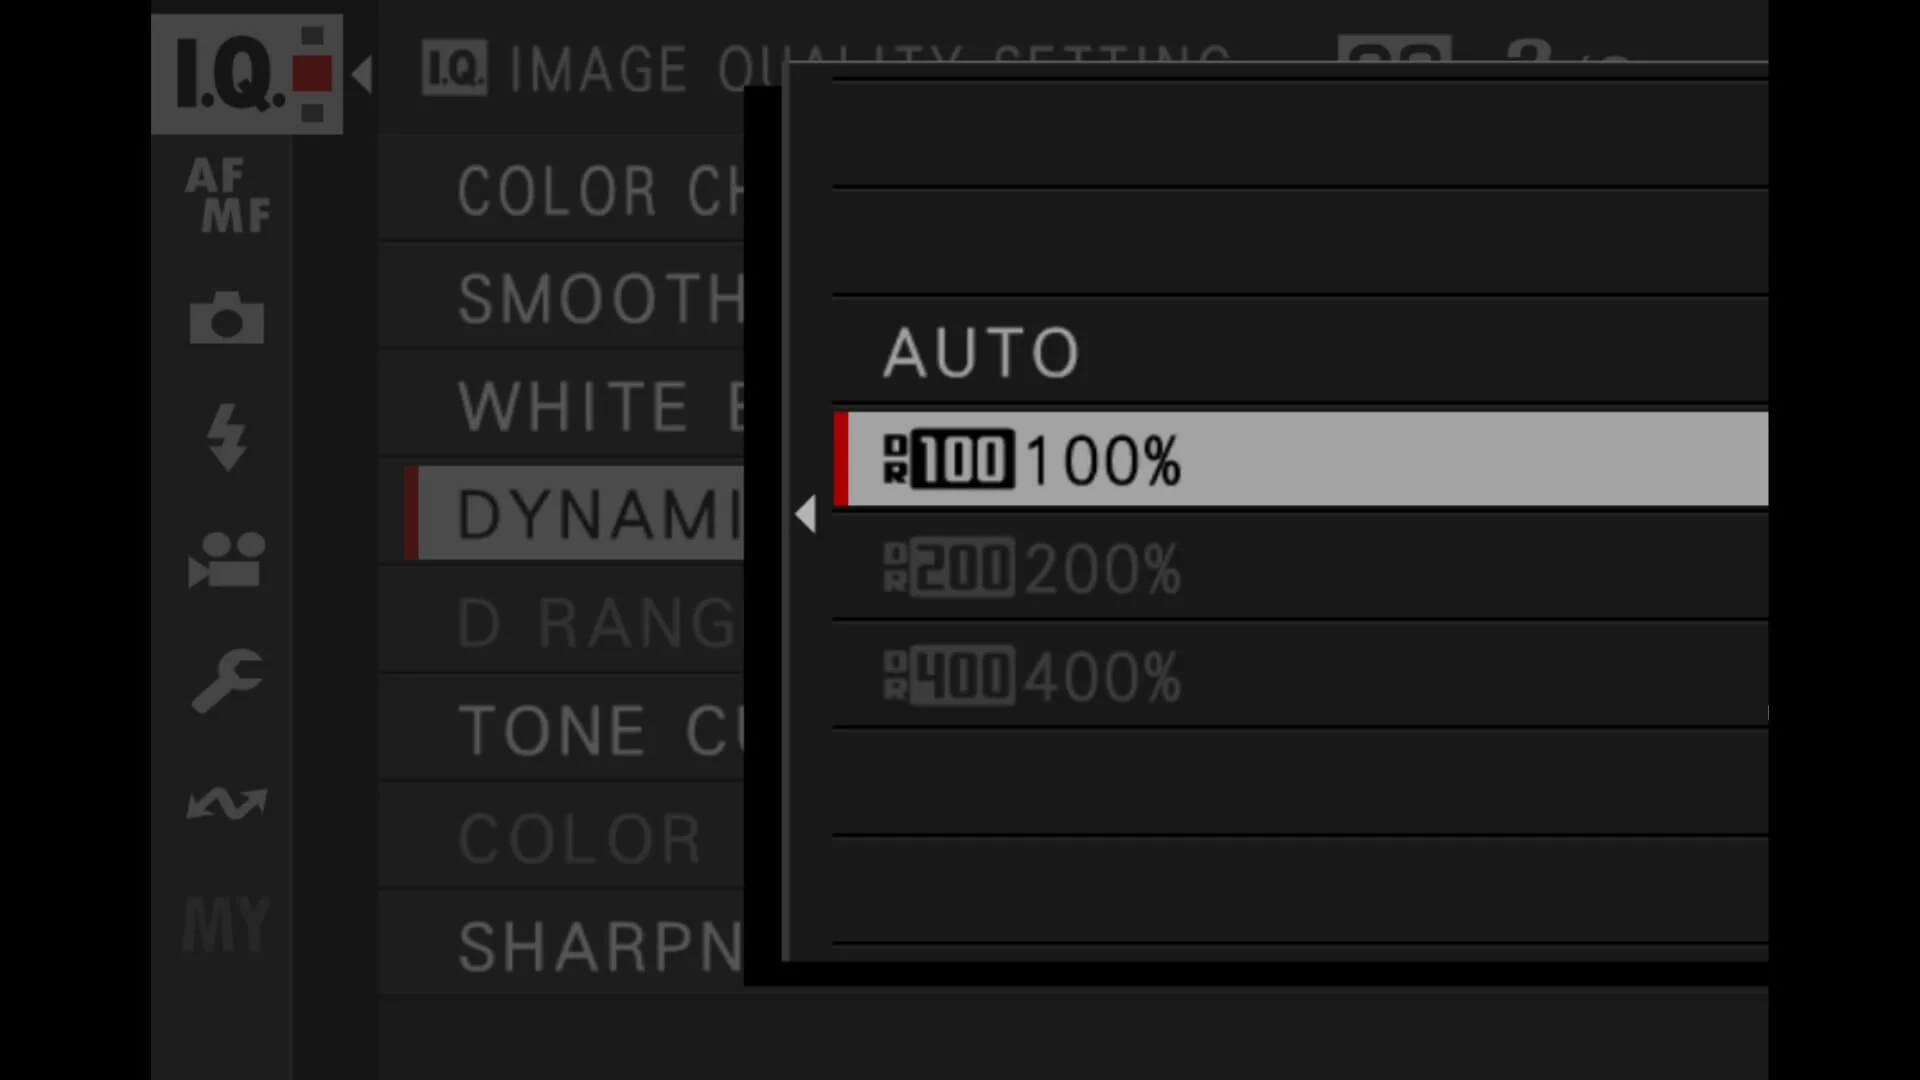
Fujifilm only allows DR200 and DR400 above certain ISO thresholds
Mistake 2: Using DR400 in low contrast scenes and wondering why everything looks a bit grim
DR400 sounds like the obvious “best” option. More is better, right?
Not always.
Why it happens
DR400 is a bigger highlight-protection mode. To do it, the camera has to hold exposure back more, then lift shadows more. In a low contrast scene, you do not need that protection, so you are basically creating work for the camera. The result can be muddier shadows, more visible noise, and a slightly lifeless look.
Fix
Match DR to the scene.
If the light is soft and there are no overly bright highlights, DR100 is often the best option. If it’s bright and contrasty, DR200 is a great middle ground. DR400 is the one I reach for when highlights are genuinely at risk, like harsh sun, backlit faces, white shirts, shiny foreheads, that sort of thing.
If you want a simple default and you shoot lots of mixed conditions, DR Auto is fine. The mistake is assuming DR400 is universally better.
Mistake 3: Exposing too dark because you assume DR will “save it”
This one is easy to do, because it starts with what seems like a common sense approach. You want to protect highlights, so you underexpose. Sensible. But then you go too far, thinking DR will do the rest.
Why it happens
DR can lift tones, but it cannot invent clean “data” that was never captured. If you push exposure down too much, the camera ends up lifting shadows aggressively, and that is where noise and mush appear.
Fix
Protect highlights, but not too much.
I tend to do this in a simple way. I watch the highlights and the overall exposure feel. If I need to protect a bright area, I’ll use a bit of negative exposure compensation, but I don’t go searching for the darkest possible exposure just because it makes the highlight warning disappear.
A practical habit that helps: take a test shot, zoom in on a face (or the important midtones), and check you still have decent texture and tone. If the face is looking odd, your exposure is too low, regardless of how safe the highlights look.
Mistake 4: Mixing DR with other tone tools and ending up with a strange, crunchy look
Fujifilm gives you a few different “levers” that affect tones. DR is one. Highlight Tone and Shadow Tone are others. D Range Priority is another. They can work together, but they can also add up to something a bit odd.
Why it happens
If you combine high DR with aggressive Shadow Tone or Highlight Tone settings, you can end up pushing and pulling tonal areas in a way that looks unnatural. Sometimes it’s fine for a gritty look, but often it just looks strange.
D Range Priority can also override your DR behaviour, depending on the camera and settings. People forget it’s enabled, then wonder why the DR menu feels like it is not doing what they asked.
Fix
Keep it simple. Change one thing at a time.
If your goal is highlight protection, let DR do that job and keep Highlight and Shadow Tone fairly neutral. If your goal is a punchy look, do it with tone settings, but don’t also crank DR unless you really need highlight headroom.
Also, if DR is behaving oddly, check if D Range Priority is enabled. It’s one of those settings that sits there and changes everything - and not always for the best.
Mistake 5: Expecting DR to behave the same for RAW files as it does for JPEGs
This trips up loads of people, especially if they shoot RAW but preview with JPEG, or they rely on the back-of-camera look to judge exposure.
Why it happens
DR settings primarily affect the JPEG rendering and the preview. Your RAW file still contains the sensor data, and you can recover highlights and shadows in post, but the camera’s DR setting influences what you see on the back screen and what the JPEG looks like straight out of camera.
So you might think “that looks great” in camera, then open the RAW and it looks different. Or you might think “that’s too dark” in camera, when the RAW is actually fine.
Fix
Decide what you are using DR for.
If you shoot JPEG (or you care a lot about your JPEG preview), DR matters directly, and you should treat it as part of your look.
If you shoot RAW, DR is still useful for preview and for any JPEGs you produce, but you should base exposure decisions on what you know about your editing workflow, not just the JPEG look. In practice, that means not overreacting to a flatter preview if the exposure is OK.
If you want a consistent experience, one approach is to shoot RAW + JPEG and keep DR predictable (DR100 or DR200, depending on your style), rather than bouncing around and then wondering why files don’t match your expectations.
If you prefer shooting RAW
If you shoot RAW and you’re editing afterwards anyway, this is the point where my Lightroom presets can make life a lot easier. I use them as my starting point on pretty much everything I edit, because they get me to a consistent look quickly, then I just fine-tune exposure and a couple of small bits depending on the scene. They’re not Fujifilm-only either. They work on files from any camera, because it’s really about the way the tones and contrast are shaped, not the brand on the front of the body.

My default settings
If you just want a baseline and you’re not in the mood to think about it every shot, here’s the simple approach I’d suggest:
Use DR100 most of the time, and switch to DR200 when highlights are genuinely risky. Save DR400 for those moments where you know it is going to be needed, like strong sun, backlight, or bright clothing.
If you shoot lots of mixed light and move fast, DR Auto is a decent “leave it alone” setting. Just be aware that the camera might prioritise highlight safety in a way that makes shadows look a bit lifted.
A quick field test you can do in five minutes
Go outside, find a scene with a bright sky and a darker foreground, and shoot the same composition three times: DR100, DR200, DR400.
Do not change anything else.
Then zoom in and compare:
highlight detail in the sky
texture in darker areas
overall “life” in the midtones
You will feel what DR is doing very quickly.
This article is part of my Fujifilm Learning Hub.
A growing collection of real-world guides, camera setup tips, lens suggestions by use-case, practical assignments, and buying advice with examples.
Prefer to see everything I write, brand-agnostic pieces on documentary & street work, reviews, tips, and the business of photography? Browse Main Articles & More.
FAQ
-
DR Auto lets the camera pick DR100, DR200, or DR400 based on the scene. In practice it usually chooses higher DR when it thinks highlights are at risk, and lower DR when the light is softer.
-
Because the camera is effectively holding exposure back, then lifting darker tones back up. Lifting shadows makes noise more visible, especially in very dark areas or at higher ISO.
-
DR mainly affects the JPEG and the preview you see on the back of the camera. The RAW file still contains the sensor data, but the in-camera preview and any accompanying JPEG can influence how you judge exposure.
-
You can. DR100 as a default is clean and predictable, DR200 is a good “mixed light” choice, and DR Auto is fine if you want the camera to make the call. DR400 is best saved for genuinely contrasty scenes where highlights are in trouble.
-
Most commonly, your ISO is too low for the DR option you’re trying to select. Another common reason is that another tone mode is taking control, such as D Range Priority on some bodies.
-
On many Fujifilm bodies it changes how DR is handled and can override or restrict your manual DR choices. If DR is not behaving how you expect, it’s worth checking whether D Range Priority is enabled.
-
Yes, because they can stack with DR and change the overall tonal shape. If you crank DR and also push shadow or highlight tone aggressively, you can end up with a look that feels flat, crunchy, or just a bit odd.
-
DR is separate from the film simulation, but the simulation affects contrast and highlight roll-off, so the combination can feel different. Some simulations make DR changes look more obvious, others hide it a bit.
Final thoughts
Dynamic Range isn’t a “better photo” switch. It’s just a way of deciding how much highlight protection you want the camera to prioritise in your JPEGs, and how much shadow lifting you’re willing to accept in return.
If you only remember one thing, make it this: DR100 for normal light, DR200 for mixed light, DR400 for rescue jobs. DR Auto is fine if you move fast, but it can change the look from shot to shot, so don’t be surprised when a set of photos feel slightly inconsistent.
And if DR settings feel different on your camera compared to someone else’s, that’s normal. Fujifilm changes the exact thresholds and interactions between generations. The principles stay the same though: protect highlights when they’re truly at risk, and don’t starve the exposure just because the menu gives you a bigger number.